Yamaha PSR-S900 Owner's Manual - Page 207
MIDI System Settings, MIDI Transmit Settings, LOCAL CONTROL, Clock setting, etc., MESSAGE SW
 |
View all Yamaha PSR-S900 manuals
Add to My Manuals
Save this manual to your list of manuals |
Page 207 highlights
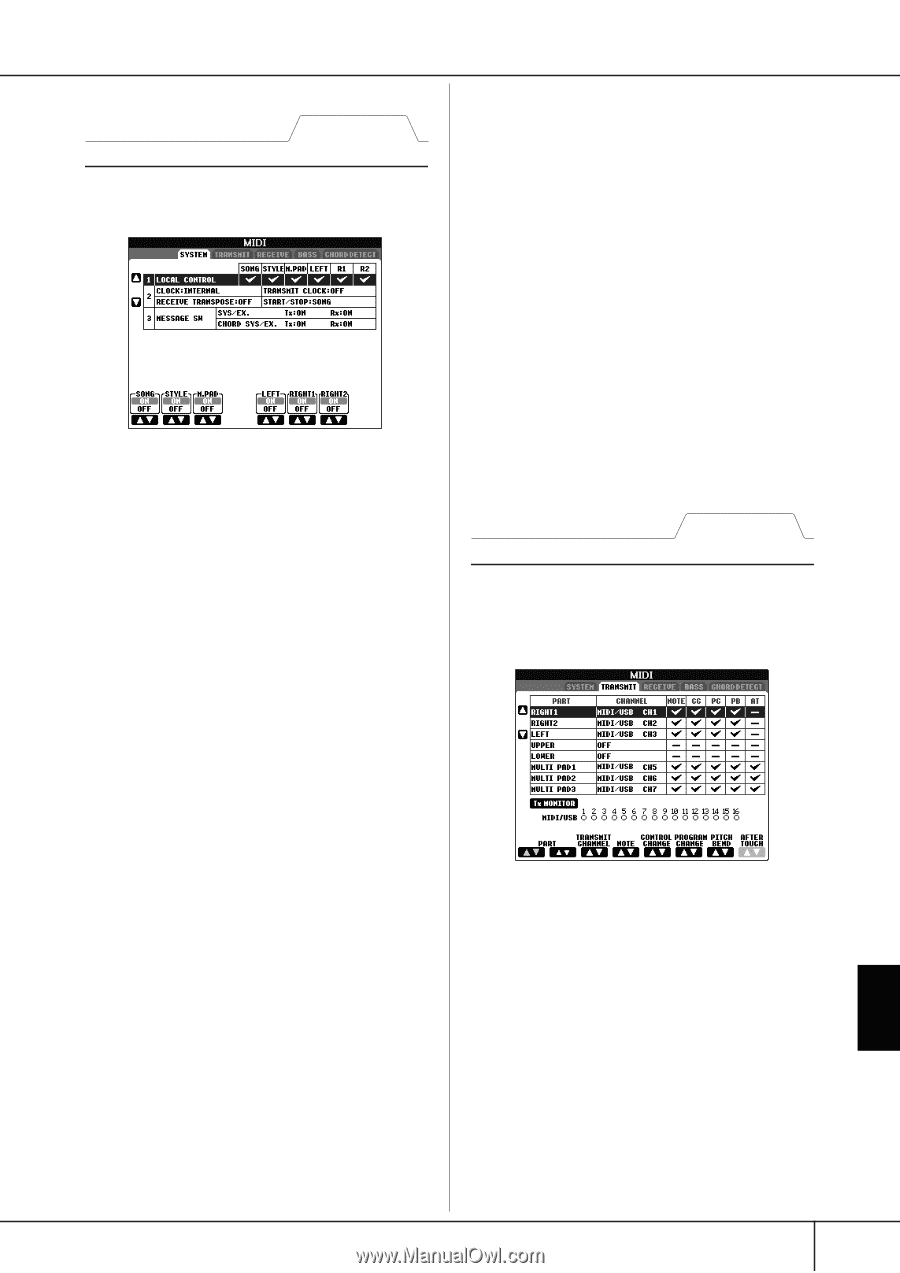
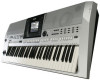
MIDI Settings MIDI System Settings SYSTEM display The explanations here apply to the SYSTEM display to be called up in step 4 of the "Basic Operation" on page 204. ■ LOCAL CONTROL Turns the Local Control for each part on or off. When Local Control is set to "ON," the keyboard of the instrument controls its own (local) internal tone generator, allowing the internal voices to be played directly from the keyboard. If you set Local to "OFF," the keyboard and controllers are internally disconnected from the instrument's tone generator section so that no sound is output when you play the keyboard or use the controllers. For example, this allows you to use an external MIDI sequencer to play the instrument's internal voices, and use the instrument keyboard to record notes to the external sequencer and/or play an external tone generator. ■ Clock setting, etc. ● CLOCK Determines whether the instrument is controlled by its own internal clock or a MIDI clock signal received from an external device. INTERNAL is the normal Clock setting when the instrument is being used alone or as a master keyboard to control external devices. If you are using the instrument with an external sequencer, MIDI computer, or other MIDI device, and you want to synchronize it to that device, set this parameter to the appropriate setting: MIDI, USB 1, or USB 2. In this case, make sure that the external device is connected properly (e.g., to the instrument's MIDI IN terminal), and that it is properly transmitting a MIDI clock signal. When this is set for control by an external device (MIDI, USB 1 or USB 2), the Tempo is indicated as "Ext." in the Main display. ● TRANSMIT CLOCK Turns MIDI clock (F8) transmission on or off. When set to OFF, no MIDI clock or Start/Stop data is transmitted even if a Song or Style is played back. ● RECEIVE TRANSPOSE Determines whether or not the instrument's transpose setting (page 61) is applied to the note events received by the instrument via MIDI. ● START/STOP Determines whether incoming FA (start) and FC (stop) messages affect Song or Style playback. ■ MESSAGE SW ● SYS/EX. The "Tx" setting turns MIDI transmission of MIDI System Exclusive messages on or off. The "Rx" setting turns MIDI reception and recognition of MIDI System Exclusive messages generated by external equipment on or off. ● CHORD SYS/EX. The "Tx" setting turns MIDI transmission of MIDI chord exclusive data (chord detect. root and type) on or off. The "Rx" setting turns MIDI reception and recognition of MIDI chord exclusive data generated by external equipment on or off. TRANSMIT display MIDI Transmit Settings The explanations here apply to the TRANSMIT display to be called up in step 4 of the "Basic Operation" on page 204. This determines which parts will be sent as MIDI data and over which MIDI channel the data will be sent. Operation Select the part to be transmitted and the channel via which the selected part will be transmitted. You can also determine the types of data to be sent. ● With the exception of the next two parts, the configuration of the parts is the same as those already explained elsewhere in this manual. • UPPER The keyboard part played on the right side of the keyboard from the Split Point for the Voices (RIGHT1 and/ or 2). • LOWER The keyboard part played on the left side of the keyboard from the Split Point for the Voices. This is not affected by the on/off status of the [ACMP] button. Using Your Instrument with Other Devices PSR-S900/S700 Owner's Manual 207
-
 1
1 -
2
-
3
-
4
-
5
-
6
-
7
-
8
-
9
-
10
-
11
-
12
-
13
-
14
-
15
-
16
-
17
-
18
-
19
-
20
-
21
-
22
-
23
-
24
-
25
-
26
-
27
-
28
-
29
-
30
-
31
-
32
-
33
-
34
-
35
-
36
-
37
-
38
-
39
-
40
-
41
-
42
-
43
-
44
-
45
-
46
-
47
-
48
-
49
-
50
-
51
-
52
-
53
-
54
-
55
-
56
-
57
-
58
-
59
-
60
-
61
-
62
-
63
-
64
-
65
-
66
-
67
-
68
-
69
-
70
-
71
-
72
-
73
-
74
-
75
-
76
-
77
-
78
-
79
-
80
-
81
-
82
-
83
-
84
-
85
-
86
-
87
-
88
-
89
-
90
-
91
-
92
-
93
-
94
-
95
-
96
-
97
-
98
-
99
-
100
-
101
-
102
-
103
-
104
-
105
-
106
-
107
-
108
-
109
-
110
-
111
-
112
-
113
-
114
-
115
-
116
-
117
-
118
-
119
-
120
-
121
-
122
-
123
-
124
-
125
-
126
-
127
-
128
-
129
-
130
-
131
-
132
-
133
-
134
-
135
-
136
-
137
-
138
-
139
-
140
-
141
-
142
-
143
-
144
-
145
-
146
-
147
-
148
-
149
-
150
-
151
-
152
-
153
-
154
-
155
-
156
-
157
-
158
-
159
-
160
-
161
-
162
-
163
-
164
-
165
-
166
-
167
-
168
-
169
-
170
-
171
-
172
-
173
-
174
-
175
-
176
-
177
-
178
-
179
-
180
-
181
-
182
-
183
-
184
-
185
-
186
-
187
-
188
-
189
-
190
-
191
-
192
-
193
-
194
-
195
-
196
-
197
-
198
-
199
-
200
-
201
-
 202
202 -
 203
203 -
 204
204 -
 205
205 -
 206
206 -
 207
207 -
 208
208 -
 209
209 -
 210
210 -
 211
211 -
 212
212 -
213
-
214
-
215
-
216
-
217
-
218
-
219
-
220
-
221
-
222
-
223
-
224
 |
 |