Alesis Strike MultiPad User Guide - Page 17
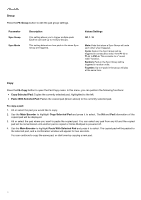
Sound Menu, Browse, Import, F1-Wave, F2-Browse, Sample Name, Library, Category, Main Encoder, Encoder
 |
View all Alesis Strike MultiPad manuals
Add to My Manuals
Save this manual to your list of manuals |
Page 17 highlights
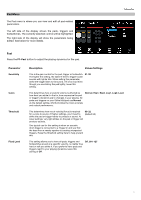
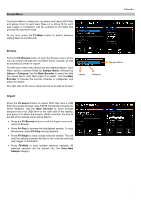
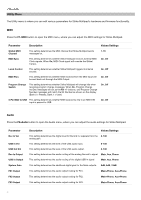
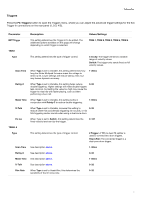
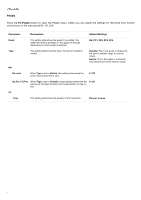
Sound Menu The Sound Menu is where you can select and import WAV files and assign them to each layer (Wave A or Wave B) for each pad, trigger or footswitch, edit the settings for the WAV files and edit the waveform itself. At any time, press the F1-Wave button to switch between editing Wave A and Wave B. Browse Press the F2-Browse button to open the Browse menu, where you can search through the included Factory sounds, as well as sounds you create or import. The left side of this menu shows the two editable Waves. Each Wave section contains fields for Sample Name, followed by Library > Category. Use the Main Encoder to select the field you would like to edit, then press it to select. Turn the Main Encoder to browse the sounds, libraries or categories, and press it to select. The right side of this menu shows the list of sounds to browse. Library Category Sample Name Import Press the F3-Import button to import WAV files from a USB flash drive (mass storage class, FAT32 formatted) connected to Strike Multipad. Use the Main Encoder to scroll through samples from your USB drive on the right side of the display, and press it to select the sample. When selected, the box to the left of the sample name will be filled in. • Press the F2-Browse button to exit the Import menu and return to Browse. • Press F4-Play to preview the highlighted sample. To stop the preview, press F4-Stop during playback. • Press F5-Single to load a single selected sample. This will load the selected sample directly to the currently selected pad, trigger or footswitch. • Press F6-Multi to load multiple selected samples. All selected samples will be placed into the User>New Sample category. 17
-
 1
1 -
2
-
3
-
4
-
5
-
6
-
7
-
8
-
9
-
10
-
11
-
 12
12 -
 13
13 -
 14
14 -
 15
15 -
 16
16 -
 17
17 -
 18
18 -
 19
19 -
 20
20 -
 21
21 -
 22
22 -
23
-
24
-
25
-
26
-
27
-
28
-
29
-
30
-
31
 |
 |
