Alesis Strike MultiPad User Guide - Page 8
Customizing Kits and Sounds, Toolbar, Browsing and Adding Sounds, Sound, Utility, KitFX, MstFX
 |
View all Alesis Strike MultiPad manuals
Add to My Manuals
Save this manual to your list of manuals |
Page 8 highlights
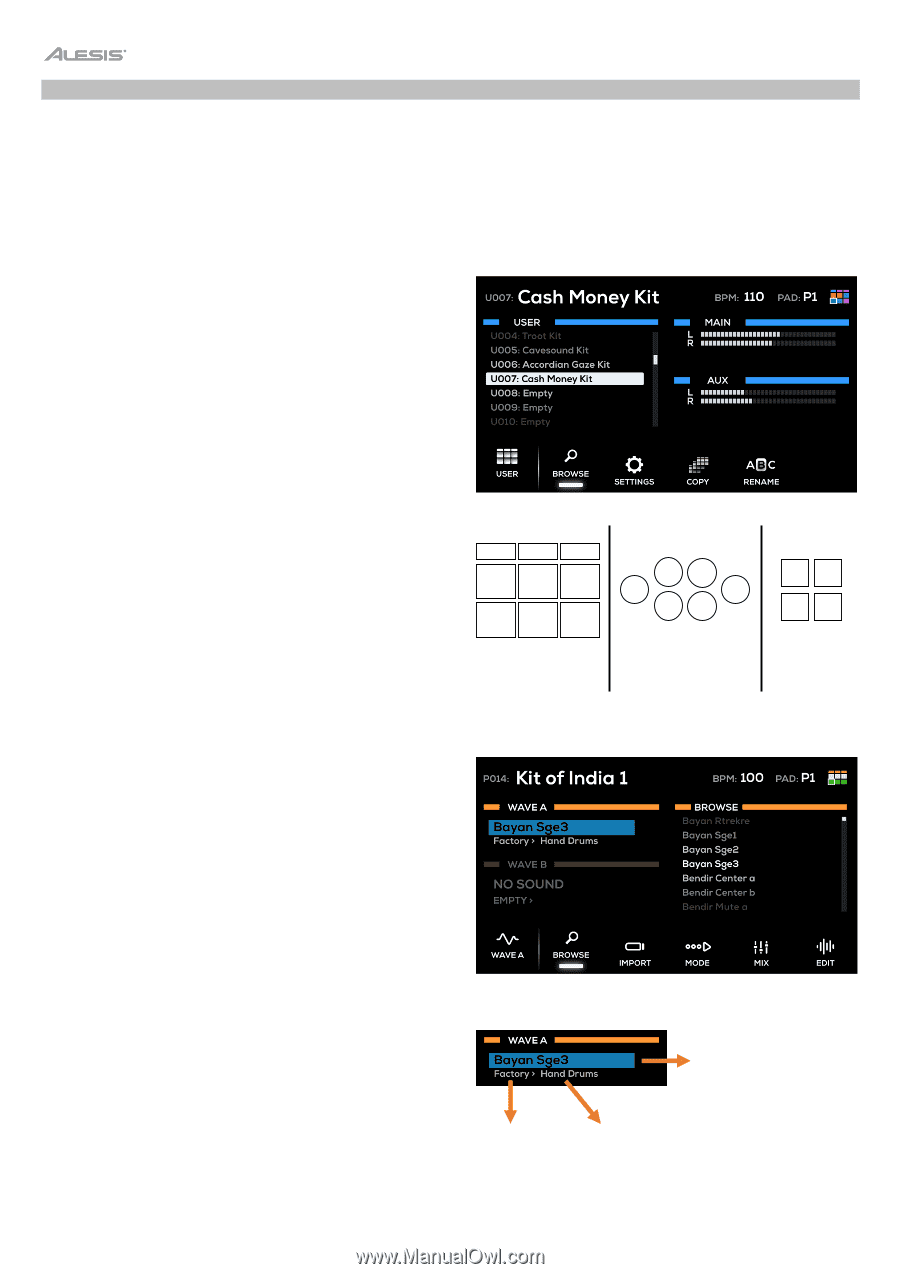
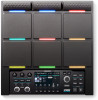
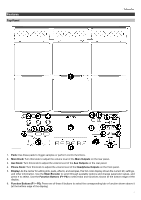
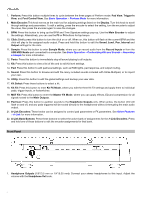
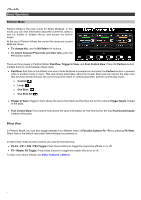
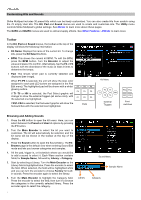
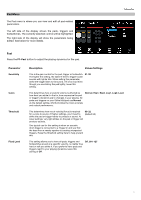
Customizing Kits and Sounds Strike Multipad includes 30 preset kits which can be freely customized. You can also create kits from scratch using the 70 empty User kits. The Kit, Pad and Sound menus are used to create and customize kits. The Utility menu controls Strike Multipad's global settings. See Menus to learn more about these pages. The KitFX and MstFX menus are used to edit and apply effects. See Other Features > Effects to learn more. Toolbar In the Kit, Pad and Sound menus, the toolbar at the top of the display will show the following information: • Kit Name: Displays the name of the current kit. To change kits, press the Kit Select buttons. • BPM: This shows the current kit BPM. To edit the BPM, press the BPM button. Turn the Encoder to adjust the value and press it to confirm. Alternatively, tap the F3 or F4 buttons with the downbeat of the music at least 3 times to determine the tempo. • Pad: This shows which pad is currently selected and displayed (see image). When P1-P9 is selected, the unit will show the stop color assigned to each pad LED (colors are assigned in the Pad Edit menu). The highlighted pad will be shown with a white/ P7 P8 P9 glowing outline. P4 P5 P6 If T1-T5 or HH is selected, the Pad Select graphic will change to show the external triggers (all same color), with P1 P2 P3 the selected one highlighted. If FS1-FS4 is selected, the Pad select graphic will show the footswitches with the selected one highlighted. Pads Kit Menu T3 T5 T1 HH T2 T4 External Triggers FS3 FS4 FS1 FS2 Footswitches Browsing and Adding Sounds 1. Press the Kit button to open the Kit menu. Here, you can select between the Preset and User kit options by pressing the F1 button. 2. Turn the Main Encoder to select the kit you want to customize. The kit will automatically be selected, and the kit name will be shown in the toolbar at the top of the display. 3. Press the Sound button to open the Sound Menu. The F2- Browse page is the default view when entering Sound Edit mode and lets you browse categories and samples. 4. Hit the pad, trigger in, or footswitch where you would like to add a sound to select it. Each Wave section contains fields for Sample Name, followed by Library > Category. 5. Start by selecting a Library. Turn the Main Encoder so the Library field is highlighted blue. Press the encoder to select the field. When selected, the field will be highlighted white and you can turn the encoder to choose Factory for builtin sounds. Press the encoder again to select the library. 6. Turn the Main Encoder to highlight the Category field. Press the encoder to select the field, then turn it to browse the categories in the currently selected library. Press the encoder again to select the category. 8 Library Sound Menu Sample Name Category
-
 1
1 -
2
-
 3
3 -
 4
4 -
 5
5 -
 6
6 -
 7
7 -
 8
8 -
 9
9 -
 10
10 -
 11
11 -
 12
12 -
 13
13 -
14
-
15
-
16
-
17
-
18
-
19
-
20
-
21
-
22
-
23
-
24
-
25
-
26
-
27
-
28
-
29
-
30
-
31
 |
 |