Alpine CDA-9887 Owners Manual - Page 26
Audio Setting, Display Setting - parts
 |
UPC - 793276711373
View all Alpine CDA-9887 manuals
Add to My Manuals
Save this manual to your list of manuals |
Page 26 highlights
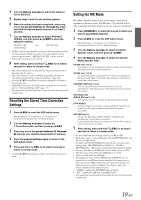
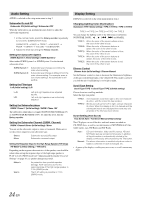
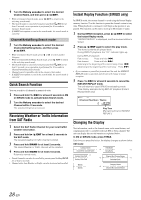
Audio Setting AUDIO is selected on the setup main menu in step 2. Subwoofer On and Off Subwoofer ON (Initial setting) / Subwoofer OFF When the subwoofer is on, perform the steps below to adjust the subwoofer output level. 1 In the normal mode, press the Rotary encoder repeatedly to select the SUBWOOFER mode. SUBWOOFER BASS TREBLE BALANCE FADER DEFEAT VOLUME SUBWOOFER 2 Adjust the level by turning the Rotary encoder. Setting the Subwoofer System SUBW.System 1 (Initial setting) / SUBW.System 2 Select either SUBW.System 1 or SUBW.System 2 for the desired subwoofer effect. SUBW.System 1 : SUBW.System 2 : Subwoofer level changes according the main volume setting. Subwoofer level change is different from the main volume setting. For example, even at low volume settings, the subwoofer is still audible. Setting the Filter type L=R (Initial setting) / L/R L=R: L/R: Left and right speakers are adjusted equally. Left and right speakers are individually adjusted. Setting the Subwoofer phase SUBW. Phase 0° (Initial setting) / SUBW. Phase 180° The subwoofer output phase is toggled SUBWOOFER NORMAL (0°) or SUBWOOFER REVERSE (180°). To adjust the level, turn the Rotary encoder. Setting the Subwoofer Channel (SUBW. Channel) SUBW. Channel Stereo (Initial setting) / Mono You can set the subwoofer output to stereo or monaural. Make sure to set the correct output for your subwoofer type. Stereo: Mono: Subwoofer stereo (L/R) output Subwoofer monaural output Setting the Response Slope for the High Range Speaker (TW Setup) TW Maker's (Initial setting ) / TW User's Depending on the response characteristics of the speaker, care should be taken when setting the response slope of the high range speaker to FLAT in 2.2ch (3WAY) mode (see "Adjusting and Storing the Crossover Settings" on page 16), as speaker damage may result. Maker's: User's: As protection from possible speaker damage, FLAT cannot be set for the response slope of the high range speaker in 2.2ch (3WAY) mode. The FLAT setting is possible in 2.2ch (3WAY) mode. Display Setting DISPLAY is selected on the setup main menu in step 2. Changing Lighting Color (Illumination) Illumination TYPE 1(Initial setting) / TYPE 2 / TYPE 3 / TYPE 4 / TYPE 5 TYPE 1 TYPE 2 TYPE 3 TYPE 4 TYPE 5 You can change the lighting color of the following seven buttons. SOURCE/ , BAND , , , , and MultEQ. TYPE 1: TYPE 2: TYPE 3: TYPE 4: TYPE 5: When the color of the seven buttons is blue, the color of the other is blue. When the color of the seven buttons is green, the color of the other is blue. When the color of the seven buttons is blue, the color of the other is red. When the color of the seven buttons is amber, the color of the other is red. When the color of the seven buttons is red, the color of the other is red. Dimmer Control Dimmer Auto (Initial setting) / Dimmer Manual Set the Dimmer control to Auto to decrease the illumination brightness of the unit with the head lights of the vehicle ON. This mode is useful if you feel the unit's backlighting is too bright at night. Scroll Type Setting Scroll Type TYPE 1 / Scroll Type TYPE 2 (Initial setting) Choose from two scrolling methods. Select the type you prefer. TYPE 1 : The characters scroll from right to left, one character at a time, until the entire title has scrolled. TYPE 2 : Words are built up from left to right, a single character at a time. When the display is full, it is cleared and the subsequent words are displayed the same way until all words of the title have been shown. Scroll Setting (Text Scroll) Text Scroll Auto / Text Scroll Manual (Initial setting) This CD player can scroll the disc and track names recorded on CD-TEXT discs, as well as text information of MP3/WMA/AAC files, folder names, tags, HD Radio and SAT Radio. Auto : CD text information, folder and file names, HD and SAT Radio text are scrolled continuously. In addition, all tag information is automatically rotated in the display continuously, without pressing the Title button. Manual : The above information is scrolled only when a disc is loaded, a channel or track is changed, etc. • In parts of the display, scrolling may not occur, or scroll content may differ. 24-EN
-
 1
1 -
2
-
3
-
4
-
5
-
6
-
7
-
8
-
9
-
10
-
11
-
12
-
13
-
14
-
15
-
16
-
17
-
18
-
19
-
20
-
 21
21 -
 22
22 -
 23
23 -
 24
24 -
 25
25 -
 26
26 -
 27
27 -
 28
28 -
 29
29 -
 30
30 -
 31
31 -
32
-
33
-
34
-
35
-
36
-
37
-
38
-
39
-
40
-
41
-
42
-
43
-
44
-
45
-
46
-
47
-
48
-
49
-
50
-
51
-
52
-
53
-
54
-
55
-
56
-
57
-
58
-
59
-
60
-
61
-
62
-
63
-
64
-
65
-
66
-
67
-
68
-
69
-
70
-
71
-
72
-
73
-
74
-
75
-
76
-
77
-
78
-
79
-
80
-
81
-
82
-
83
-
84
-
85
-
86
-
87
-
88
-
89
-
90
-
91
-
92
-
93
-
94
-
95
-
96
-
97
-
98
-
99
-
100
-
101
-
102
-
103
-
104
-
105
-
106
-
107
-
108
-
109
-
110
-
111
-
112
-
113
-
114
-
115
-
116
-
117
-
118
-
119
-
120
-
121
-
122
-
123
-
124
-
125
-
126
-
127
-
128
-
129
-
130
-
131
-
132
 |
 |
