Brother International MFC 795CW Network Users Manual - English - Page 34
Confirm your wireless network setup method - installation
 |
UPC - 012502623311
View all Brother International MFC 795CW manuals
Add to My Manuals
Save this manual to your list of manuals |
Page 34 highlights
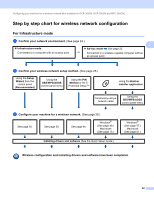
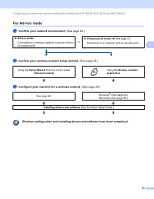
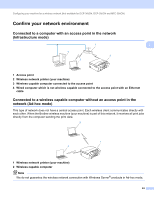
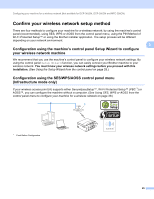
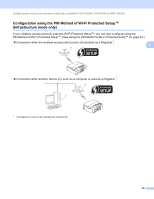
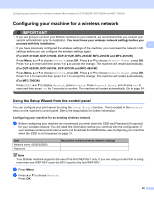
Configuring your machine for a wireless network (Not available for DCP-365CN, DCP-395CN and MFC-295CN) Confirm your wireless network setup method 3 There are four methods to configure your machine for a wireless network; by using the machine's control panel (recommended), using SES, WPS or AOSS from the control panel menu, using the PIN Method of Wi-Fi Protected Setup™ or using the Brother installer application. The setup process will be different depending on your network environment. 3 Configuration using the machine's control panel Setup Wizard to configure your wireless network machine 3 We recommend that you use the machine's control panel to configure your wireless network settings. By using the control panel Setup Wizard function, you can easily connect your Brother machine to your wireless network. You must know your wireless network settings before you proceed with this installation. (See Using the Setup Wizard from the control panel on page 28.) Configuration using the SES/WPS/AOSS control panel menu (Infrastructure mode only) 3 If your wireless access point (A) supports either SecureEasySetup™, Wi-Fi Protected Setup™ (PBC 1) or AOSS™, you can configure the machine without a computer. (See Using SES, WPS or AOSS from the control panel menu to configure your machine for a wireless network on page 39.) A 1 Push Button Configuration 25
-
 1
1 -
2
-
3
-
4
-
5
-
6
-
7
-
8
-
9
-
10
-
11
-
12
-
13
-
14
-
15
-
16
-
17
-
18
-
19
-
20
-
21
-
22
-
23
-
24
-
25
-
26
-
27
-
28
-
 29
29 -
 30
30 -
 31
31 -
 32
32 -
 33
33 -
 34
34 -
 35
35 -
 36
36 -
 37
37 -
 38
38 -
 39
39 -
40
-
41
-
42
-
43
-
44
-
45
-
46
-
47
-
48
-
49
-
50
-
51
-
52
-
53
-
54
-
55
-
56
-
57
-
58
-
59
-
60
-
61
-
62
-
63
-
64
-
65
-
66
-
67
-
68
-
69
-
70
-
71
-
72
-
73
-
74
-
75
-
76
-
77
-
78
-
79
-
80
-
81
-
82
-
83
-
84
-
85
-
86
-
87
-
88
-
89
-
90
-
91
-
92
-
93
-
94
-
95
-
96
-
97
-
98
-
99
-
100
-
101
-
102
-
103
-
104
-
105
-
106
-
107
-
108
-
109
-
110
-
111
-
112
-
113
-
114
-
115
-
116
-
117
-
118
-
119
-
120
-
121
-
122
-
123
-
124
-
125
-
126
-
127
-
128
-
129
-
130
-
131
-
132
-
133
-
134
-
135
-
136
-
137
-
138
-
139
-
140
-
141
-
142
-
143
-
144
-
145
-
146
-
147
-
148
-
149
-
150
-
151
-
152
-
153
-
154
-
155
-
156
-
157
-
158
-
159
-
160
-
161
-
162
-
163
-
164
-
165
-
166
-
167
-
168
-
169
-
170
 |
 |
