Brother International MFC 795CW Network Users Manual - English - Page 54
Add a wireless device, Network
 |
UPC - 012502623311
View all Brother International MFC 795CW manuals
Add to My Manuals
Save this manual to your list of manuals |
Page 54 highlights
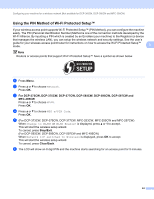
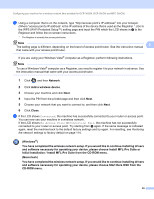
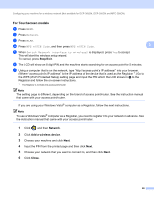
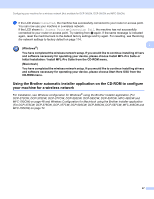
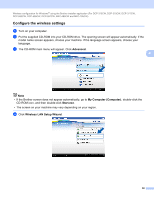
Configuring your machine for a wireless network (Not available for DCP-365CN, DCP-395CN and MFC-295CN) g Using a computer that is on the network, type "http://access point's IP address/" into your browser. (Where "access point's IP address" is the IP address of the device that is used as the Registrar 1.) Go to the WPS (Wi-Fi Protected Setup™) setting page and input the PIN which the LCD shows in f to the Registrar and follow the on-screen instructions. 1 The Registrar is normally the access point/router. Note 3 The setting page is different, depending on the brand of access point/router. See the instruction manual that came with your access point/router. If you are using your Windows Vista® computer as a Registrar, perform following instructions. Note To use a Windows Vista® computer as a Registrar, you need to register it to your network in advance. See the instruction manual that came with your access point/router. 1 Click and then Network. 2 Click Add a wireless device. 3 Choose your machine and click Next. 4 Input the PIN from the printed page and then click Next. 5 Choose your network that you want to connect to, and then click Next. 6 Click Close. h If the LCD shows Connected, the machine has successfully connected to your router or access point. You can now use your machine in a wireless network. If the LCD shows No Access Point or Connection Fail, the machine has not successfully connected to your router or access point. Try starting from d again. If the same message is indicated again, reset the machine back to the default factory settings and try again. For resetting, see Restoring the network settings to factory default on page 114. (Windows®) You have completed the wireless network setup. If you would like to continue installing drivers and software necessary for operating your device, please choose Install MFL-Pro Suite or Initial Installation / Install MFL-Pro Suite from the CD-ROM menu. (Macintosh) You have completed the wireless network setup. If you would like to continue installing drivers and software necessary for operating your device, please choose Start Here OSX from the CD-ROM menu. 45
-
 1
1 -
2
-
3
-
4
-
5
-
6
-
7
-
8
-
9
-
10
-
11
-
12
-
13
-
14
-
15
-
16
-
17
-
18
-
19
-
20
-
21
-
22
-
23
-
24
-
25
-
26
-
27
-
28
-
29
-
30
-
31
-
32
-
33
-
34
-
35
-
36
-
37
-
38
-
39
-
40
-
41
-
42
-
43
-
44
-
45
-
46
-
47
-
48
-
 49
49 -
 50
50 -
 51
51 -
 52
52 -
 53
53 -
 54
54 -
 55
55 -
 56
56 -
 57
57 -
 58
58 -
 59
59 -
60
-
61
-
62
-
63
-
64
-
65
-
66
-
67
-
68
-
69
-
70
-
71
-
72
-
73
-
74
-
75
-
76
-
77
-
78
-
79
-
80
-
81
-
82
-
83
-
84
-
85
-
86
-
87
-
88
-
89
-
90
-
91
-
92
-
93
-
94
-
95
-
96
-
97
-
98
-
99
-
100
-
101
-
102
-
103
-
104
-
105
-
106
-
107
-
108
-
109
-
110
-
111
-
112
-
113
-
114
-
115
-
116
-
117
-
118
-
119
-
120
-
121
-
122
-
123
-
124
-
125
-
126
-
127
-
128
-
129
-
130
-
131
-
132
-
133
-
134
-
135
-
136
-
137
-
138
-
139
-
140
-
141
-
142
-
143
-
144
-
145
-
146
-
147
-
148
-
149
-
150
-
151
-
152
-
153
-
154
-
155
-
156
-
157
-
158
-
159
-
160
-
161
-
162
-
163
-
164
-
165
-
166
-
167
-
168
-
169
-
170
 |
 |
