Brother International MFC-J835DW Advanced Users Manual - English - Page 72
Disc Tray., cord out of the machine. - ink cartridges
 |
View all Brother International MFC-J835DW manuals
Add to My Manuals
Save this manual to your list of manuals |
Page 72 highlights
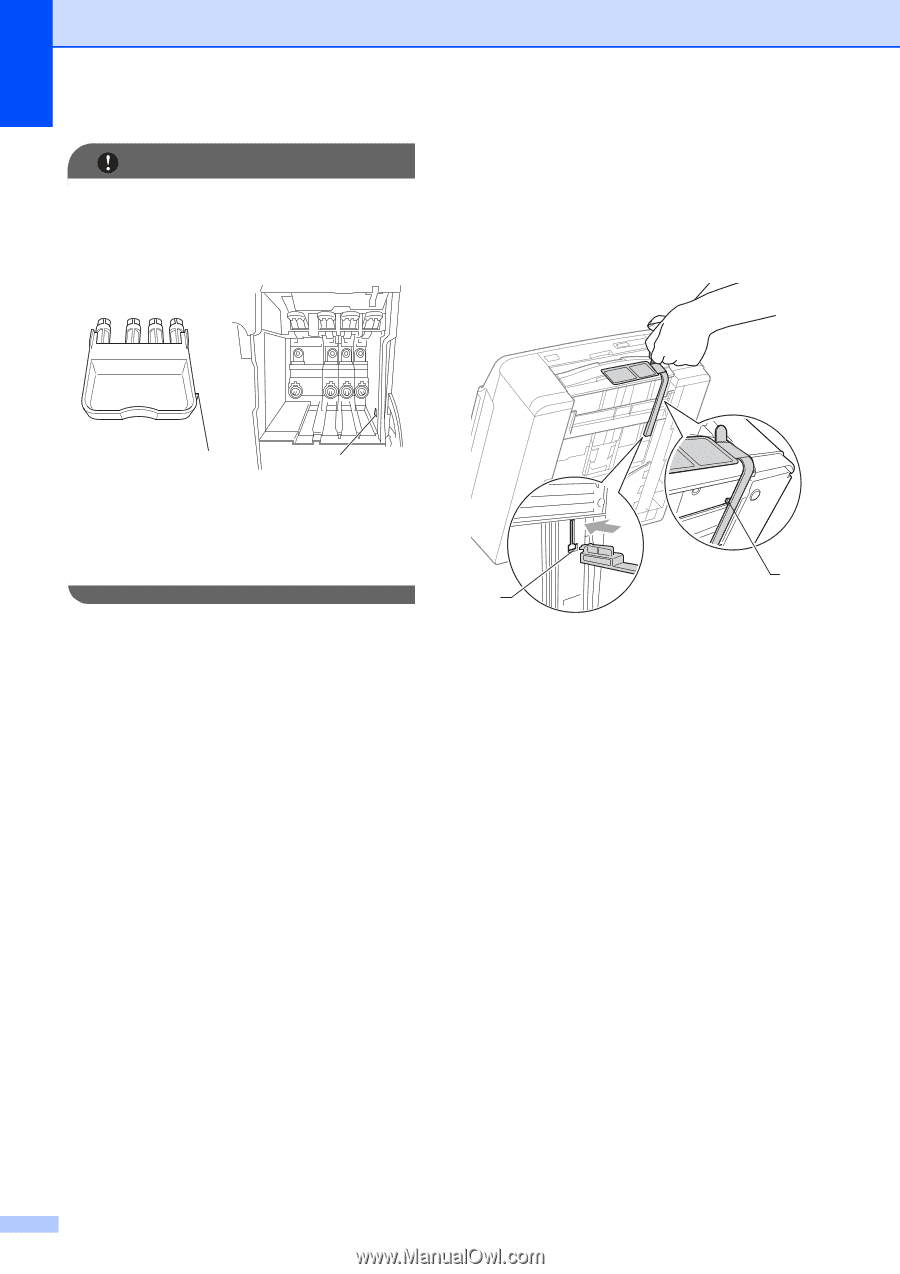
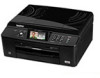
IMPORTANT • Make sure the plastic tab on the right side of the orange protective part (1) clicks securely into place (2). e Lift the machine from the front and hook the tab of the orange protective part into the keyed opening (1) on the bottom of the paper tray. Then latch the protective part over the raised portion of the paper tray (2). 1 2 • If you are not able to find the orange protective part, ship the machine without it. DO NOT install the ink cartridges as an alternative before shipping. d Open the scanner cover and remove the Disc Tray. Place the disc tray in the folded piece of cardboard and tape it together. 2 1 f Unplug the machine from the telephone wall jack and take the telephone line cord out of the machine. g Unplug the machine from the AC power outlet. h Using both hands, use the plastic tabs on both sides of the machine to lift the scanner cover into the open position. Then unplug the interface cable from the machine, if it is connected. 66
-
 1
1 -
2
-
3
-
4
-
5
-
6
-
7
-
8
-
9
-
10
-
11
-
12
-
13
-
14
-
15
-
16
-
17
-
18
-
19
-
20
-
21
-
22
-
23
-
24
-
25
-
26
-
27
-
28
-
29
-
30
-
31
-
32
-
33
-
34
-
35
-
36
-
37
-
38
-
39
-
40
-
41
-
42
-
43
-
44
-
45
-
46
-
47
-
48
-
49
-
50
-
51
-
52
-
53
-
54
-
55
-
56
-
57
-
58
-
59
-
60
-
61
-
62
-
63
-
64
-
65
-
66
-
 67
67 -
 68
68 -
 69
69 -
 70
70 -
 71
71 -
 72
72 -
 73
73 -
 74
74 -
 75
75 -
 76
76 -
 77
77 -
78
-
79
-
80
-
81
-
82
 |
 |