Brother International PEDESIGN 7.0 Quick Reference Guide - English - Page 35
Font Creator Window
 |
View all Brother International PEDESIGN 7.0 manuals
Add to My Manuals
Save this manual to your list of manuals |
Page 35 highlights
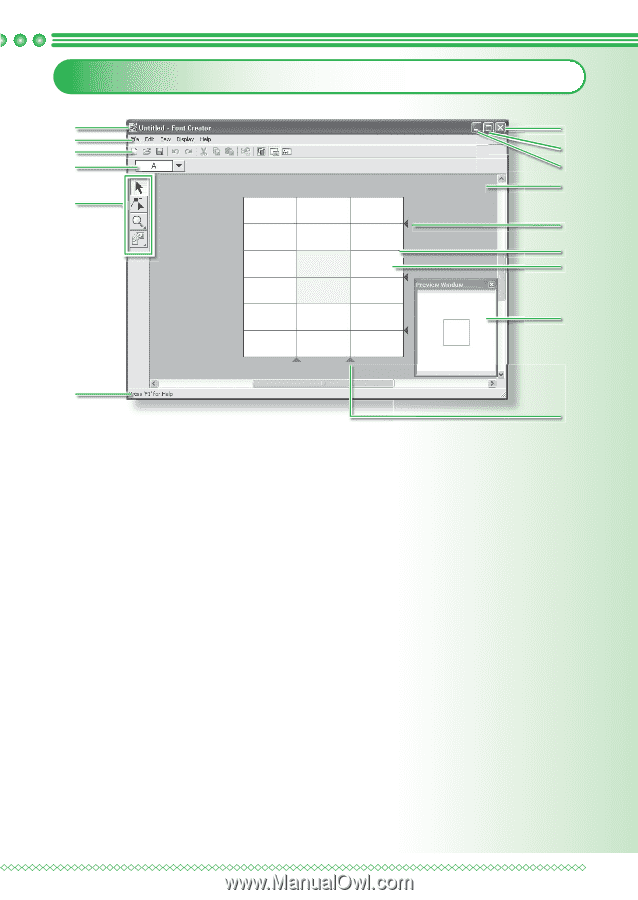
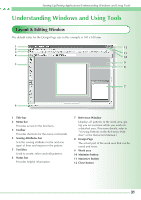
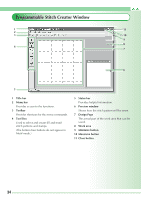
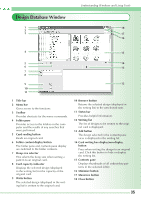
Font Creator Window 1 2 3 4 5 Understanding Windows and Using Tools 14 13 12 11 10 9 8 7 6 10 1 Title bar 2 Menu bar Provides access to the functions. 3 Toolbar Provides shortcuts for the menu commands. 4 Select Character bar Allows characters from created fonts to be selected. 5 Tool Box Used to select and create font pattern. 6 Status bar Provides helpful information. 7 Preview window Shows how the stitch pattern will be sewn. 8 Design Page The actual part of the work area that can be saved. 9 Guidelines (fixed) The distance between the two guidelines becomes the height of the font created. 10 Guidelines (movable) These guidelines can be moved according to the shape of the created font. The distance between the two red guidelines becomes the width of the font created. The three blue guidelines are positioning lines for accent positions, the height of small characters, and the bottom edge of small characters. 11 Work area 12 Minimize button 13 Maximize button 14 Close button 33
-
 1
1 -
2
-
3
-
4
-
5
-
6
-
7
-
8
-
9
-
10
-
11
-
12
-
13
-
14
-
15
-
16
-
17
-
18
-
19
-
20
-
21
-
22
-
23
-
24
-
25
-
26
-
27
-
28
-
29
-
 30
30 -
 31
31 -
 32
32 -
 33
33 -
 34
34 -
 35
35 -
 36
36 -
 37
37 -
 38
38 -
 39
39 -
 40
40 -
41
-
42
-
43
-
44
-
45
-
46
-
47
-
48
-
49
-
50
 |
 |