Canon Color imageCLASS MF9280Cdn imageCLASS MF9280Cdn/MF9220Cdn Starter Guide - Page 21
Set Date and Time
 |
View all Canon Color imageCLASS MF9280Cdn manuals
Add to My Manuals
Save this manual to your list of manuals |
Page 21 highlights
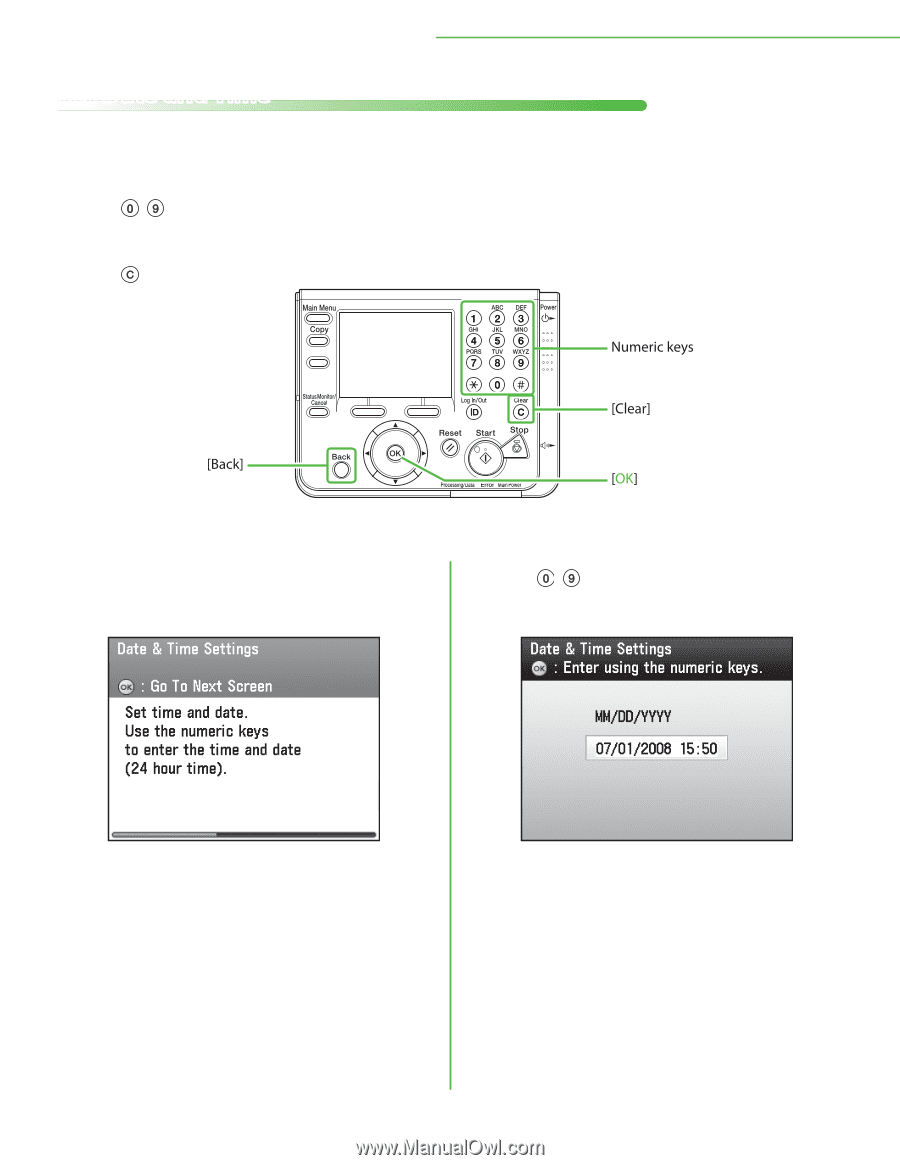
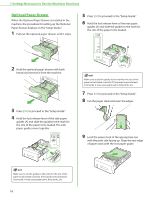
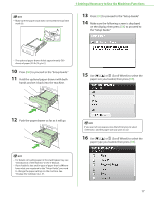
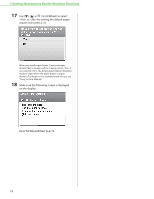
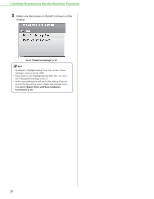
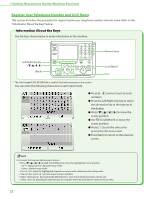
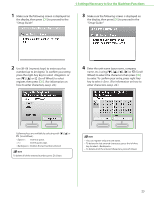
1 Settings Necessary to Use the Machines Functions Set Date and Time Before using the machine, you MUST set the current date and time. The date and time set are used as a standard for timer settings functions. ● Information About the Keys ‒ Press - (numeric keys) to enter numbers. ‒ Press [OK] to set the entry or to proceed to the next screen. ‒ Press [Back] to return to the previous screen. ‒ Press (Clear) to delete the entire entry. * The Color imageCLASS MF9280Cdn is used for illustration purposes in this section. 1 Make sure the following screen displayed on the display, then press [OK] to proceed to the "Setup Guide." 2 Use - (numeric keys) to enter the date (month/day/year) and time (in 24-hour/military time format), then press [OK]. 19
-
 1
1 -
2
-
3
-
4
-
5
-
6
-
7
-
8
-
9
-
10
-
11
-
12
-
13
-
14
-
15
-
 16
16 -
 17
17 -
 18
18 -
 19
19 -
 20
20 -
 21
21 -
 22
22 -
 23
23 -
 24
24 -
 25
25 -
 26
26 -
27
-
28
-
29
-
30
-
31
-
32
-
33
-
34
-
35
-
36
-
37
-
38
-
39
-
40
-
41
-
42
-
43
-
44
-
45
-
46
-
47
-
48
-
49
-
50
-
51
-
52
-
53
-
54
-
55
-
56
-
57
-
58
-
59
-
60
-
61
-
62
-
63
-
64
 |
 |