Canon DC420 DC410/DC420 Instruction Manual - Page 39
to turn on
 |
View all Canon DC420 manuals
Add to My Manuals
Save this manual to your list of manuals |
Page 39 highlights
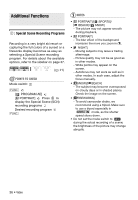
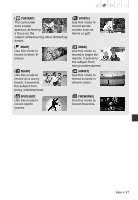
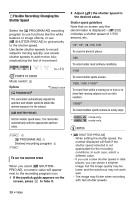
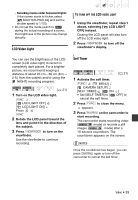
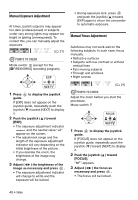
- Recording movies under fluorescent lights: If the screen starts to flicker, select [ SHUTTER-PRIO.AE] and set the shutter speed to 1/100. • Do not set the mode switch to during the actual recording of a scene; the brightness of the picture may change abruptly. LCD Video Light TO TURN OFF THE LCD VIDEO LIGHT 1 Using the viewfinder, repeat step 1 above, selecting [ LCD LIGHT OFF] instead. Closing the LCD panel will also turn off the LCD video light. 2 Press VIEWFINDER to turn off the viewfinder's display. You can use the brightness of the LCD screen (LCD video light) to record in completely dark places. For a brighter picture, we recommend keeping a distance of about 20 cm - 60 cm (8 in. - 2 ft.) from the subject and/or using the [ NIGHT] recording program. ( 21) 1 Turn on the LCD video light. FUNC. [ LCD LIGHT OFF] [ LCD LIGHT ON] Press FUNC. 2 Rotate the LCD panel toward the lens and point it in the direction of the subject. 3 Press VIEWFINDER to turn on the viewfinder. Use the viewfinder to continue recording. Self Timer ( 21) 1 Activate the self timer. FUNC. [ MENU] [ CAMERA SETUP] [SELF TIMER] [ ON • Set [SELF TIMER] to [ cancel the self timer. ] OFF] to 2 Press FUNC. to close the menu. appears. 3 Press Start/Stop on the camcorder to start recording. The camcorder starts recording video ( mode) or records a still image ( mode) after a 10-second countdown. The countdown appears on the screen. NOTES Once the countdown has begun, you can press Start/Stop again or turn off the camcorder to cancel the self timer. Video • 39
-
 1
1 -
2
-
3
-
4
-
5
-
6
-
7
-
8
-
9
-
10
-
11
-
12
-
13
-
14
-
15
-
16
-
17
-
18
-
19
-
20
-
21
-
22
-
23
-
24
-
25
-
26
-
27
-
28
-
29
-
30
-
31
-
32
-
33
-
 34
34 -
 35
35 -
 36
36 -
 37
37 -
 38
38 -
 39
39 -
 40
40 -
 41
41 -
 42
42 -
 43
43 -
 44
44 -
45
-
46
-
47
-
48
-
49
-
50
-
51
-
52
-
53
-
54
-
55
-
56
-
57
-
58
-
59
-
60
-
61
-
62
-
63
-
64
-
65
-
66
-
67
-
68
-
69
-
70
-
71
-
72
-
73
-
74
-
75
-
76
-
77
-
78
-
79
-
80
-
81
-
82
-
83
-
84
-
85
-
86
-
87
-
88
-
89
-
90
-
91
-
92
-
93
-
94
-
95
-
96
-
97
-
98
 |
 |