Canon PowerShot A100 Software Starter Guide DC SD Ver.9 - Page 111
Downloading Images
 |
View all Canon PowerShot A100 manuals
Add to My Manuals
Save this manual to your list of manuals |
Page 111 highlights
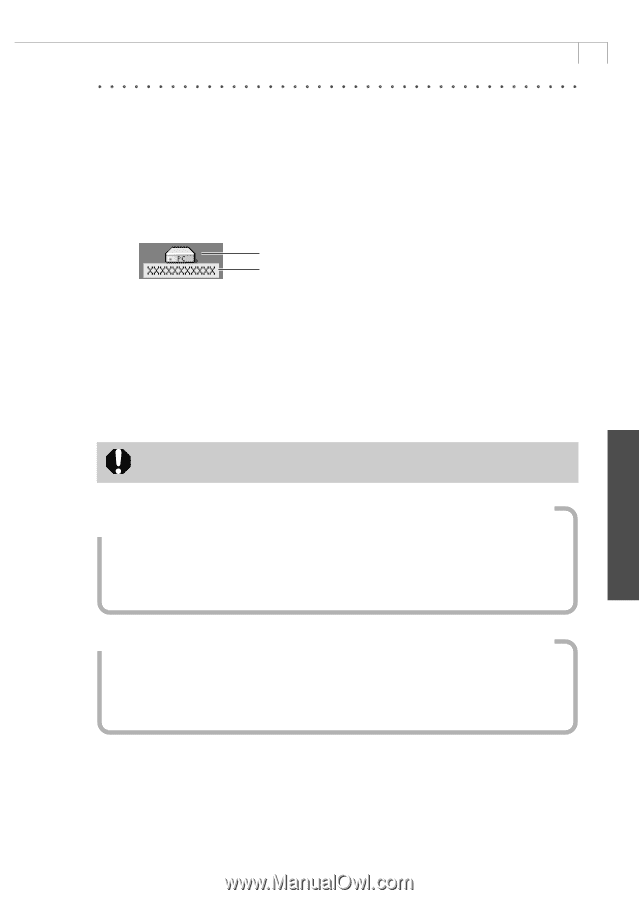
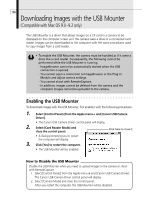
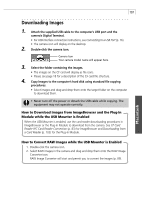
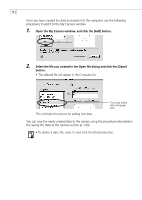
107 Downloading Images 1. Attach the supplied USB cable to the computer's USB port and the camera's Digital Terminal. • For USB interface connection instructions, see Connecting to a USB Port (p. 16). • The camera icon will display on the desktop. 2. Double-click the camera icon. Camera Icon Your camera model name will appear here. 3. Select the folder containing the images. • The images on the CF card will display as file icons. • Please see page 18 for a description of the CF card file structure. 4. Copy images to the computer's hard disk using standard file copying procedures. • Select images and drag and drop them onto the target folder on the computer to download them. • Never turn off the power or detach the USB cable while copying. The equipment may not operate correctly. How to Download Images from ImageBrowser and the Plug-In Module while the USB Mounter is Enabled When the USB Mounter is enabled, use the card reader downloading procedures in ImageBrowser or the Plug-In Module to download from the camera. See CF Card Reader / PC Card Reader Connection (p. 83) for ImageBrowser and Downloading from a Card Reader (p. 103) for the Plug-In Module. How to Convert RAW Images while the USB Mounter is Enabled 1. Double-click the camera icon. 2. Select RAW images in the camera and drag and drop them onto the RAW Image Converter icon. RAW Image Converter will start and permit you to convert the images (p. 89). Macintosh
-
 1
1 -
2
-
3
-
4
-
5
-
6
-
7
-
8
-
9
-
10
-
11
-
12
-
13
-
14
-
15
-
16
-
17
-
18
-
19
-
20
-
21
-
22
-
23
-
24
-
25
-
26
-
27
-
28
-
29
-
30
-
31
-
32
-
33
-
34
-
35
-
36
-
37
-
38
-
39
-
40
-
41
-
42
-
43
-
44
-
45
-
46
-
47
-
48
-
49
-
50
-
51
-
52
-
53
-
54
-
55
-
56
-
57
-
58
-
59
-
60
-
61
-
62
-
63
-
64
-
65
-
66
-
67
-
68
-
69
-
70
-
71
-
72
-
73
-
74
-
75
-
76
-
77
-
78
-
79
-
80
-
81
-
82
-
83
-
84
-
85
-
86
-
87
-
88
-
89
-
90
-
91
-
92
-
93
-
94
-
95
-
96
-
97
-
98
-
99
-
100
-
101
-
102
-
103
-
104
-
105
-
 106
106 -
 107
107 -
 108
108 -
 109
109 -
 110
110 -
 111
111 -
 112
112 -
 113
113 -
 114
114 -
 115
115 -
 116
116 -
117
-
118
-
119
-
120
-
121
-
122
-
123
 |
 |