Canon PowerShot A100 Software Starter Guide DC SD Ver.9 - Page 96
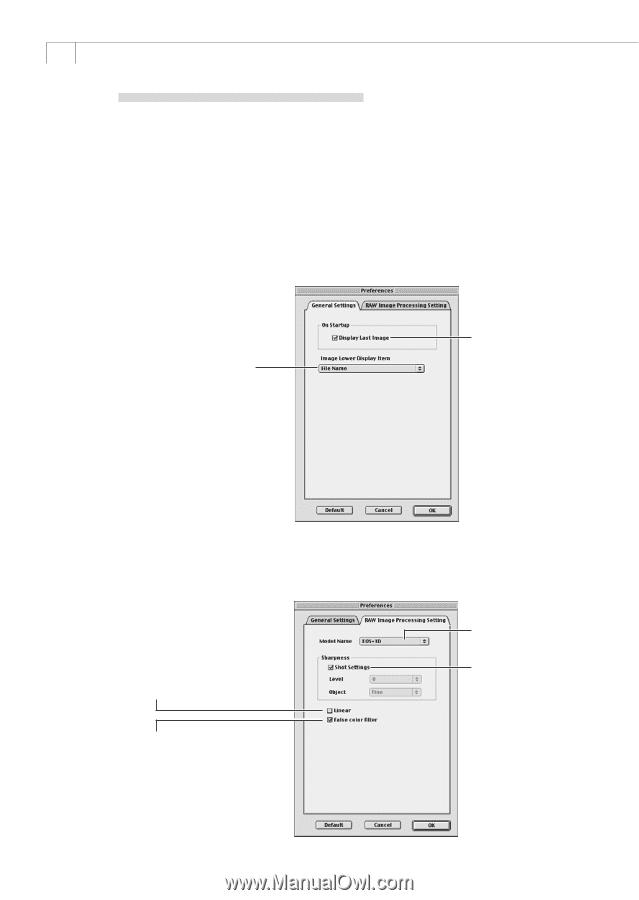
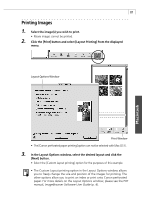
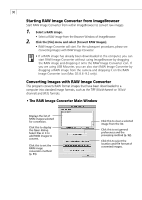
Click [Preferences] in the RAW Image Converter main window., Click the [General Settings] or [RAW
 |
View all Canon PowerShot A100 manuals
Add to My Manuals
Save this manual to your list of manuals |
Page 96 highlights
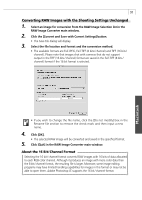
92 Setting the Preference Settings You can set the general preferences for the conversion settings window and the methods used for converting RAW images. 1. Click [Preferences] in the RAW Image Converter main window. • The Preferences dialog will display. 2. Click the [General Settings] or [RAW Image Processing Settings] tab. • The selected tab will display. • General Tab in the Preferences Dialog Click here to select the information shown beneath images: [File Name] or [Shooting Date]. When checked, the files with the largest numbers in the folder with the highest number within the DCIM folder display in the list when the [List of Conversion Settings] button is clicked (p. 93). When unchecked, the images from the folder with the smallest number display in the list. • RAW Processing Settings Tab in the Preferences Dialog Select this when you wish to use linear processing with tone curves in Photoshop 5.0 LE or other programs. This setting allows you to reduce image quality deterioration associated with tone curve adjustments and to fine-tune saturation levels. Click here to select your camera model. Click here to select a sharpness setting: [Shooting Settings], [Weak], [Standard] or [Strong]. False colors may be generated in an image under specific conditions during conversion. This function reduces the false colors when checked. When unchecked, images convert faster.
-
 1
1 -
2
-
3
-
4
-
5
-
6
-
7
-
8
-
9
-
10
-
11
-
12
-
13
-
14
-
15
-
16
-
17
-
18
-
19
-
20
-
21
-
22
-
23
-
24
-
25
-
26
-
27
-
28
-
29
-
30
-
31
-
32
-
33
-
34
-
35
-
36
-
37
-
38
-
39
-
40
-
41
-
42
-
43
-
44
-
45
-
46
-
47
-
48
-
49
-
50
-
51
-
52
-
53
-
54
-
55
-
56
-
57
-
58
-
59
-
60
-
61
-
62
-
63
-
64
-
65
-
66
-
67
-
68
-
69
-
70
-
71
-
72
-
73
-
74
-
75
-
76
-
77
-
78
-
79
-
80
-
81
-
82
-
83
-
84
-
85
-
86
-
87
-
88
-
89
-
90
-
 91
91 -
 92
92 -
 93
93 -
 94
94 -
 95
95 -
 96
96 -
 97
97 -
 98
98 -
 99
99 -
 100
100 -
 101
101 -
102
-
103
-
104
-
105
-
106
-
107
-
108
-
109
-
110
-
111
-
112
-
113
-
114
-
115
-
116
-
117
-
118
-
119
-
120
-
121
-
122
-
123
 |
 |