Canon PowerShot G12 PowerShot G12 Camera User Guide - Page 170
Customizing Display Information
 |
View all Canon PowerShot G12 manuals
Add to My Manuals
Save this manual to your list of manuals |
Page 170 highlights
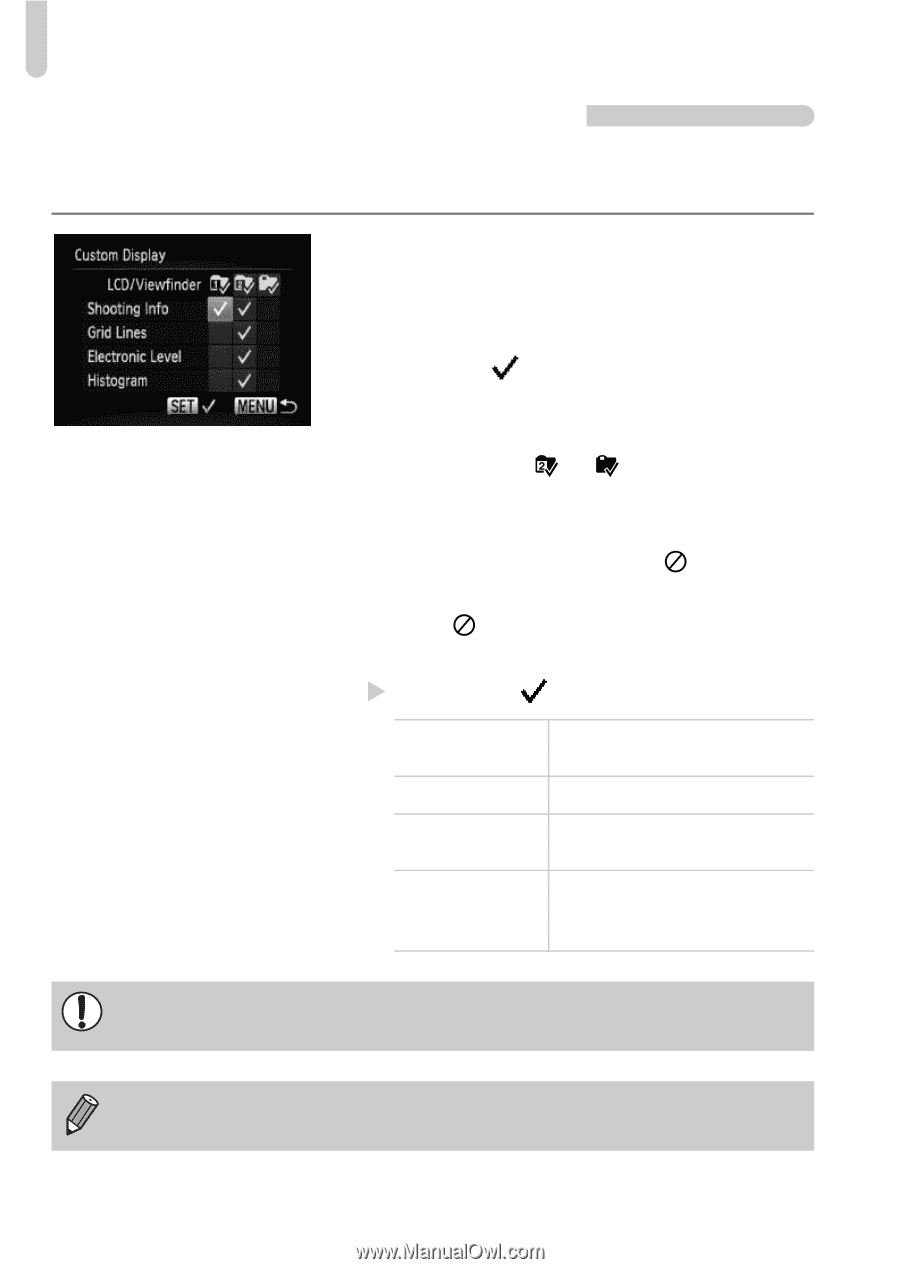
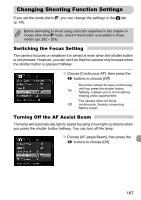
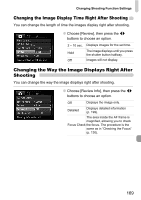
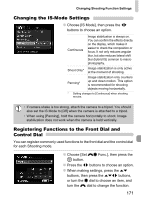
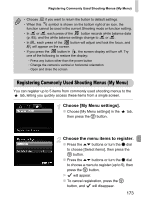
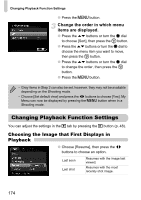
Changing Shooting Function Settings Customizing Display Information You can change which information is displayed by switching between custom displays with each press of the l button. ● Choose [Custom Display], then press the m button. ● Press the opqr buttons or turn the Ê dial to choose an item, then press the m button. A will appear on items that display. ● Press the opqr buttons or turn the Ê dial to choose or , then press the m button, and the l button to change the custom display settings. Custom display items with will not display when the l button is pressed. Also, cannot be set for the current custom display while making settings. X Items with a will display. Shooting Info Displays shooting information (p. 196). Grid Lines A grid overlays the screen. Electronic Level An electronic level appears on the screen (p. 108). Histogram A histogram (p. 45) appears in Shooting modes G, M, B, D. If you press the shutter button halfway and return to the shooting screen from the custom display settings screen, the settings will not be saved. Gray items can also be set, however, they may not appear depending on the Shooting mode. 170
-
 1
1 -
2
-
3
-
4
-
5
-
6
-
7
-
8
-
9
-
10
-
11
-
12
-
13
-
14
-
15
-
16
-
17
-
18
-
19
-
20
-
21
-
22
-
23
-
24
-
25
-
26
-
27
-
28
-
29
-
30
-
31
-
32
-
33
-
34
-
35
-
36
-
37
-
38
-
39
-
40
-
41
-
42
-
43
-
44
-
45
-
46
-
47
-
48
-
49
-
50
-
51
-
52
-
53
-
54
-
55
-
56
-
57
-
58
-
59
-
60
-
61
-
62
-
63
-
64
-
65
-
66
-
67
-
68
-
69
-
70
-
71
-
72
-
73
-
74
-
75
-
76
-
77
-
78
-
79
-
80
-
81
-
82
-
83
-
84
-
85
-
86
-
87
-
88
-
89
-
90
-
91
-
92
-
93
-
94
-
95
-
96
-
97
-
98
-
99
-
100
-
101
-
102
-
103
-
104
-
105
-
106
-
107
-
108
-
109
-
110
-
111
-
112
-
113
-
114
-
115
-
116
-
117
-
118
-
119
-
120
-
121
-
122
-
123
-
124
-
125
-
126
-
127
-
128
-
129
-
130
-
131
-
132
-
133
-
134
-
135
-
136
-
137
-
138
-
139
-
140
-
141
-
142
-
143
-
144
-
145
-
146
-
147
-
148
-
149
-
150
-
151
-
152
-
153
-
154
-
155
-
156
-
157
-
158
-
159
-
160
-
161
-
162
-
163
-
164
-
 165
165 -
 166
166 -
 167
167 -
 168
168 -
 169
169 -
 170
170 -
 171
171 -
 172
172 -
 173
173 -
 174
174 -
 175
175 -
176
-
177
-
178
-
179
-
180
-
181
-
182
-
183
-
184
-
185
-
186
-
187
-
188
-
189
-
190
-
191
-
192
-
193
-
194
-
195
-
196
-
197
-
198
-
199
-
200
-
201
-
202
-
203
-
204
-
205
-
206
-
207
-
208
-
209
-
210
-
211
-
212
-
213
-
214
 |
 |