Canon ZR45MC DIGITAL VIDEO SOLUTION DISK Ver.1 Software Instruction Manual - Page 37
and click the [Download] button.
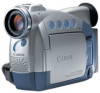 |
View all Canon ZR45MC manuals
Add to My Manuals
Save this manual to your list of manuals |
Page 37 highlights
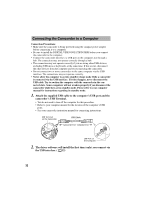
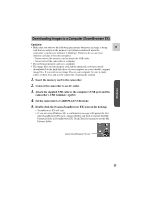
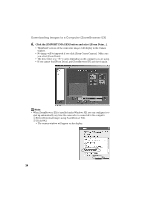
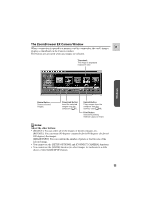
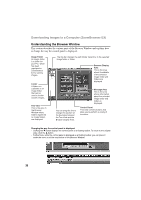
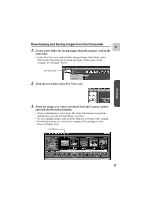
Windows Downloading and Saving Images from the Camcorder E 1. Create a new folder for saving images from the memory card in the camcorder. • In the Tree View area, right-click the [Image Library One] folder, select [New Folder] from the pop-up menu and input a folder name. In this example, we will input "Travel." Tree View Area 2. Click the new folder in the Tree View area. 3. Select the images you wish to download from the Camera window and click the [Download] button. • Click on thumbnails to select them. The color of the frame(s) around the thumbnail(s) you selected will change to be blue. • To select multiple images, hold down the Shift key or Ctrl key while clicking. • Downloaded images are saved to the computer disk and appear in the Browser Display Area. Thumbnail 37
-
 1
1 -
2
-
3
-
4
-
5
-
6
-
7
-
8
-
9
-
10
-
11
-
12
-
13
-
14
-
15
-
16
-
17
-
18
-
19
-
20
-
21
-
22
-
23
-
24
-
25
-
26
-
27
-
28
-
29
-
30
-
31
-
 32
32 -
 33
33 -
 34
34 -
 35
35 -
 36
36 -
 37
37 -
 38
38 -
 39
39 -
 40
40 -
 41
41 -
 42
42 -
43
-
44
-
45
-
46
-
47
-
48
-
49
-
50
-
51
-
52
-
53
-
54
-
55
-
56
-
57
-
58
-
59
-
60
-
61
-
62
-
63
-
64
-
65
-
66
-
67
-
68
-
69
-
70
-
71
-
72
-
73
 |
 |
