Canon ZR700 ZR700 ZR600 Instruction Manual - Page 105
Selecting Images for Transfer Transfer Order
 |
UPC - 013803063691
View all Canon ZR700 manuals
Add to My Manuals
Save this manual to your list of manuals |
Page 105 highlights
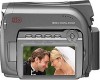
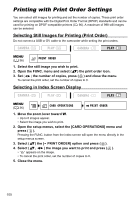
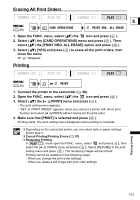
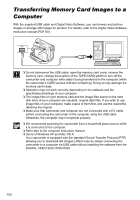
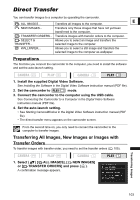
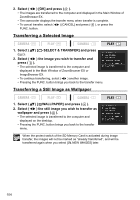
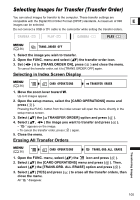
Selecting Images for Transfer (Transfer Order) You can select images for transfer to the computer. These transfer settings are compatible with the Digital Print Order Format (DPOF) standards. A maximum of 998 E images can be selected. Do not connect a USB or DV cable to the camcorder while setting the transfer orders. MENU ( 36) TRANS.ORDER OFF 1. Select the image you wish to transfer. 2. Open the FUNC. menu and select ( ) the transfer order icon. 3. Set ( ) it to [TRANS.ORDER ON], press ( ) and close the menu. To cancel the transfer order, set it to [TRANS.ORDER OFF] again. Selecting in Index Screen Display MENU ( 36) CARD OPERATIONS TRANSFER ORDER 1. Move the zoom lever toward W. Up to 6 images appear. 2. Open the setup menus, select the [CARD OPERATIONS] menu and press ( ). Pressing the FUNC. button from the index screen will open the menu directly in the setup menus screen. 3. Select ( ) the [ TRANSFER ORDER] option and press ( ). 4. Select ( , ) the image you want to transfer and press ( ). • " " appears on the image. • To cancel the transfer order, press ( ) again. 5. Close the menu. Erasing All Transfer Orders MENU ( 36) CARD OPERATIONS TRANS.ORD.ALL ERASE 1. Open the FUNC. menu, select ( ) the icon and press ( ). 2. Select ( ) the [CARD OPERATIONS] menu and press ( ). Then, select ( ) the [TRANS.ORD. ALL ERASE] option and press ( ). 3. Select ( ) [YES] and press ( close the menu. All " " disappear. ) to erase all the transfer orders, then Transferring Images 105
-
 1
1 -
2
-
3
-
4
-
5
-
6
-
7
-
8
-
9
-
10
-
11
-
12
-
13
-
14
-
15
-
16
-
17
-
18
-
19
-
20
-
21
-
22
-
23
-
24
-
25
-
26
-
27
-
28
-
29
-
30
-
31
-
32
-
33
-
34
-
35
-
36
-
37
-
38
-
39
-
40
-
41
-
42
-
43
-
44
-
45
-
46
-
47
-
48
-
49
-
50
-
51
-
52
-
53
-
54
-
55
-
56
-
57
-
58
-
59
-
60
-
61
-
62
-
63
-
64
-
65
-
66
-
67
-
68
-
69
-
70
-
71
-
72
-
73
-
74
-
75
-
76
-
77
-
78
-
79
-
80
-
81
-
82
-
83
-
84
-
85
-
86
-
87
-
88
-
89
-
90
-
91
-
92
-
93
-
94
-
95
-
96
-
97
-
98
-
99
-
 100
100 -
 101
101 -
 102
102 -
 103
103 -
 104
104 -
 105
105 -
 106
106 -
 107
107 -
 108
108 -
 109
109 -
 110
110 -
111
-
112
-
113
-
114
-
115
-
116
-
117
-
118
-
119
-
120
-
121
-
122
-
123
-
124
-
125
-
126
-
127
-
128
-
129
-
130
-
131
 |
 |