Canon imageCLASS 2300N Basic Guide for imageCLASS 2300 - Page 94
Place a document., Specify the transmitting conditions, press [OK].
 |
View all Canon imageCLASS 2300N manuals
Add to My Manuals
Save this manual to your list of manuals |
Page 94 highlights
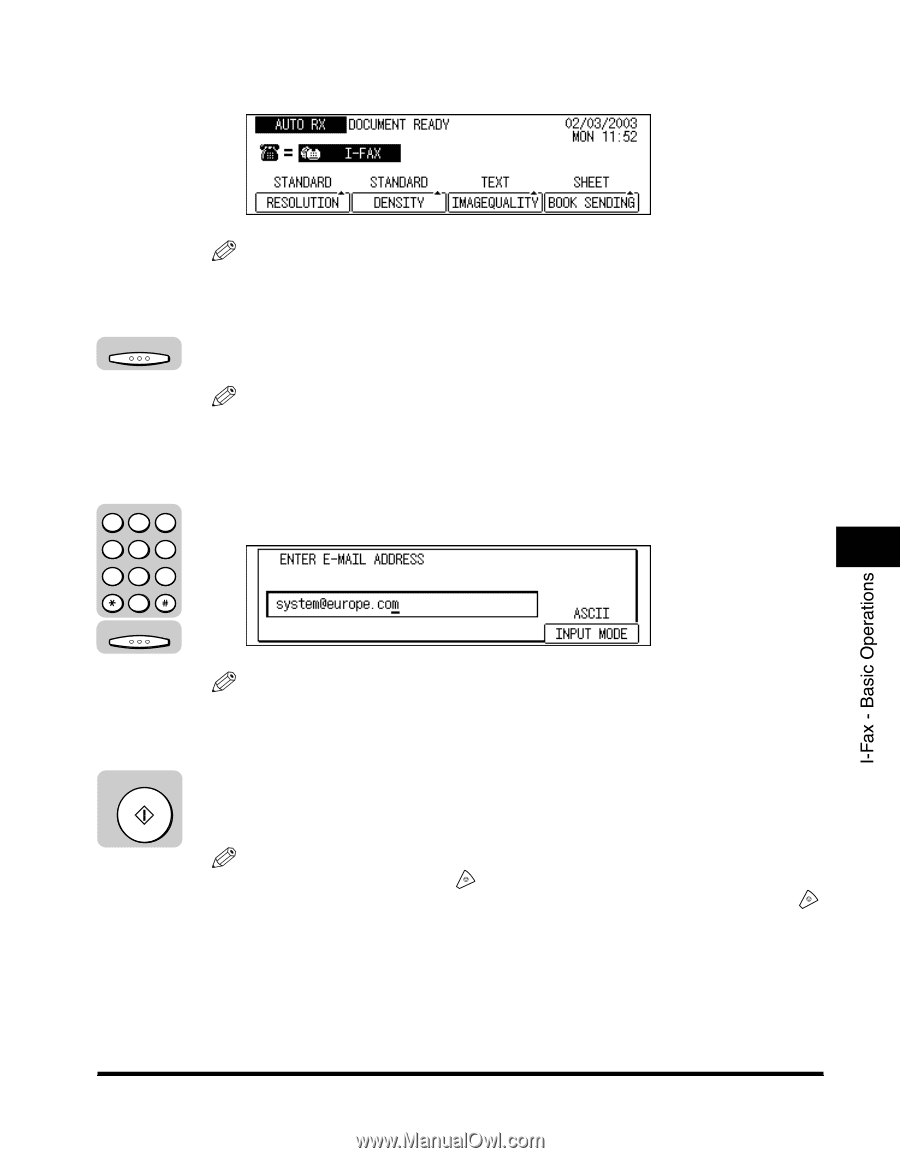
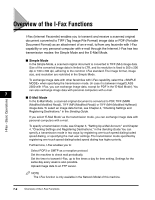
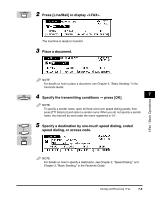
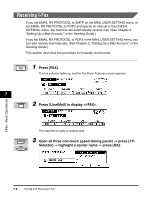
3 Place a document. I-Fax - Basic Operations NOTE For details on how to place a document, see Chapter 3, "Basic Sending," in the Facsimile Guide. OK 4 Specify the transmitting conditions © press [OK]. NOTE To specify a sender name, open all three one-touch speed dialing panels, then press [TTI Selector] and select a sender name. When you do not specify a sender name, the mail will be sent under the name registered in '01'. 5 @. ABC DEF 123 Specify a destination using the numeric keys © press [OK]. GHI JKL MNO 456 7 PRS TUV WXY 789 OPER 0 SYMBOLS OK NOTE For details on how to specify a destination, see Chapter 2, "Speed Dialing," and Chapter 3, "Basic Sending," in the Facsimile Guide. Start 6 Press [Start]. The machine scans the document. NOTE To cancel transmitting, press (Stop) while scanning the document or while on standby for transmitting. You cannot cancel while transmitting, even if you press (Stop). If the machine fails to transmit due to transmitting error, etc., it will retransmit for the number of times specified in RETRY of the MAIL USER SETTING menu. In this case, the retry interval will be as specified in RETRY INTERVAL of the MAIL USER SETTING menu. For specification details of Retry and Retry Interval, see Chapter 3, "Setting Up a Mail Account," in the Sending Guide. Sendig and Receiving I-Fax 7-7
-
 1
1 -
2
-
3
-
4
-
5
-
6
-
7
-
8
-
9
-
10
-
11
-
12
-
13
-
14
-
15
-
16
-
17
-
18
-
19
-
20
-
21
-
22
-
23
-
24
-
25
-
26
-
27
-
28
-
29
-
30
-
31
-
32
-
33
-
34
-
35
-
36
-
37
-
38
-
39
-
40
-
41
-
42
-
43
-
44
-
45
-
46
-
47
-
48
-
49
-
50
-
51
-
52
-
53
-
54
-
55
-
56
-
57
-
58
-
59
-
60
-
61
-
62
-
63
-
64
-
65
-
66
-
67
-
68
-
69
-
70
-
71
-
72
-
73
-
74
-
75
-
76
-
77
-
78
-
79
-
80
-
81
-
82
-
83
-
84
-
85
-
86
-
87
-
88
-
 89
89 -
 90
90 -
 91
91 -
 92
92 -
 93
93 -
 94
94 -
 95
95 -
 96
96 -
 97
97 -
 98
98 -
 99
99 -
100
-
101
-
102
-
103
-
104
-
105
-
106
-
107
-
108
-
109
-
110
-
111
-
112
-
113
-
114
-
115
-
116
-
117
-
118
-
119
-
120
-
121
-
122
-
123
-
124
-
125
-
126
-
127
-
128
-
129
-
130
-
131
-
132
-
133
-
134
-
135
-
136
-
137
-
138
-
139
-
140
-
141
-
142
-
143
-
144
-
145
-
146
-
147
-
148
-
149
-
150
-
151
-
152
-
153
-
154
-
155
-
156
 |
 |