Cisco AIR-BR350-E-K9 Hardware Installation Guide - Page 30
Before You Start, Summary of Configuration Steps, Using the IP Setup Utility
 |
View all Cisco AIR-BR350-E-K9 manuals
Add to My Manuals
Save this manual to your list of manuals |
Page 30 highlights
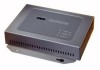
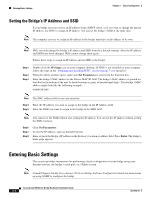
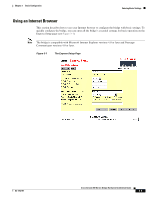
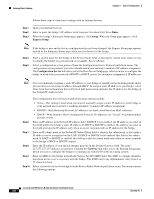
Before You Start Chapter 3 Basic Configuration Before You Start Before configuring the bridge, ask your network administrator for the following information: • The service set identifier (SSID) to be used for the bridge. • A system name for the bridge. The name should describe the location or principal users of the bridge. • If your network does not use DHCP to assign IP addresses, you will need an IP address for the bridge. • If your network uses subnets, you will need a default gateway and an IP subnet mask for the bridge. • The bridge's MAC address, which is printed on the label on the bottom of the bridge. Summary of Configuration Steps You use the Express Setup page to assign basic settings to the bridge. For instructions on setting up security, filtering, and other bridge features, consult the Cisco Aironet 350 Series Bridge Software Configuration Guide on the bridge CD. Follow these steps to enter the basic bridge settings: 1. Connect the bridge as described in the Quick Start Guide: Cisco Aironet 350 Series Bridge. 2. Use the bridge's IP address through an Internet browser or a Telnet session to open the bridge's management system. If your network uses a DHCP server, use the IP Setup Utility (IPSU) to find the bridge's DHCP-assigned IP address. The "Using the IP Setup Utility" section on page 3-2 describes how to use IPSU. You can also use a 9-pin, straight-through, male-to-female serial cable to connect your computer's COM1 or COM2 port to the serial port on the back of the bridge and use a terminal emulator to open the management system. The "Using a Terminal Emulator" section on page 3-9 describes using a terminal emulator to assign basic settings. 3. Enter basic settings on the Express Setup page. Using the IP Setup Utility The IP Setup utility (IPSU) allows you to find the bridge's IP address when it has been assigned by a DHCP server. You can also use IPSU to set the bridge's IP address and SSID if they have not been changed from the default settings. Note You must run IPSU from a computer on the same subnet as the bridge. The sections below explain how to obtain and install the utility, how to use it to find the bridge's IP address, and how to use it to set the IP address and the SSID. Obtaining and Installing IPSU IPSU is available on the Cisco web site. Follow these steps to obtain and install IPSU: Cisco Aironet 350 Series Bridge Hardware Installation Guide 3-2 OL-1412-01
-
 1
1 -
2
-
3
-
4
-
5
-
6
-
7
-
8
-
9
-
10
-
11
-
12
-
13
-
14
-
15
-
16
-
17
-
18
-
19
-
20
-
21
-
22
-
23
-
24
-
 25
25 -
 26
26 -
 27
27 -
 28
28 -
 29
29 -
 30
30 -
 31
31 -
 32
32 -
 33
33 -
 34
34 -
 35
35 -
36
-
37
-
38
-
39
-
40
-
41
-
42
-
43
-
44
-
45
-
46
-
47
-
48
-
49
-
50
-
51
-
52
-
53
-
54
-
55
-
56
-
57
-
58
-
59
-
60
-
61
-
62
-
63
-
64
-
65
-
66
-
67
-
68
-
69
-
70
-
71
-
72
-
73
-
74
-
75
-
76
 |
 |
