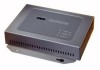
Cisco AIR-BR350-E-K9 Hardware Installation Guide - Page 37
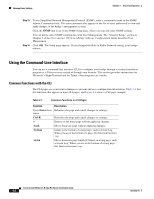
Using a Terminal Emulator
 |
View all Cisco AIR-BR350-E-K9 manuals
Add to My Manuals
Save this manual to your list of manuals |
Page 37 highlights
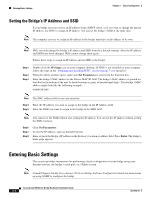
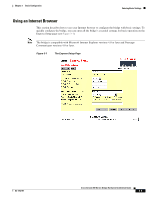
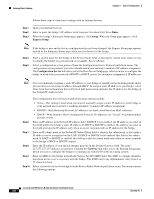
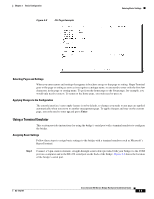
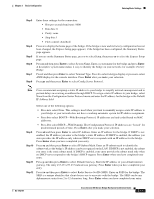
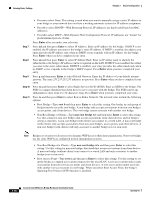
Chapter 3 Basic Configuration Figure 3-2 CLI Page Example Entering Basic Settings Selecting Pages and Settings When you enter names and settings that appear in brackets you go to that page or setting. HyperTerminal goes to the page or setting as soon as it recognizes a unique name, so you need to enter only the first few characters in the page or setting name. To go from the home page to the Setup page, for example, you would only need to enter s. To return to the home page, you only need to press =. Applying Changes to the Configuration The console interface's auto-apply feature is on by default, so changes you make to any page are applied automatically when you move to another management page. To apply changes and stay on the current page, you only need to enter ap and press Enter. Using a Terminal Emulator This section provides instructions for using the bridge's serial port with a terminal emulator to configure the bridge. Assigning Basic Settings Follow these steps to assign basic settings to the bridge with a terminal emulator such as Microsoft's HyperTerminal. Step 1 Connect a 9-pin, male-to-female, straight-through serial cable (provided with your bridge) to the COM port on a computer and to the RS-232 serial port on the back of the bridge. Figure 3-3 shows the location of the bridge's serial port. OL-1412-01 Cisco Aironet 350 Series Bridge Hardware Installation Guide 3-9
-
 1
1 -
2
-
3
-
4
-
5
-
6
-
7
-
8
-
9
-
10
-
11
-
12
-
13
-
14
-
15
-
16
-
17
-
18
-
19
-
20
-
21
-
22
-
23
-
24
-
25
-
26
-
27
-
28
-
29
-
30
-
31
-
 32
32 -
 33
33 -
 34
34 -
 35
35 -
 36
36 -
 37
37 -
 38
38 -
 39
39 -
 40
40 -
 41
41 -
 42
42 -
43
-
44
-
45
-
46
-
47
-
48
-
49
-
50
-
51
-
52
-
53
-
54
-
55
-
56
-
57
-
58
-
59
-
60
-
61
-
62
-
63
-
64
-
65
-
66
-
67
-
68
-
69
-
70
-
71
-
72
-
73
-
74
-
75
-
76
 |
 |
