Cisco SRW2024P User Guide - Page 18
Configuring the Switch through the, Console Interface, Switch Main Menu - default login
 |
UPC - 745883571000
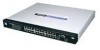
View all Cisco SRW2024P manuals
Add to My Manuals
Save this manual to your list of manuals |
Page 18 highlights
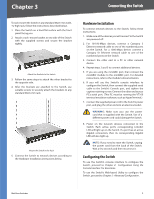
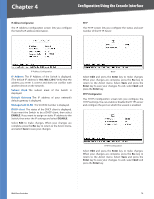
Chapter 4 Configuration Using the Console Interface Telnet Login Screen Press the Esc button to return to the login screen. Use the right arrow button to navigate to the Execute option and press the Enter button to open CLI interface. Configuring the Switch through the Console Interface The console screens consist of a series of menus. Each menu has several options, which are listed vertically. You select a menu option when you highlight it; pressing the Enter key activates the highlighted option. To navigate through the menus and actions of the console interface, use the up or down arrow keys to move up or down, and use the left or right arrow keys to move left or right. Use the Enter key to select a menu option, and use the Esc key to return to the previous selection. Menu options and any values entered or present will be highlighted. The bottom of the screen lists the actions available. Switch Main Menu The System Main Menu screen displays these choices: 1. System Configuration Information Menu 2. Port Status 3. Port Configuration 4. Help 5. Logout System Configuration Menu On the System Configuration Menu screen, you can choose from the following: 1. System Information 2. Management Settings 3. User & Password Settings 4. Security Settings 5. IP Configuration 6. File Management 7. Restore System Default Settings 8. Reboot System 9. Back to main menu System Configuration Menu System Information Using System Information screen, you can check the Switch's firmware versions and general system information. System Configuration Menu Switch Main Menu WebView Switches 11
-
 1
1 -
2
-
3
-
4
-
5
-
6
-
7
-
8
-
9
-
10
-
11
-
12
-
 13
13 -
 14
14 -
 15
15 -
 16
16 -
 17
17 -
 18
18 -
 19
19 -
 20
20 -
 21
21 -
 22
22 -
 23
23 -
24
-
25
-
26
-
27
-
28
-
29
-
30
-
31
-
32
-
33
-
34
-
35
-
36
-
37
-
38
-
39
-
40
-
41
-
42
-
43
-
44
-
45
-
46
-
47
-
48
-
49
-
50
-
51
-
52
-
53
-
54
-
55
-
56
-
57
-
58
-
59
-
60
-
61
-
62
-
63
-
64
-
65
-
66
-
67
-
68
-
69
-
70
-
71
-
72
-
73
-
74
-
75
-
76
-
77
-
78
-
79
-
80
-
81
-
82
-
83
-
84
-
85
-
86
-
87
-
88
-
89
-
90
-
91
-
92
-
93
-
94
-
95
-
96
 |
 |
