Cisco WRVS4400N Administration Guide - Page 136
IPS > Configuration, Enable, Disable, TELNET, Browse, Signature Update, Update, STEP 1 - ips signature
 |
UPC - 745883574797
View all Cisco WRVS4400N manuals
Add to My Manuals
Save this manual to your list of manuals |
Page 136 highlights
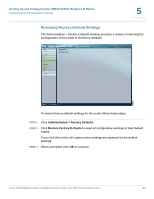
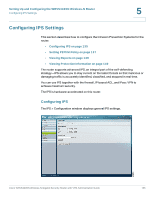
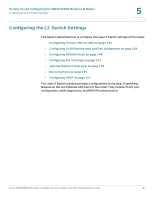
Setting Up and Configuring the WRVS4400N Wireless-N Router Configuring IPS Settings 5 To configure general IPS settings: STEP 1 Click IPS > Configuration. STEP 2 In the IPS Function field, click Enable. STEP 3 In the Anomaly Detection section, configure the detection settings: • HTTP-Web attacks use weaknesses on HTTP protocol to trigger the buffer overflow on Web servers. The default is Disable. • FTP-FTP attacks use weaknesses on FTP protocol to generate illegal FTP commands to the FTP server. The default is Disable. • TELNET-Telnet attacks use weakness on TELNET protocol to execute illegal commands on the TELNET server. The default is Disable. • RPC-Remote Procedure Call allows attackers to issue illegal commands to be executed on RPC server. The default is Disable STEP 4 To protect your local network from the latest Internet threats, upgrade the IPS signature file regularly: a. Download the signature file from www.cisco.com to your personal computer. b. Click Browse to locate the signature file. Alternatively, enter the path to the file in the Signature Update field c. Click Update. STEP 5 Click Save. Cisco WRVS4400N Wireless-N Gigabit Security Router with VPN Administration Guide 136
-
 1
1 -
2
-
3
-
4
-
5
-
6
-
7
-
8
-
9
-
10
-
11
-
12
-
13
-
14
-
15
-
16
-
17
-
18
-
19
-
20
-
21
-
22
-
23
-
24
-
25
-
26
-
27
-
28
-
29
-
30
-
31
-
32
-
33
-
34
-
35
-
36
-
37
-
38
-
39
-
40
-
41
-
42
-
43
-
44
-
45
-
46
-
47
-
48
-
49
-
50
-
51
-
52
-
53
-
54
-
55
-
56
-
57
-
58
-
59
-
60
-
61
-
62
-
63
-
64
-
65
-
66
-
67
-
68
-
69
-
70
-
71
-
72
-
73
-
74
-
75
-
76
-
77
-
78
-
79
-
80
-
81
-
82
-
83
-
84
-
85
-
86
-
87
-
88
-
89
-
90
-
91
-
92
-
93
-
94
-
95
-
96
-
97
-
98
-
99
-
100
-
101
-
102
-
103
-
104
-
105
-
106
-
107
-
108
-
109
-
110
-
111
-
112
-
113
-
114
-
115
-
116
-
117
-
118
-
119
-
120
-
121
-
122
-
123
-
124
-
125
-
126
-
127
-
128
-
129
-
130
-
 131
131 -
 132
132 -
 133
133 -
 134
134 -
 135
135 -
 136
136 -
 137
137 -
 138
138 -
 139
139 -
 140
140 -
 141
141 -
142
-
143
-
144
-
145
-
146
-
147
-
148
-
149
-
150
-
151
-
152
-
153
-
154
-
155
-
156
-
157
-
158
-
159
-
160
-
161
-
162
-
163
-
164
-
165
-
166
-
167
-
168
-
169
-
170
-
171
-
172
-
173
-
174
-
175
-
176
-
177
-
178
-
179
-
180
-
181
-
182
-
183
-
184
-
185
-
186
-
187
-
188
-
189
-
190
-
191
-
192
-
193
-
194
-
195
-
196
-
197
-
198
-
199
-
200
-
201
-
202
-
203
-
204
-
205
-
206
-
207
-
208
-
209
-
210
-
211
-
212
-
213
-
214
-
215
-
216
-
217
-
218
-
219
-
220
-
221
-
222
-
223
-
224
 |
 |
