Cisco WRVS4400N Administration Guide - Page 179
Windows XP, Network and Internet Connections
 |
UPC - 745883574797
View all Cisco WRVS4400N manuals
Add to My Manuals
Save this manual to your list of manuals |
Page 179 highlights
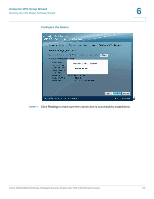
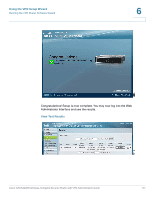
Troubleshooting A STEP 7 Select Use the following DNS server addresses, and enter the Preferred DNS server and Alternative DNS server (provided by your ISP). Contact your ISP or go on its website to find the information. STEP 8 Click OK in the Internet Protocol (TCP/IP) Properties window, and click OK in the Local Area Connection Properties window. STEP 9 Restart the computer if asked. Windows XP STEP 1 Click Start and Control Panel. STEP 2 Click the Network and Internet Connections icon and then the Network Connections icon. STEP 3 Right-click the Local Area Connection associated with your Ethernet adapter, and click Properties. STEP 4 In the This "connection uses the following items" box, select Internet Protocol (TCP/IP). Click Properties. STEP 5 Select Use the following IP address, and enter a unique IP address that is not used by any other computer on the network connected to the router. You can only use an IP address in the ranges 192.168.1.2 to 192.168.1.99 and 192.168.1.151 to 192.168.1.254. STEP 6 Enter the Subnet Mask, 255.255.255.0. STEP 7 Enter the Default Gateway, 192.168.1.1 (Router's default IP address). STEP 8 Select Use the following DNS server addresses, and enter the Preferred DNS server and Alternative DNS server (provided by your ISP). Contact your ISP or go on its website to find the information. STEP 9 Click OK in the Internet Protocol (TCP/IP) Properties window. Click OK in the Local Area Connection Properties window. Cisco WRVS4400N Wireless-N Gigabit Security Router with VPN Administration Guide 179
-
 1
1 -
2
-
3
-
4
-
5
-
6
-
7
-
8
-
9
-
10
-
11
-
12
-
13
-
14
-
15
-
16
-
17
-
18
-
19
-
20
-
21
-
22
-
23
-
24
-
25
-
26
-
27
-
28
-
29
-
30
-
31
-
32
-
33
-
34
-
35
-
36
-
37
-
38
-
39
-
40
-
41
-
42
-
43
-
44
-
45
-
46
-
47
-
48
-
49
-
50
-
51
-
52
-
53
-
54
-
55
-
56
-
57
-
58
-
59
-
60
-
61
-
62
-
63
-
64
-
65
-
66
-
67
-
68
-
69
-
70
-
71
-
72
-
73
-
74
-
75
-
76
-
77
-
78
-
79
-
80
-
81
-
82
-
83
-
84
-
85
-
86
-
87
-
88
-
89
-
90
-
91
-
92
-
93
-
94
-
95
-
96
-
97
-
98
-
99
-
100
-
101
-
102
-
103
-
104
-
105
-
106
-
107
-
108
-
109
-
110
-
111
-
112
-
113
-
114
-
115
-
116
-
117
-
118
-
119
-
120
-
121
-
122
-
123
-
124
-
125
-
126
-
127
-
128
-
129
-
130
-
131
-
132
-
133
-
134
-
135
-
136
-
137
-
138
-
139
-
140
-
141
-
142
-
143
-
144
-
145
-
146
-
147
-
148
-
149
-
150
-
151
-
152
-
153
-
154
-
155
-
156
-
157
-
158
-
159
-
160
-
161
-
162
-
163
-
164
-
165
-
166
-
167
-
168
-
169
-
170
-
171
-
172
-
173
-
 174
174 -
 175
175 -
 176
176 -
 177
177 -
 178
178 -
 179
179 -
 180
180 -
 181
181 -
 182
182 -
 183
183 -
 184
184 -
185
-
186
-
187
-
188
-
189
-
190
-
191
-
192
-
193
-
194
-
195
-
196
-
197
-
198
-
199
-
200
-
201
-
202
-
203
-
204
-
205
-
206
-
207
-
208
-
209
-
210
-
211
-
212
-
213
-
214
-
215
-
216
-
217
-
218
-
219
-
220
-
221
-
222
-
223
-
224
 |
 |
