Craftsman 22901 Instruction Manual - Page 23
See
 |
View all Craftsman 22901 manuals
Add to My Manuals
Save this manual to your list of manuals |
Page 23 highlights
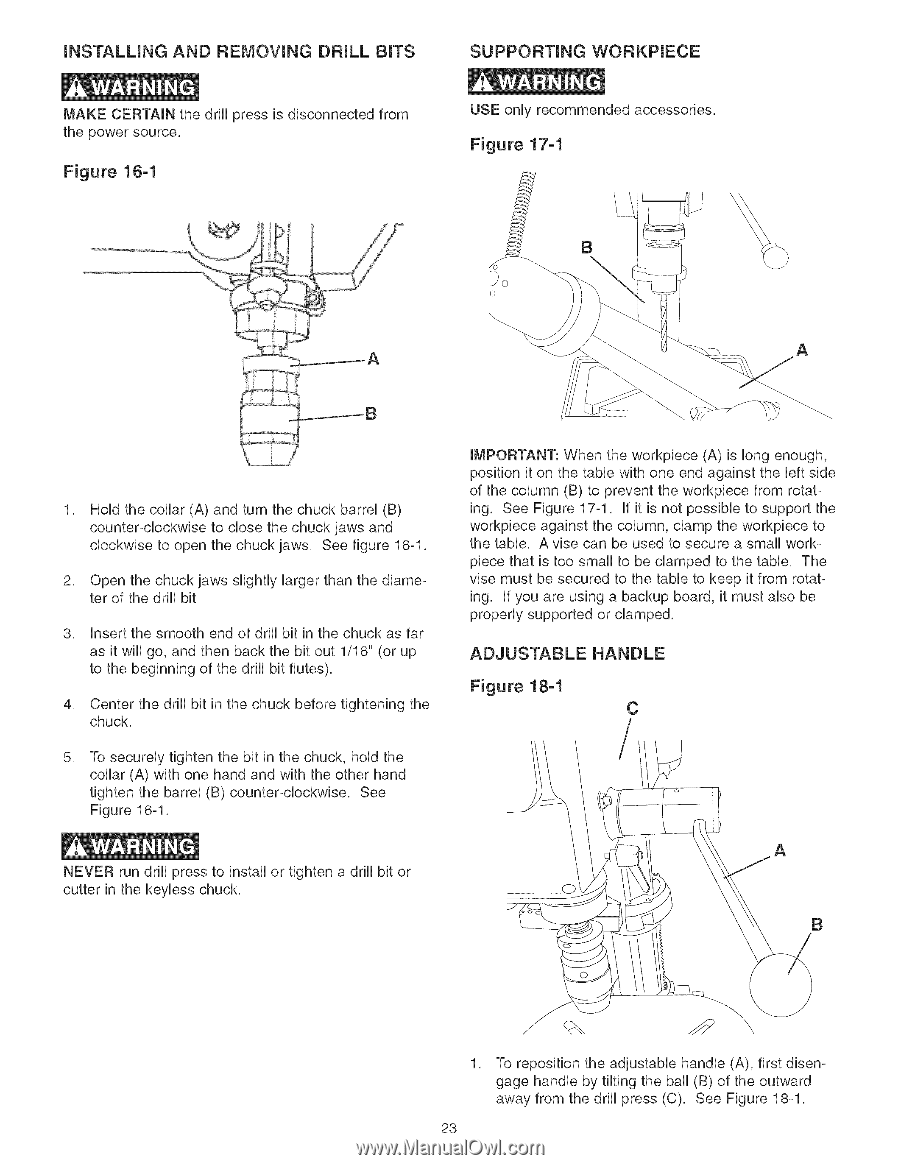
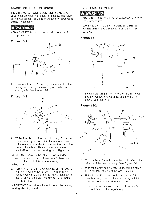
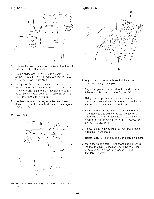
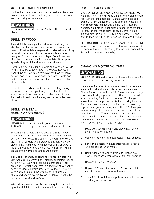
iNSTALLiNG AND REMOVING DRULL BITS MAKE CERTAIN the drill press is disconnected from the power source. Figure 18-1 SUPPORTING WOF{KPIECE USE onUyrecommended accessories. Figure 17-1 B o A HoUdthe collar (A) and turn the chuck barreU (B) counterocbckwbe to close the chuck jaws and clockwise to open the chuck jaws. See figure 16-1. 2, Open the chuck jaws slightly Uarger than the diameter of the drHUbit 3, insert the smooth end of drHUbit in the chuck as far as it wHUgo, and then back the bit out 1/16" (or up to the beginning of the drHUbit flutes). 4, Center the drHUbit in the chuck before tightening the chuck. 5, To secureUy tighten the bit in the chuck, hoUdthe collar (A) with one hand and with the other hand tighten the barrel (B) counter-clockwise. See Figure 16-1. NEVER run drill press to install or tighten a drill bit or cutter in the keyless chuck, IMPORTANT: When the workpiece (A) is long enough, position it on the table with one end against the left side of the column (B) to prevent the workpiece from rotating. See Figure 17ol. if it is not possible to support the workpiece against the column, clamp the workpiece to the table. A vise can be used to secure a small workpiece that is too small to be clamped to the table. The vise must be secured to the table to keep it from rotating. if you are using a backup board, it must also be properly supported or clamped. ADJUSTABLE HANDLE Figure 18-1 C A B 1, To reposition the adjustable handle (A), first disengage handle by tilting the ball (B) of the outward away from the drill press (C), See Figure 18-1, 23
-
 1
1 -
2
-
3
-
4
-
5
-
6
-
7
-
8
-
9
-
10
-
11
-
12
-
13
-
14
-
15
-
16
-
17
-
 18
18 -
 19
19 -
 20
20 -
 21
21 -
 22
22 -
 23
23 -
 24
24 -
 25
25 -
 26
26 -
 27
27 -
 28
28 -
29
-
30
-
31
-
32
-
33
-
34
-
35
-
36
-
37
-
38
-
39
-
40
-
41
-
42
-
43
-
44
-
45
-
46
-
47
-
48
-
49
-
50
-
51
-
52
-
53
-
54
-
55
-
56
-
57
-
58
-
59
-
60
 |
 |