Craftsman 22901 Instruction Manual - Page 26
Do Not Use Flammable
 |
View all Craftsman 22901 manuals
Add to My Manuals
Save this manual to your list of manuals |
Page 26 highlights
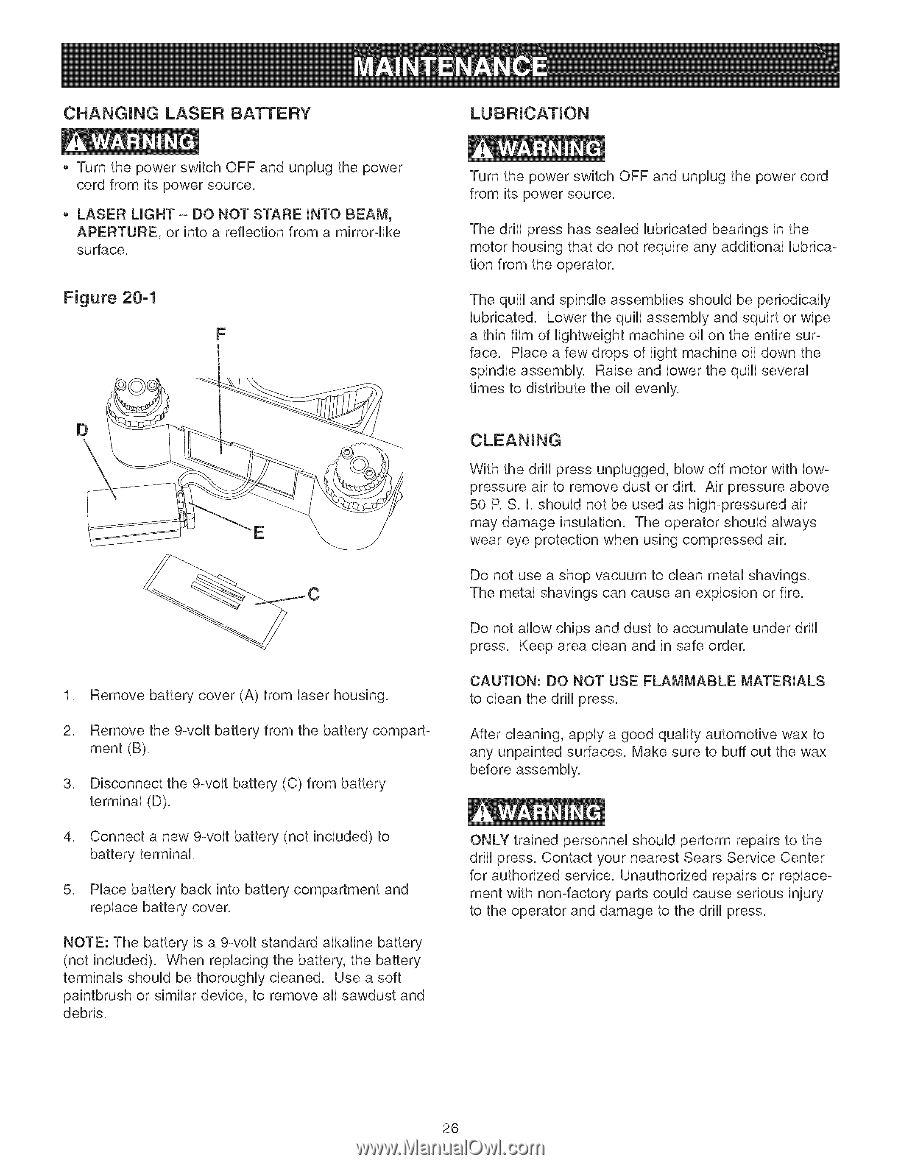
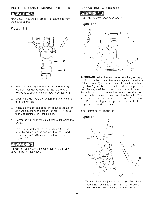
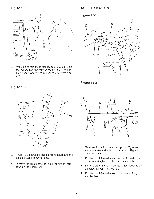
CHANGmNG LASER BATTERY Turn the power switch OFF and unplug the power cord from its power source, LASER UGHT - DO NOT STARE mNTOBEAM, APERTURE, or into a reflection from a mirror-like surface, Figure 20-1 F Turn the power switch OFF and unplug the power cord from its power source, The drill press has sealed lubricated bearings in the motor housing that do not require any additional lubrication from the operator, The quill and spindle assemblies should be periodically lubricated, Lower the quill assembly and squirt or wipe a thin film of lightweight machine oil on the entire surface, Place a few drops of light machine oil down the spindle assembly, Raise and lower the quill several times to distribute the oil evenly, 1. Remove battery cover (A) from laser housing. 2. Remove the 9-volt battery from the battery compartment (B). 3. Disconnect the 9-volt battery (C) from battery terminal (D). 4. Connect a new 9-volt battery (not included) to battery terminal. 5. Place battery back into battery compartment and replace battery cover. NOTE: The battery is a 9-volt standard alkaline battery (not included). When replacing the battery, the battery terminals should be thoroughly cleaned. Use a soft paintbrush or similar device, to remove all sawdust and debris. With the drill press unplugged, blow off motor with low° pressure air to remove dust or dirt, Air pressure above 50 P, S, I, should not be used as high-pressured air may damage insulation, The operator should always wear eye protection when using compressed air, Do not use a shop vacuum to clean metal shavings. The metal shavings can cause an explosion or fire. Do not allow chips and dust to accumulate under drill press, Keep area clean and in safe order, CAUTION: DO NOT USE FLAMMABLE MATERIALS to clean the drill press. After cleaning, apply a good quality automotive wax to any unpainted surfaces, Make sure to buff out the wax before assembly, ONLY trained personnel should perform repairs to the drill press, Contact your nearest Sears Service Center for authorized service, Unauthorized repairs or replace° ment with non-factory parts could cause serious injury to the operator and damage to the drill press, 26
-
 1
1 -
2
-
3
-
4
-
5
-
6
-
7
-
8
-
9
-
10
-
11
-
12
-
13
-
14
-
15
-
16
-
17
-
18
-
19
-
20
-
 21
21 -
 22
22 -
 23
23 -
 24
24 -
 25
25 -
 26
26 -
 27
27 -
 28
28 -
 29
29 -
 30
30 -
 31
31 -
32
-
33
-
34
-
35
-
36
-
37
-
38
-
39
-
40
-
41
-
42
-
43
-
44
-
45
-
46
-
47
-
48
-
49
-
50
-
51
-
52
-
53
-
54
-
55
-
56
-
57
-
58
-
59
-
60
 |
 |