Dell 1815dn Service Manual - Page 47
Remove the four screws securing the Scan Upper .
 |
UPC - 000061100008
View all Dell 1815dn manuals
Add to My Manuals
Save this manual to your list of manuals |
Page 47 highlights
Precautions 6. Lift the ADF Ass'y upward to remove it. ADF Ass'y 9. Remove the four screws securing the Scan Upper . Scanner 7. To remove the OPE Unit, first pull the part below the front of the OPE Unit with a light pressure to the direction of arrow. OPE Unit 10. Release the four hooks securing the Scan Upper to the Scan Lower and remove it, as shown below . Scan Upper 8. Unplug the three connectors from the OPE PBA, as shown below and then release the Battery. OPE Unit Scan Lower 11. Remove the CCD Cable, as shown below. CCD Cable Battery 5-12 Service Manual
-
 1
1 -
2
-
3
-
4
-
5
-
6
-
7
-
8
-
9
-
10
-
11
-
12
-
13
-
14
-
15
-
16
-
17
-
18
-
19
-
20
-
21
-
22
-
23
-
24
-
25
-
26
-
27
-
28
-
29
-
30
-
31
-
32
-
33
-
34
-
35
-
36
-
37
-
38
-
39
-
40
-
41
-
 42
42 -
 43
43 -
 44
44 -
 45
45 -
 46
46 -
 47
47 -
 48
48 -
 49
49 -
 50
50 -
 51
51 -
 52
52 -
53
-
54
-
55
-
56
-
57
-
58
-
59
-
60
-
61
-
62
-
63
-
64
-
65
-
66
-
67
-
68
-
69
-
70
-
71
-
72
-
73
-
74
-
75
-
76
-
77
-
78
-
79
-
80
-
81
-
82
-
83
-
84
-
85
-
86
-
87
-
88
-
89
-
90
-
91
-
92
-
93
-
94
-
95
-
96
-
97
-
98
-
99
-
100
-
101
-
102
-
103
-
104
-
105
-
106
-
107
-
108
-
109
-
110
-
111
-
112
-
113
-
114
-
115
-
116
-
117
-
118
-
119
-
120
-
121
-
122
-
123
-
124
-
125
-
126
-
127
-
128
-
129
-
130
-
131
-
132
-
133
-
134
-
135
-
136
-
137
-
138
-
139
-
140
-
141
-
142
-
143
-
144
-
145
-
146
-
147
-
148
-
149
-
150
-
151
-
152
 |
 |
Service Manual
Precautions
5-12
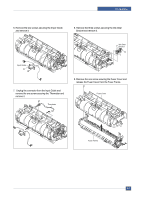
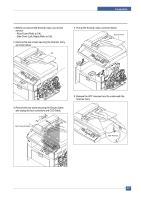
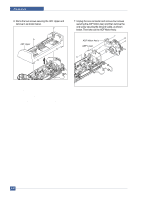
6. Lift the ADF Ass'y upward to remove it.
7. To remove the OPE Unit, first pull the part below the
front of the OPE Unit with a light pressure to the
direction of arrow.
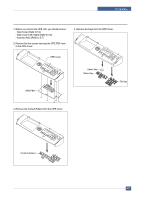
8. Unplug the three connectors from the OPE PBA, as
shown below and then release the Battery.
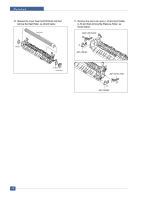
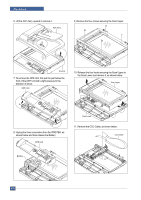
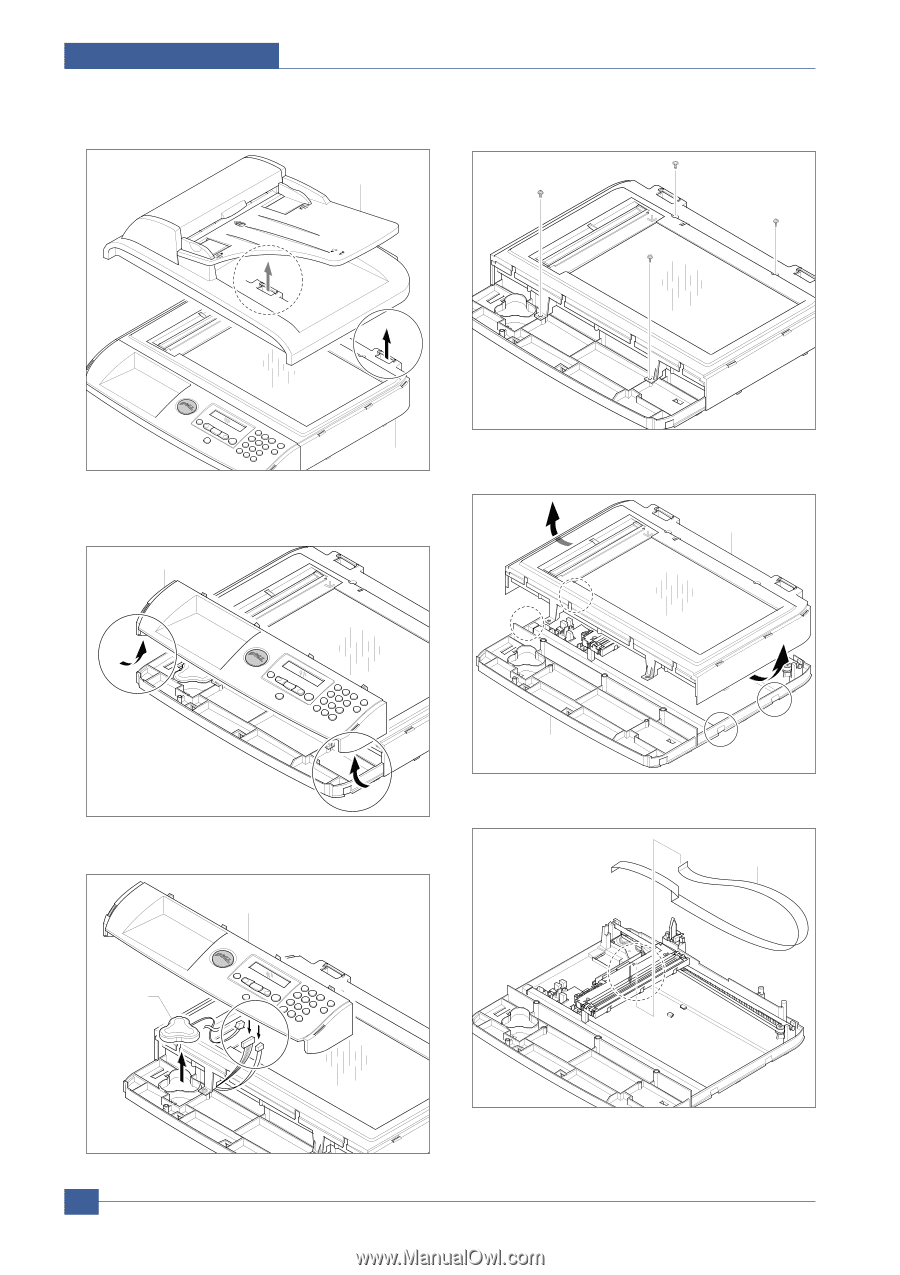
9. Remove the four screws securing the Scan Upper .
10. Release the four hooks securing the Scan Upper to
the Scan Lower and remove it, as shown below .
11. Remove the CCD Cable, as shown below.
ADF Ass'y
Scanner
Battery
OPE Unit
Scan Upper
Scan Lower
CCD Cable
OPE Unit