Dell 1815dn Service Manual - Page 55
Drive Ass'y, Shield Controller Ass'y Refer to 5.10
 |
UPC - 000061100008
View all Dell 1815dn manuals
Add to My Manuals
Save this manual to your list of manuals |
Page 55 highlights
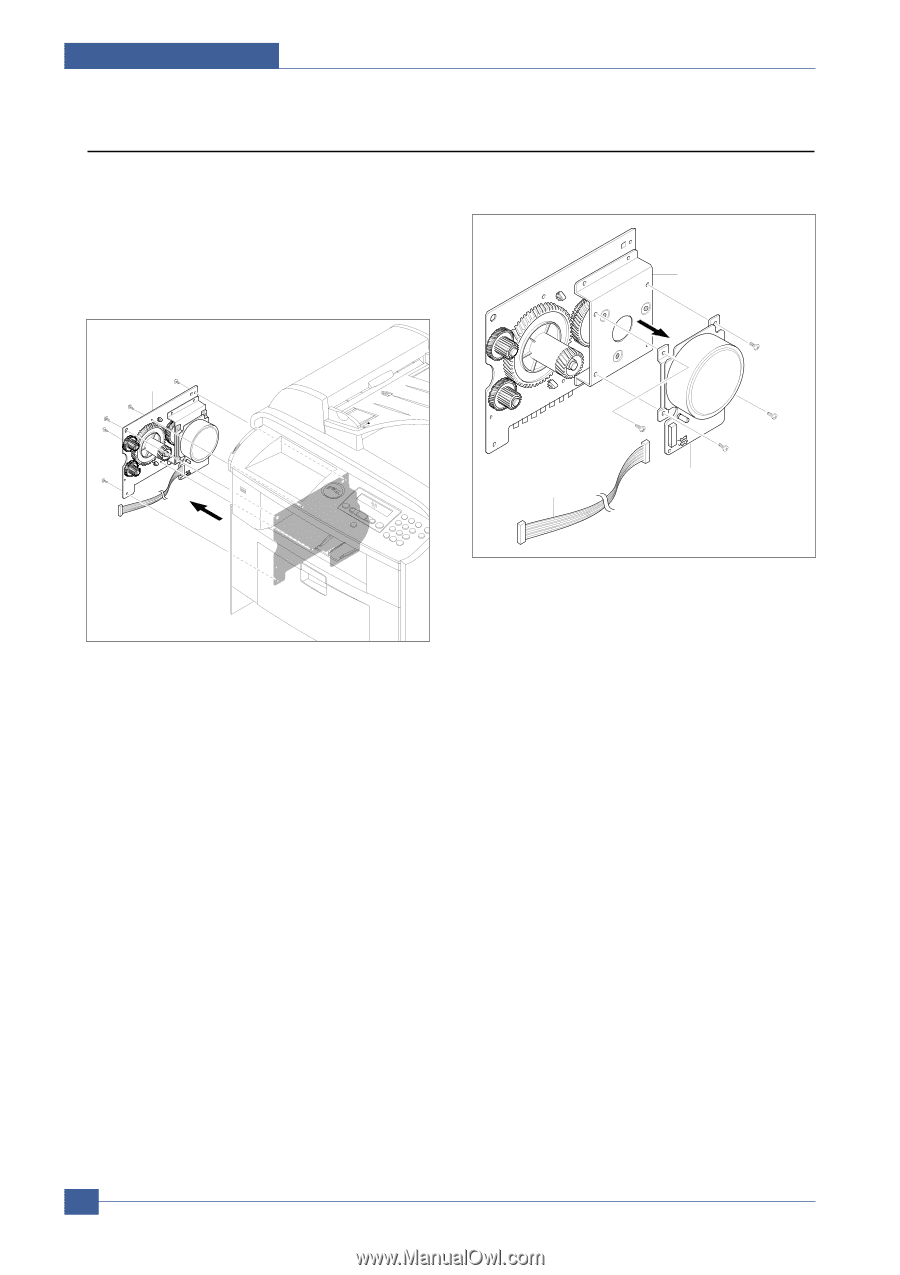
Precautions 5.11 Drive Ass'y 1. Before you remove the Drive Ass'y, you should remove: - Rear Cover (Refer to 5.4) - Side Cover Left (Refer to 5.6.4) - Shield Controller Ass'y (Refer to 5.10) 2. Remove the five screws securing the Drive Ass'y and remove it. 3. If necessary, remove the four screws securing the BVDC Motor Ass'y and remove it. Gear Bracket Ass'y Drive Ass'y Harness BVDC Motor Ass'y Notice : The six screws have numbers stamped into the Drive Ass'y base plate. When refitting the Drive Ass'y tighten the screws the order they are numbered. Only screws numbered 1 to 5 are fitted at this stage. Screw 6 is fitted when the Shield Controller Ass'y is refitted. 5-20 Service Manual
-
 1
1 -
2
-
3
-
4
-
5
-
6
-
7
-
8
-
9
-
10
-
11
-
12
-
13
-
14
-
15
-
16
-
17
-
18
-
19
-
20
-
21
-
22
-
23
-
24
-
25
-
26
-
27
-
28
-
29
-
30
-
31
-
32
-
33
-
34
-
35
-
36
-
37
-
38
-
39
-
40
-
41
-
42
-
43
-
44
-
45
-
46
-
47
-
48
-
49
-
 50
50 -
 51
51 -
 52
52 -
 53
53 -
 54
54 -
 55
55 -
 56
56 -
 57
57 -
 58
58 -
 59
59 -
 60
60 -
61
-
62
-
63
-
64
-
65
-
66
-
67
-
68
-
69
-
70
-
71
-
72
-
73
-
74
-
75
-
76
-
77
-
78
-
79
-
80
-
81
-
82
-
83
-
84
-
85
-
86
-
87
-
88
-
89
-
90
-
91
-
92
-
93
-
94
-
95
-
96
-
97
-
98
-
99
-
100
-
101
-
102
-
103
-
104
-
105
-
106
-
107
-
108
-
109
-
110
-
111
-
112
-
113
-
114
-
115
-
116
-
117
-
118
-
119
-
120
-
121
-
122
-
123
-
124
-
125
-
126
-
127
-
128
-
129
-
130
-
131
-
132
-
133
-
134
-
135
-
136
-
137
-
138
-
139
-
140
-
141
-
142
-
143
-
144
-
145
-
146
-
147
-
148
-
149
-
150
-
151
-
152
 |
 |
Service Manual
Precautions
5-20
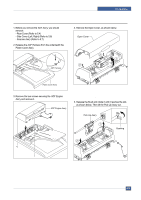
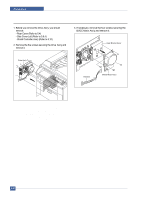
1. Before you remove the Drive Ass'y, you should
remove:
- Rear Cover (Refer to 5.4)
- Side Cover Left (Refer to 5.6.4)
- Shield Controller Ass'y (Refer to 5.10)
2. Remove the five screws securing the Drive Ass'y and
remove it.
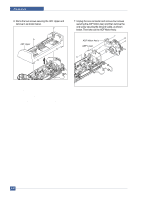
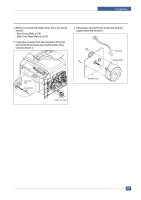
Notice :
The six screws have numbers stamped into the
Drive Ass'y base plate. When refitting the Drive
Ass'y tighten the screws the order they are
numbered. Only screws numbered 1 to 5 are
fitted at this stage. Screw 6 is fitted when the
Shield Controller Ass'y is refitted.
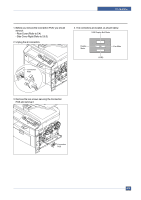
3.
If necessary, remove the four screws securing the
BVDC Motor Ass'y and remove it.
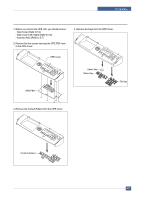
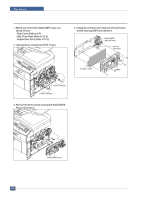
5.11 Drive Ass'y
Drive Ass'y
Gear Bracket Ass’y
BVDC Motor Ass’y
Harness