Dell 2135cn User Guide - Page 247
Updating your PCL Driver
 |
UPC - 884116001980
View all Dell 2135cn manuals
Add to My Manuals
Save this manual to your list of manuals |
Page 247 highlights
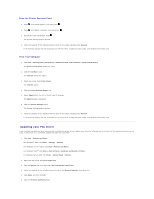
From the Printer Operator Panel 1. Press until >SETUP appears, and then press . 2. Press until >Reports appears, and then press . 3. System Settings is displayed. Press . The System Settings page is printed. 4. Verify the capacity of the installed memory listed in the system settings under General. If the memory capacity has not increased, turn off the printer, unplug the power cable, and reinstall the memory card. From Your Computer 1. Click start® All Programs® Dell Printers® Additional Color Laser Software® Quick Launch Utility. The Quick Launch Utility dialog box opens. 2. Click the Tool Box button. The Tool Box dialog box opens. 3. Select the printer from Printer Name. The Tool Box opens. 4. Click the Printer Settings Report tab. 5. Select Reports from the list at the left side of the page. The Reports page is displayed. 6. Click the System Settings button. The System Settings page is printed. 7. Verify the capacity of the installed memory listed in the system settings under General. If the memory capacity has not increased, turn off the printer, unplug the power cable, and reinstall the memory card. Updating your PCL Driver If you installed the additional print memory after installing the printer driver, update your driver by following the instructions for the operating system you are using. If the printer is on a network, update the driver for each client. 1. Click start® Printers and Faxes. For Windows® 2000: Click Start® Settings® Printers. For Windows Server® 2003: Click Start® Printers and Faxes. For Windows Vista®: Click Start® Control Panel® Hardware and Sound® Printers. For Windows Server 2008: Click Start® Control Panel® Printers. 2. Right-click the printer and select Properties. 3. Click the Options tab, and then select Get Information from Printer. 4. Verify the capacity of the installed memory listed on the Memory Capacity: drop-down list. 5. Click Apply, and then click OK. 6. Close the Printers and Faxes folder.
-
 1
1 -
2
-
3
-
4
-
5
-
6
-
7
-
8
-
9
-
10
-
11
-
12
-
13
-
14
-
15
-
16
-
17
-
18
-
19
-
20
-
21
-
22
-
23
-
24
-
25
-
26
-
27
-
28
-
29
-
30
-
31
-
32
-
33
-
34
-
35
-
36
-
37
-
38
-
39
-
40
-
41
-
42
-
43
-
44
-
45
-
46
-
47
-
48
-
49
-
50
-
51
-
52
-
53
-
54
-
55
-
56
-
57
-
58
-
59
-
60
-
61
-
62
-
63
-
64
-
65
-
66
-
67
-
68
-
69
-
70
-
71
-
72
-
73
-
74
-
75
-
76
-
77
-
78
-
79
-
80
-
81
-
82
-
83
-
84
-
85
-
86
-
87
-
88
-
89
-
90
-
91
-
92
-
93
-
94
-
95
-
96
-
97
-
98
-
99
-
100
-
101
-
102
-
103
-
104
-
105
-
106
-
107
-
108
-
109
-
110
-
111
-
112
-
113
-
114
-
115
-
116
-
117
-
118
-
119
-
120
-
121
-
122
-
123
-
124
-
125
-
126
-
127
-
128
-
129
-
130
-
131
-
132
-
133
-
134
-
135
-
136
-
137
-
138
-
139
-
140
-
141
-
142
-
143
-
144
-
145
-
146
-
147
-
148
-
149
-
150
-
151
-
152
-
153
-
154
-
155
-
156
-
157
-
158
-
159
-
160
-
161
-
162
-
163
-
164
-
165
-
166
-
167
-
168
-
169
-
170
-
171
-
172
-
173
-
174
-
175
-
176
-
177
-
178
-
179
-
180
-
181
-
182
-
183
-
184
-
185
-
186
-
187
-
188
-
189
-
190
-
191
-
192
-
193
-
194
-
195
-
196
-
197
-
198
-
199
-
200
-
201
-
202
-
203
-
204
-
205
-
206
-
207
-
208
-
209
-
210
-
211
-
212
-
213
-
214
-
215
-
216
-
217
-
218
-
219
-
220
-
221
-
222
-
223
-
224
-
225
-
226
-
227
-
228
-
229
-
230
-
231
-
232
-
233
-
234
-
235
-
236
-
237
-
238
-
239
-
240
-
241
-
 242
242 -
 243
243 -
 244
244 -
 245
245 -
 246
246 -
 247
247 -
 248
248 -
 249
249 -
 250
250 -
 251
251 -
 252
252 -
253
-
254
-
255
-
256
-
257
-
258
-
259
-
260
 |
 |
