Dell 2405FPW User Manual - Page 37
Video Problems, Common Symptoms, What You Experience, Possible Solutions - reset
 |
View all Dell 2405FPW manuals
Add to My Manuals
Save this manual to your list of manuals |
Page 37 highlights
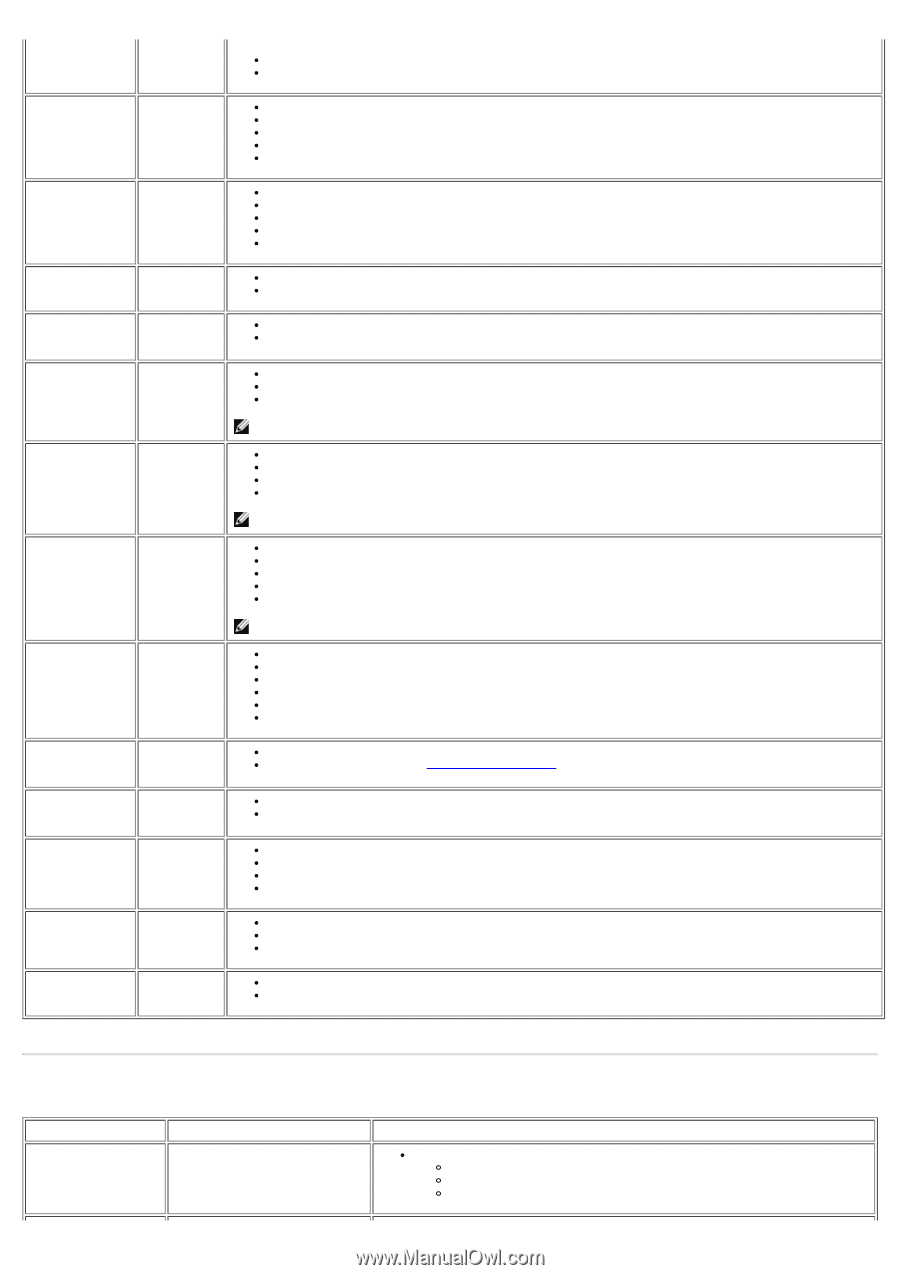
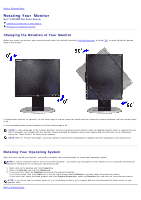
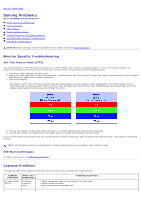
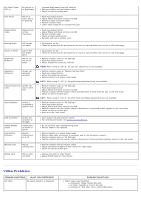
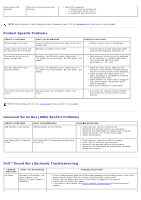
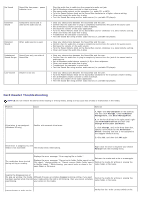
No Video/ Power No picture or LED on no brightness Poor Focus Picture is fuzzy, blurry or ghosting Shaky/Jittery Video Wavy picture or fine movement Missing Pixels LCD screen has spots Stuck-on Pixels Brightness Problems LCD screen has bright spots Picture too dim or too bright Geometric Distortion Screen not centered correctly Horizontal/Vertical Screen has Lines one or more lines Sync Problems Screen is scrambled or appears torn LCD Scratched Safety Related Issues Intermittent Problems Screen has scratches or smudges Visible signs of smoke or sparks Monitor malfunctions on & off Missing Color Picture missing color Wrong Color Picture color not good Increase brightness & contrast controls Perform monitor self-test feature check Check for bent or broken pins Push Auto Adjust button Adjust Phase and Clock controls via OSD Eliminate video extension cables Perform monitor reset Lower video resolution or increase font size Push Auto Adjust button Adjust Phase and Clock controls via OSD Perform monitor reset Check environmental factors Relocate and test in another room Cycle power on-off These are pixels that are permanently off and is a natural defect that occurs in LCD technology Cycle power on-off These are pixels that are permanently on and is a natural defect that occurs in LCD technology Perform monitor reset on "All Settings" Push Auto Adjust button Adjust brightness & contrast controls NOTE: When using '2: DVI-D', the contrast adjustment is not available. Perform monitor reset on "Position Settings Only" Push auto-adjust button Adjust the centering controls Ensure monitor is in proper video mode NOTE: When using '2: DVI-D', the positioning adjustments are not available. Perform monitor reset on "All Settings" Push Auto Adjust button Adjust Phase and Clock controls via OSD Perform monitor self-test feature check and determine if these lines are also in self-test mode Check for bent or broken pins NOTE: When using '2: DVI-D', the Pixel Clock and Phase adjustments are not available. Perform monitor reset on "All Settings" Push Auto Adjust button Adjust Phase and Clock controls via OSD Perform monitor self-test feature check to determine if scrambled screen appears in self-test mode Check for bent or broken pins Boot up in the "safe mode" Turn monitor off and clean the screen For cleaning instruction, see Caring for Your Monitor. Do not perform any troubleshooting steps Monitor needs to be replaced Ensure monitor is in proper video mode Ensure video cable connection to computer and to the flat panel is secure Perform monitor reset on "All Settings" Perform monitor self-test feature check to determine if the intermittent problem occurs in self-test mode Perform monitor self-test feature check Check connection integrity at both end of the video cable Check for bent or broken pins Change the color to "User Preset" Adjust R/G/B value of "User Preset" Video Problems COMMON SYMPTOMS WHAT YOU EXPERIENCE No Video No signal indicator is displayed POSSIBLE SOLUTIONS Check Video Input Selection Composite: Yellow colored RCA jack S-Video: Typically a round 4 pin jack Component: Red, Blue, Green colored RCA jacks
-
 1
1 -
2
-
3
-
4
-
5
-
6
-
7
-
8
-
9
-
10
-
11
-
12
-
13
-
14
-
15
-
16
-
17
-
18
-
19
-
20
-
21
-
22
-
23
-
24
-
25
-
26
-
27
-
28
-
29
-
30
-
31
-
 32
32 -
 33
33 -
 34
34 -
 35
35 -
 36
36 -
 37
37 -
 38
38 -
 39
39 -
 40
40 -
 41
41 -
 42
42 -
43
-
44
-
45
-
46
-
47
-
48
-
49
-
50
-
51
-
52
-
53
-
54
-
55
-
56
-
57
-
58
-
59
-
60
-
61
-
62
-
63
-
64
-
65
-
66
-
67
-
68
-
69
-
70
-
71
-
72
-
73
-
74
-
75
-
76
-
77
 |
 |