Dell 2405FPW User Manual - Page 39
Card Reader Troubleshooting, My Computer, Manage, Management, Desk Management, Removable Device
 |
View all Dell 2405FPW manuals
Add to My Manuals
Save this manual to your list of manuals |
Page 39 highlights
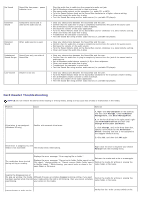
No Sound Sound Bar has power - power indicator is on. Distorted Sound Computer's sound card is used as the audio source. Distorted Sound Other audio source is used. Unbalanced Sound from only one side of Sound Output Sound Bar Low Volume Volume is too low. Plug the audio line-in cable into the computer's audio out jack. Set all Windows volume controls to their maximum. Play some audio content on the computer (i.e. audio CD, or MP3). Turn the Power/Volume knob on the Sound Bar clockwise to a higher volume setting. Clean and reseat the audio line-in plug. Test the Sound Bar using another audio source (i.e. portable CD player). Clear any obstructions between the Sound Bar and the user. Confirm that the audio line-in plug is completely inserted into the jack of the sound card. Set all Windows volume controls to their midpoints. Decrease the volume of the audio application. Turn the Power/Volume knob on the Sound Bar counter-clockwise to a lower volume setting. Clean and reseat the audio line-in plug. Troubleshoot the computer's sound card. Test the Sound Bar using another audio source (i.e. portable CD player). Clear any obstructions between the Sound Bar and the user. Confirm that the audio line-in plug is completely inserted into the jack of the audio source. Decrease the volume of the audio source. Turn the Power/Volume knob on the Sound Bar counter-clockwise to a lower volume setting. Clean and reseat the audio line-in plug. Clear any obstructions between the Sound Bar and the user. Confirm that the audio line-in plug is completely inserted into the jack of the sound card or audio source. Set all Windows audio balance controls (L-R) to their midpoints. Clean and reseat the audio line-in plug. Troubleshoot the computer's sound card. Test the Sound Bar using another audio source (i.e. portable CD player). Clear any obstructions between the Sound Bar and the user. Turn the Power/Volume knob on the Sound Bar clockwise to the maximum volume setting. Set all Windows volume controls to their maximum. Increase the volume of the audio application. Test the Sound Bar using another audio source (i.e. portable CD player). Card Reader Troubleshooting NOTICE: Do not remove the device while reading or writing media. Doing so may cause loss of data or malfunction in the media. Problem Cause Drive letter is not assigned. (Windows XP only) Conflict with network drive letter. Solution A. Right-click My Computer on the desktop, and then click Manage. Under Computer Management, click Desk Management. B. In the list of drives in the right panel, rightclick Removable Device and then click Change Drive Letter and Paths. C. Click Change, and in the drop-down box, specify a drive letter for the Removable Device, choosing one that is not assigned to the mapped network drives. D. Click OK, and then click OK again Drive letter is assigned, but the media is not accessible The media needs reformatting. Right-click the drive in Explorer and choose Format from the resulting menu. The media has been ejected during writing or erasing. Displays the error message, "Error copying file or folder." Reinsert the media and write or erase again. Displays the error message, "Cannot write folder (folder name) or file (file name)," during writing, or, "Cannot remove folder (folder name) Format the media for writing or erasing the or file(file name),". While erasing, you cannot write or erase in the same folder or file name. same folder or file name. Despite the disappearance of the pop-up window, the media Although the pop-up window disappears during writing, if you eject has been ejected while the LED your media while the LED is still blinking, then you cannot complete was blinking. your action on the media. Format the media for writing or erasing the same folder or file name. Cannot format or write on the Verify that the write- protect switch of the
-
 1
1 -
2
-
3
-
4
-
5
-
6
-
7
-
8
-
9
-
10
-
11
-
12
-
13
-
14
-
15
-
16
-
17
-
18
-
19
-
20
-
21
-
22
-
23
-
24
-
25
-
26
-
27
-
28
-
29
-
30
-
31
-
32
-
33
-
 34
34 -
 35
35 -
 36
36 -
 37
37 -
 38
38 -
 39
39 -
 40
40 -
 41
41 -
 42
42 -
 43
43 -
 44
44 -
45
-
46
-
47
-
48
-
49
-
50
-
51
-
52
-
53
-
54
-
55
-
56
-
57
-
58
-
59
-
60
-
61
-
62
-
63
-
64
-
65
-
66
-
67
-
68
-
69
-
70
-
71
-
72
-
73
-
74
-
75
-
76
-
77
 |
 |
