Dell Axim X50 Owner's Manual - Page 95
Creating an Ethernet Connection - drivers
 |
View all Dell Axim X50 manuals
Add to My Manuals
Save this manual to your list of manuals |
Page 95 highlights
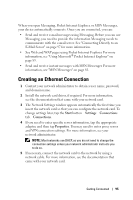
When you open Messaging, Pocket Internet Explorer, or MSN Messenger, your device automatically connects. Once you are connected, you can: • Send and receive e-mail messages using Messaging. Before you can use Messaging, you need to provide the information Messaging needs to communicate with the e-mail server. See "Connecting Directly to an E-Mail Server" on page 97 for more information. • See Web and WAP pages using Pocket Internet Explorer. For more information, see "Using Microsoft® Pocket Internet Explorer" on page 85. • Send and receive instant messages with MSN Messenger. For more information, see "MSN Messenger" on page 81. Creating an Ethernet Connection 1 Contact your network administrator to obtain a user name, password, and domain name. 2 Install the network card driver, if required. For more information, see the documentation that came with your network card. 3 The Network Settings window appears automatically the first time you insert the network card so that you can configure the network card. To change settings later, tap the Start button →Settings →Connections tab →Connections. 4 If you need to enter specific server information, tap the appropriate adapter, and then tap Properties. You may need to enter proxy server and VPN connection settings. For more information, see your network administrator. NOTE: Most networks use DHCP, so you do not need to change the connection settings unless your network administrator instructs you to do so. 5 If necessary, connect the network card to the network by using a network cable. For more information, see the documentation that came with your network card. Getting Connected 95
-
 1
1 -
2
-
3
-
4
-
5
-
6
-
7
-
8
-
9
-
10
-
11
-
12
-
13
-
14
-
15
-
16
-
17
-
18
-
19
-
20
-
21
-
22
-
23
-
24
-
25
-
26
-
27
-
28
-
29
-
30
-
31
-
32
-
33
-
34
-
35
-
36
-
37
-
38
-
39
-
40
-
41
-
42
-
43
-
44
-
45
-
46
-
47
-
48
-
49
-
50
-
51
-
52
-
53
-
54
-
55
-
56
-
57
-
58
-
59
-
60
-
61
-
62
-
63
-
64
-
65
-
66
-
67
-
68
-
69
-
70
-
71
-
72
-
73
-
74
-
75
-
76
-
77
-
78
-
79
-
80
-
81
-
82
-
83
-
84
-
85
-
86
-
87
-
88
-
89
-
 90
90 -
 91
91 -
 92
92 -
 93
93 -
 94
94 -
 95
95 -
 96
96 -
 97
97 -
 98
98 -
 99
99 -
 100
100 -
101
-
102
-
103
-
104
-
105
-
106
-
107
-
108
-
109
-
110
-
111
-
112
-
113
-
114
-
115
-
116
-
117
-
118
-
119
-
120
-
121
-
122
-
123
-
124
-
125
-
126
-
127
-
128
-
129
-
130
-
131
-
132
-
133
-
134
-
135
-
136
-
137
-
138
-
139
-
140
-
141
-
142
-
143
-
144
-
145
-
146
-
147
-
148
-
149
-
150
-
151
-
152
-
153
-
154
-
155
-
156
-
157
-
158
-
159
-
160
-
161
-
162
-
163
-
164
-
165
-
166
-
167
-
168
-
169
-
170
-
171
-
172
-
173
-
174
 |
 |