Dell Force10 E300 Installing and Maintaining the E300 System - Page 17
Installing the Chassis, Safety Considerations, Installing the Chassis into an Equipment Rack
 |
View all Dell Force10 E300 manuals
Add to My Manuals
Save this manual to your list of manuals |
Page 17 highlights
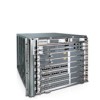
4 Installing the Chassis Safety Considerations WARNING: The E300 System is packaged in two separate containers. The chassis container measures 25.5" x 31" x 28" and weighs approximately 135 pounds. The board container measures 24" x 34.5" x 26.5" and weighs approximately 90 pounds. Use an equipment lift or pallet jack to install or lift the chassis. Lifting the chassis by its shelves or fan try opening will cause chassis damage. NOTE: If you are installing the chassis without using a equipment lift or pallet jack, remove all AC power supplies, the fan tray, line cards, RPMs and SFMs from the chassis prior to lifting it. Installing the Chassis into an Equipment Rack Ensure there is a minimum of six inches of clearance between the side intake and exhaust vents and any walls. If you are installing two E300s next to each other or an E300 next to another side-by-side airflow chassis, position the chassis at least 12 inches apart. Prior to installing the E300 in an equipment rack, you must install the equipment rack bar. This bar enables you to easily position the chassis into the rack and stabilizes the chassis. Figure 4-1. Installing the Equipment Rack Bar FN To install the chassis into a 19-inch equipment rack, using the front mounting brackets, follow these steps: Step Task 1 At the desired location in the rack, orient the equipment rack bar with the arrows pointing up. The smooth side of the bar should face outward. 2 Using the mounting screws provided with your rack, attach the bar to the rack (see Figure 4-1). 3 Using a hand cart, pallet jack, or forklift, align the rack-mount holes with the equipment rack holes, situating the chassis on top of the equipment rack bar. Installing the Chassis | 17
-
 1
1 -
2
-
3
-
4
-
5
-
6
-
7
-
8
-
9
-
10
-
11
-
 12
12 -
 13
13 -
 14
14 -
 15
15 -
 16
16 -
 17
17 -
 18
18 -
 19
19 -
 20
20 -
 21
21 -
 22
22 -
23
-
24
-
25
-
26
-
27
-
28
-
29
-
30
-
31
-
32
-
33
-
34
-
35
-
36
-
37
-
38
-
39
-
40
-
41
-
42
-
43
-
44
-
45
-
46
-
47
-
48
-
49
-
50
-
51
-
52
-
53
-
54
-
55
-
56
-
57
-
58
-
59
-
60
-
61
-
62
-
63
-
64
-
65
-
66
-
67
-
68
-
69
-
70
-
71
-
72
-
73
-
74
 |
 |
