Dell Force10 E300 Installing and Maintaining the E300 System - Page 18
Installing the Chassis into an Equipment Cabinet, Rack Mounting the Chassis
 |
View all Dell Force10 E300 manuals
Add to My Manuals
Save this manual to your list of manuals |
Page 18 highlights
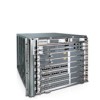
www.dell.com | support.dell.com Step Task 4 Using the screws provided with your equipment rack, insert screws into both the chassis rack mounting bracket and the equipment rack and tighten (see Figure 4-2). Figure 4-2. Rack Mounting the Chassis FN00046d For 19-inch mid mount and 23-inch mid mount brackets, refer to the documentation included with those brackets. Installing the Chassis into an Equipment Cabinet Prior to installing the E300 into an equipment cabinet, make sure that there is adequate space for proper ventilation, access to cables, and access for maintenance. With the chassis installed in a cabinet, there must be a minimum of six inches (16 cm) between the chassis sides and the cabinet walls. To install a chassis into an equipment cabinet: Step Task 1 At the desired location in the rack, orient the equipment rack bar with the arrows pointing up. The smooth side of the bar should face outward. 2 Using the mounting screws provided with your rack, attach the bar to the rack (see Figure 4-1). 3 Using a hand cart, pallet jack, or forklift, align the rack-mount holes with the equipment rack hole, situating the chassis on top of the equipment rack bar. 4 Using the screws provided with the cabinet, insert and tighten the screws into the chassis rack mounting and the cabinet. 18 | Installing the Chassis
-
 1
1 -
2
-
3
-
4
-
5
-
6
-
7
-
8
-
9
-
10
-
11
-
12
-
 13
13 -
 14
14 -
 15
15 -
 16
16 -
 17
17 -
 18
18 -
 19
19 -
 20
20 -
 21
21 -
 22
22 -
 23
23 -
24
-
25
-
26
-
27
-
28
-
29
-
30
-
31
-
32
-
33
-
34
-
35
-
36
-
37
-
38
-
39
-
40
-
41
-
42
-
43
-
44
-
45
-
46
-
47
-
48
-
49
-
50
-
51
-
52
-
53
-
54
-
55
-
56
-
57
-
58
-
59
-
60
-
61
-
62
-
63
-
64
-
65
-
66
-
67
-
68
-
69
-
70
-
71
-
72
-
73
-
74
 |
 |
