Dell OptiPlex Gs Service Manual (.pdf) - Page 70
SIMMs, SIMM Removal, SIMM Installation
 |
View all Dell OptiPlex Gs manuals
Add to My Manuals
Save this manual to your list of manuals |
Page 70 highlights
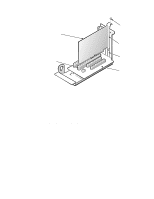
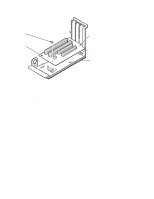
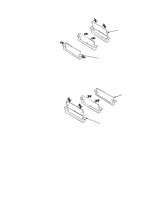
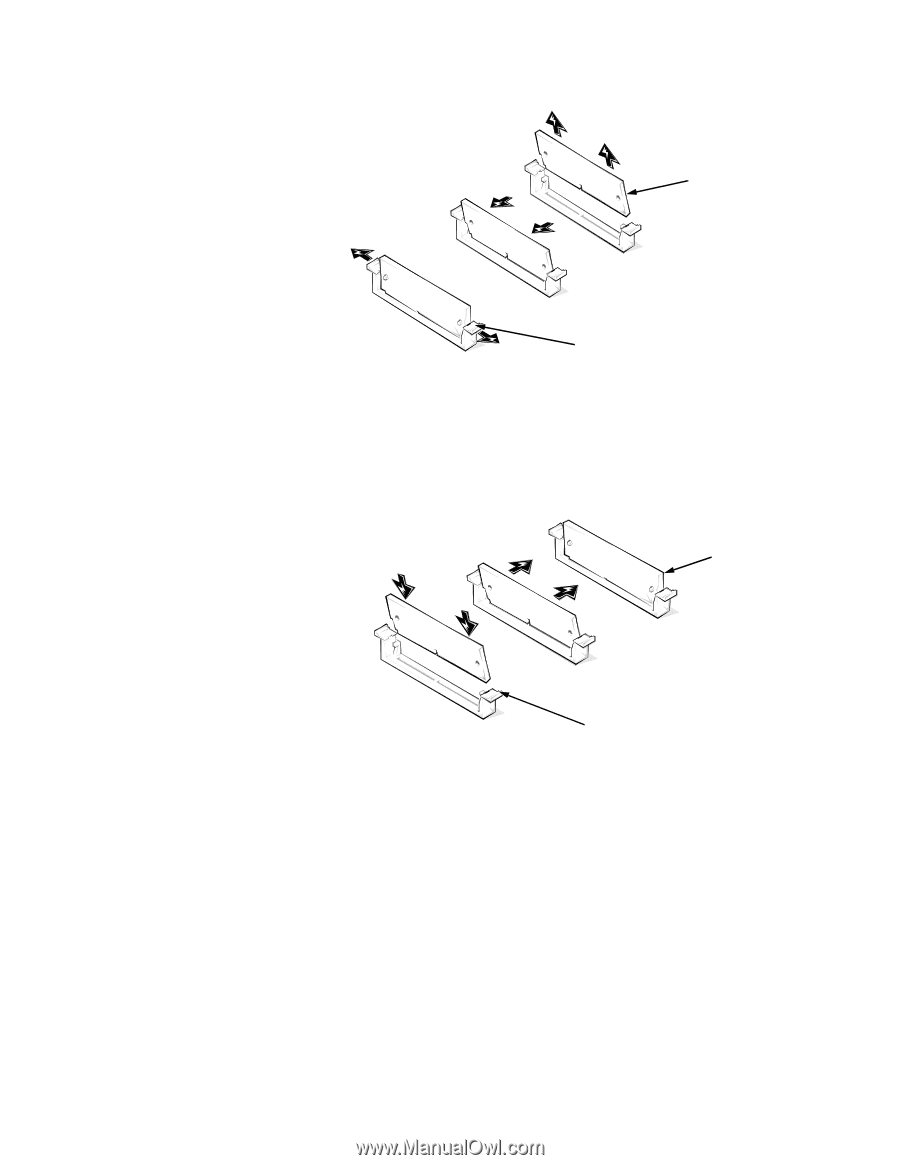
SIMMs SIMM 3. front of computer 1. Figure 4-14. SIMM Removal 2. tabs (2) To remove a SIMM, push outward on the SIMM socket's tabs until the SIMM is released from its socket (it should pop forward slightly). Then lift the SIMM away from the socket. SIMM 3. 2. front of computer 1. Figure 4-15. SIMM Installation tabs (2) To replace a SIMM, place the SIMM fully into the socket at an angle. Pivot the SIMM upward until the tabs lock the SIMM into the socket. 4-16 Dell OptiPlex Gs and Gs+ Systems Service Manual
-
 1
1 -
2
-
3
-
4
-
5
-
6
-
7
-
8
-
9
-
10
-
11
-
12
-
13
-
14
-
15
-
16
-
17
-
18
-
19
-
20
-
21
-
22
-
23
-
24
-
25
-
26
-
27
-
28
-
29
-
30
-
31
-
32
-
33
-
34
-
35
-
36
-
37
-
38
-
39
-
40
-
41
-
42
-
43
-
44
-
45
-
46
-
47
-
48
-
49
-
50
-
51
-
52
-
53
-
54
-
55
-
56
-
57
-
58
-
59
-
60
-
61
-
62
-
63
-
64
-
 65
65 -
 66
66 -
 67
67 -
 68
68 -
 69
69 -
 70
70 -
 71
71 -
 72
72 -
 73
73 -
 74
74 -
 75
75 -
76
-
77
-
78
-
79
-
80
-
81
-
82
-
83
-
84
-
85
-
86
-
87
-
88
-
89
-
90
-
91
-
92
-
93
-
94
-
95
-
96
-
97
-
98
-
99
-
100
-
101
-
102
-
103
-
104
-
105
-
106
-
107
-
108
-
109
-
110
-
111
 |
 |
4-16
Dell OptiPlex Gs and Gs+ Systems Service Manual
SIMMs
Figure 4-14.
SIMM Removal
To remove a SIMM, push outward on the SIMM socket’s tabs until the SIMM is
released from its socket (it should pop forward slightly). Then lift the SIMM
away from the socket.
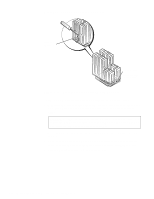
Figure 4-15.
SIMM Installation
To replace a SIMM, place the SIMM fully into the socket at an angle. Pivot the
SIMM upward until the tabs lock the SIMM into the socket.
1.
tabs (2)
2.
SIMM
3.
front of computer
tabs (2)
1.
2.
SIMM
3.
front of computer