Dell OptiPlex Gs Service Manual (.pdf) - Page 83
Control Panel, To remove the control panel, follow these steps
 |
View all Dell OptiPlex Gs manuals
Add to My Manuals
Save this manual to your list of manuals |
Page 83 highlights
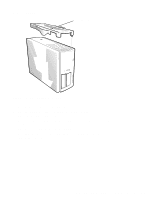
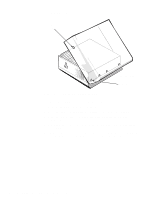
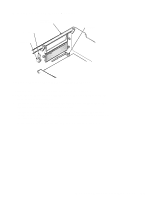
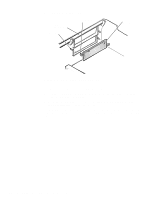
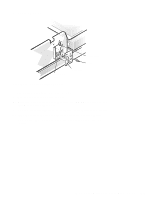
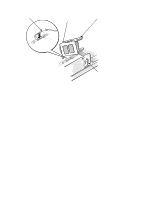
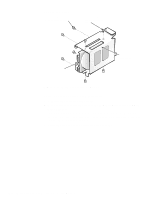
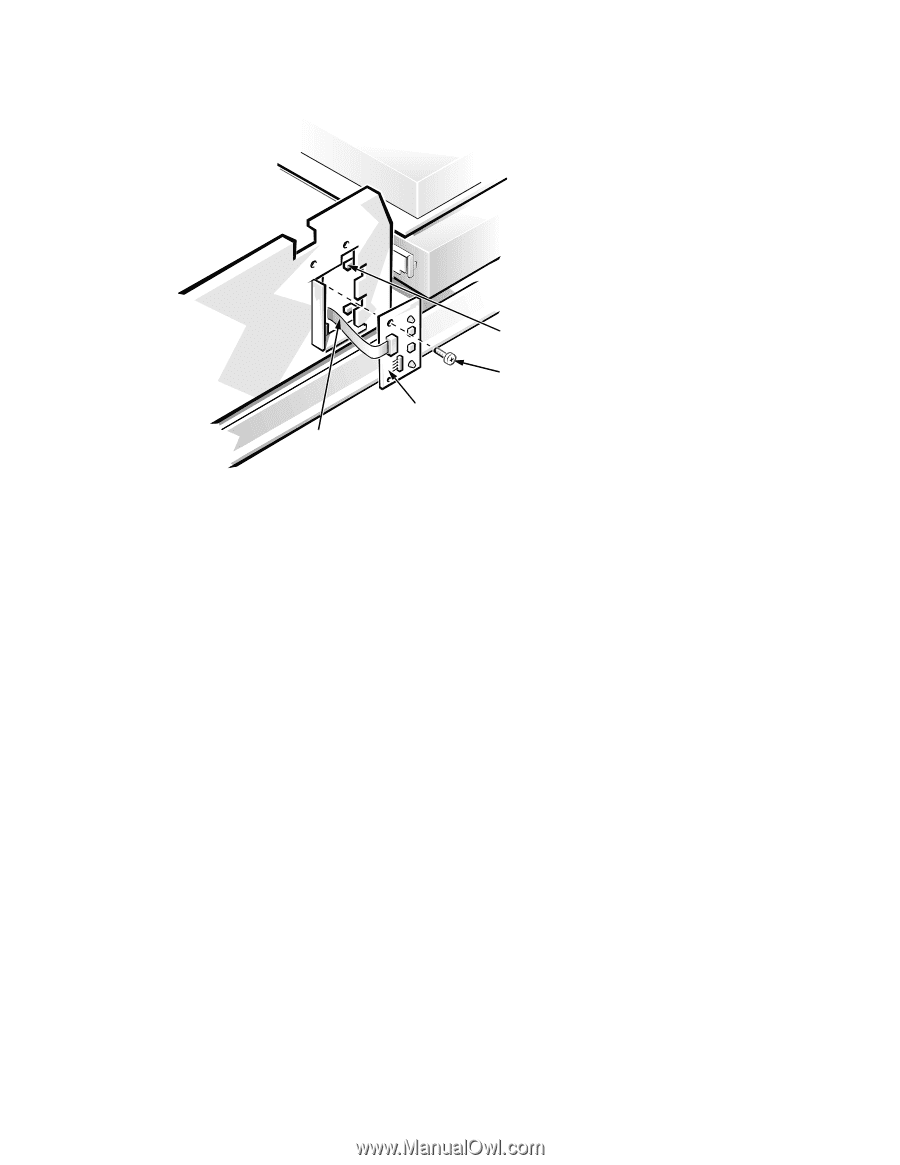
Control Panel control panel cable Figure 5-5. Control Panel Removal chassis hooks (2) screw control panel To remove the control panel, follow these steps: 1. Remove the hard-disk drive bracket. 2. Disconnect the control panel cable from the PANEL connector on the system board (see Figure 5-13). 3. Unscrew the mounting screw securing the control panel to the chassis. 4. Slide the control panel out of the hooks securing it to the chassis. Note the routing of the control panel cable as you remove it from the chassis. Removing and Replacing Parts in the Midsize System 5-7
-
 1
1 -
2
-
3
-
4
-
5
-
6
-
7
-
8
-
9
-
10
-
11
-
12
-
13
-
14
-
15
-
16
-
17
-
18
-
19
-
20
-
21
-
22
-
23
-
24
-
25
-
26
-
27
-
28
-
29
-
30
-
31
-
32
-
33
-
34
-
35
-
36
-
37
-
38
-
39
-
40
-
41
-
42
-
43
-
44
-
45
-
46
-
47
-
48
-
49
-
50
-
51
-
52
-
53
-
54
-
55
-
56
-
57
-
58
-
59
-
60
-
61
-
62
-
63
-
64
-
65
-
66
-
67
-
68
-
69
-
70
-
71
-
72
-
73
-
74
-
75
-
76
-
77
-
 78
78 -
 79
79 -
 80
80 -
 81
81 -
 82
82 -
 83
83 -
 84
84 -
 85
85 -
 86
86 -
 87
87 -
 88
88 -
89
-
90
-
91
-
92
-
93
-
94
-
95
-
96
-
97
-
98
-
99
-
100
-
101
-
102
-
103
-
104
-
105
-
106
-
107
-
108
-
109
-
110
-
111
 |
 |
Removing and Replacing Parts in the Midsize System
5-7
C
ontrol Panel
Figure 5-5.
Control Panel Removal
To remove the control panel, follow these steps:
1.
Remove the hard-disk drive bracket.
2.
Disconnect the control panel cable from the PANEL connector on the
system board (see Figure 5-13).
3.
Unscrew the mounting screw securing the control panel to the chassis.
4.
Slide the control panel out of the hooks securing it to the chassis.
Note the routing of the control panel cable as you remove it from the
chassis.
control panel
control panel
cable
screw
chassis hooks (2)