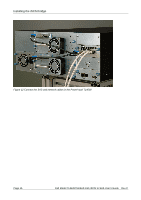
Dell PowerVault TL4000 Dell Model TL24iSCSIxSAS 1Gb iSCSI to SAS - User's G - Page 23
Setting the IP-address, Setting the Subnet-Mask, Setting the Broadcast-Address, Committing
 |
View all Dell PowerVault TL4000 manuals
Add to My Manuals
Save this manual to your list of manuals |
Page 23 highlights
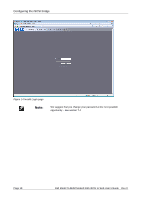
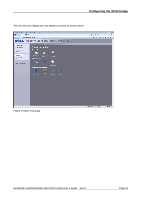
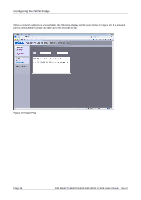
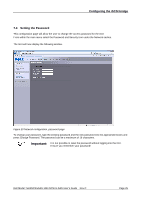
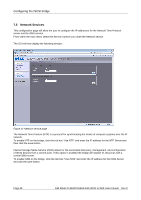
Configuring the iSCSI bridge 7.2.4 Setting the IP-address There are two possibilities when configuring the IP-address of the iSCSI bridge: • DHCP - this means the bridge will seek out the DHCP-sever on your network and obtain an IPaddress from the server each time it powers up. • Static IP - the IP-address set in this page will be the IP-address the unit will use each time it powers up. Depending on your configuration, either click the DHCP-button or set your Static IP-address. Note: If you select the DHCP-mode, ensure your DHCP-server is set to automatically update the DNS-server. 7.2.5 Setting the Subnet-Mask If the bridge is configured to use DHCP the net mask will be issued from the DHCP-server. If you are using a static IP-address enter the IP-mask in this box. 7.2.6 Setting the Broadcast-Address Enter in this box your Broadcast-address for your network. 7.2.7 Committing the changes Once you have configured both of the Network-interfaces, click the save button to save these parameters. All changes will only take effect after a reboot. Click the reboot option in the left hand pane to reboot the bridge. 7.2.8 Reconnect to the bridge If you made changes to your computers network settings, for the initial setup, return them to their previous setting and reconnect to the bridge using the IP-address or hostname, depending on which addressing mode you selected. Note: When reconnecting to the bridge the user should flush the arp table in their PC. This can be achieved by typing arp -d from the cmd line window. Dell Model TL24iSCSIxSAS 1Gb iSCSI to SAS User's Guide Rev.C Page 21
-
 1
1 -
2
-
3
-
4
-
5
-
6
-
7
-
8
-
9
-
10
-
11
-
12
-
13
-
14
-
15
-
16
-
17
-
 18
18 -
 19
19 -
 20
20 -
 21
21 -
 22
22 -
 23
23 -
 24
24 -
 25
25 -
 26
26 -
 27
27 -
 28
28 -
29
-
30
-
31
-
32
-
33
-
34
-
35
-
36
-
37
-
38
-
39
-
40
-
41
-
42
-
43
-
44
-
45
-
46
-
47
-
48
-
49
-
50
-
51
-
52
-
53
-
54
-
55
-
56
-
57
-
58
-
59
-
60
-
61
-
62
-
63
-
64
-
65
-
66
 |
 |
