Epson 7880 User's Guide - Page 193
Loading Roll Paper Onto the Take-Up Reel
 |
UPC - 010343866874
View all Epson 7880 manuals
Add to My Manuals
Save this manual to your list of manuals |
Page 193 highlights
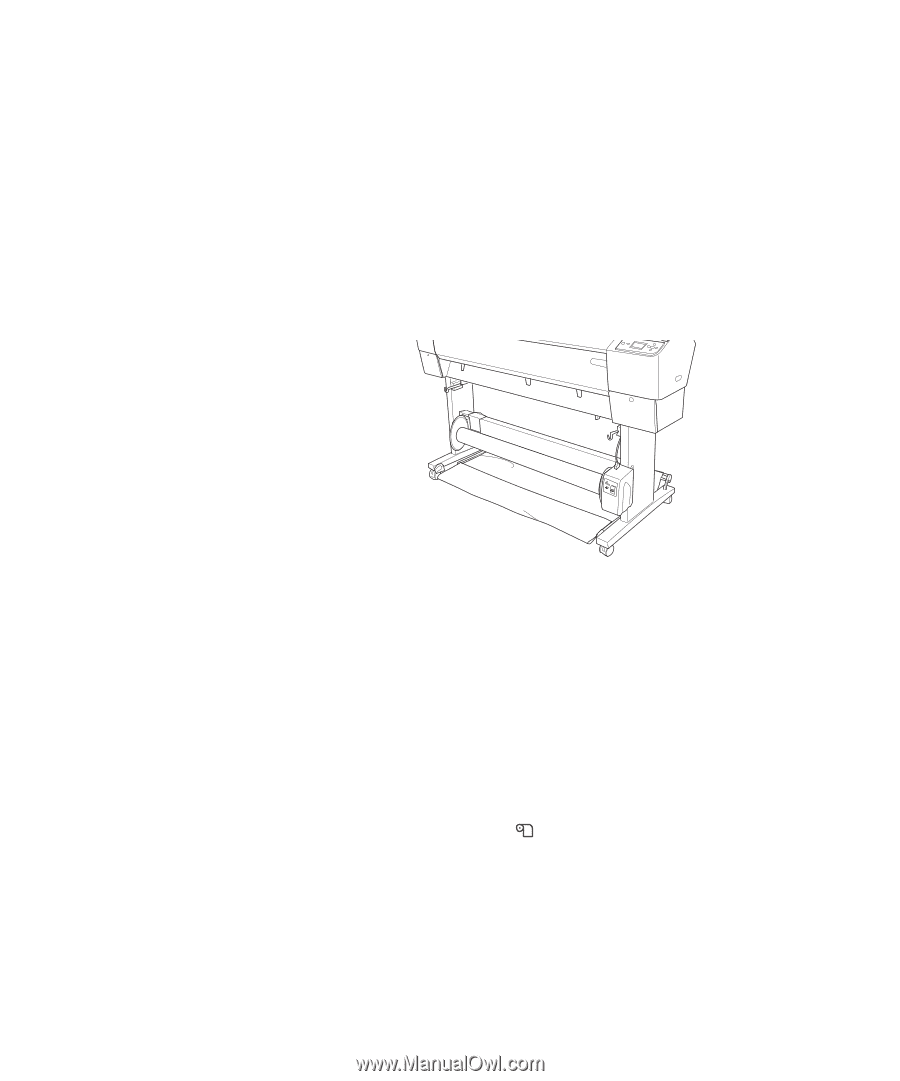
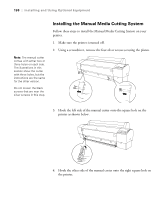
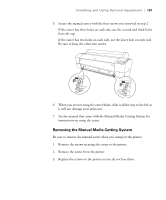
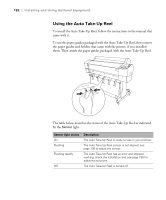
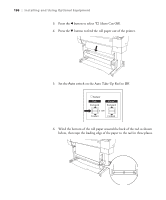
Installing and Using Optional Equipment | 193 Warning: Make sure the Auto Take-Up Reel is installed properly and is turned off before loading paper. If it is installed incorrectly or operates unexpectedly, bodily injury may occur. Loading Roll Paper Onto the Take-Up Reel Before you load roll paper onto the take-up reel core, check the following: • Turn off the Auto Take-Up Reel to avoid injury. • Make sure that the leading edge of the roll paper is straight. • Remove the center shaft from the upper basket hooks and the lower shafts from the holes on the bottom of the base, then place the paper basket under the printer. Taking-Up Paper Forward When you want paper wound onto the take-up reel with the print on the outside, set the take-up reel to wind paper forward, as described below. 1. Attach the three paper guides that came with the Auto Take-Up Reel, making sure to space them evenly. 2. Make sure that the roll paper is loaded in the printer properly. For instructions, see page 55. 3. Press the l button to select (Auto Cut Off). 193
-
 1
1 -
2
-
3
-
4
-
5
-
6
-
7
-
8
-
9
-
10
-
11
-
12
-
13
-
14
-
15
-
16
-
17
-
18
-
19
-
20
-
21
-
22
-
23
-
24
-
25
-
26
-
27
-
28
-
29
-
30
-
31
-
32
-
33
-
34
-
35
-
36
-
37
-
38
-
39
-
40
-
41
-
42
-
43
-
44
-
45
-
46
-
47
-
48
-
49
-
50
-
51
-
52
-
53
-
54
-
55
-
56
-
57
-
58
-
59
-
60
-
61
-
62
-
63
-
64
-
65
-
66
-
67
-
68
-
69
-
70
-
71
-
72
-
73
-
74
-
75
-
76
-
77
-
78
-
79
-
80
-
81
-
82
-
83
-
84
-
85
-
86
-
87
-
88
-
89
-
90
-
91
-
92
-
93
-
94
-
95
-
96
-
97
-
98
-
99
-
100
-
101
-
102
-
103
-
104
-
105
-
106
-
107
-
108
-
109
-
110
-
111
-
112
-
113
-
114
-
115
-
116
-
117
-
118
-
119
-
120
-
121
-
122
-
123
-
124
-
125
-
126
-
127
-
128
-
129
-
130
-
131
-
132
-
133
-
134
-
135
-
136
-
137
-
138
-
139
-
140
-
141
-
142
-
143
-
144
-
145
-
146
-
147
-
148
-
149
-
150
-
151
-
152
-
153
-
154
-
155
-
156
-
157
-
158
-
159
-
160
-
161
-
162
-
163
-
164
-
165
-
166
-
167
-
168
-
169
-
170
-
171
-
172
-
173
-
174
-
175
-
176
-
177
-
178
-
179
-
180
-
181
-
182
-
183
-
184
-
185
-
186
-
187
-
 188
188 -
 189
189 -
 190
190 -
 191
191 -
 192
192 -
 193
193 -
 194
194 -
 195
195 -
 196
196 -
 197
197 -
 198
198 -
199
-
200
-
201
-
202
-
203
-
204
-
205
-
206
-
207
-
208
-
209
-
210
-
211
-
212
-
213
-
214
-
215
-
216
-
217
-
218
 |
 |