Epson 7880 User's Guide - Page 62
Printing Trim Lines, roll Auto Cut
 |
UPC - 010343866874
View all Epson 7880 manuals
Add to My Manuals
Save this manual to your list of manuals |
Page 62 highlights
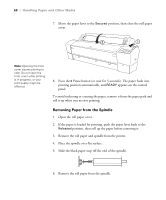
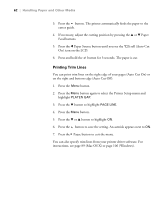
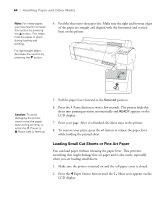
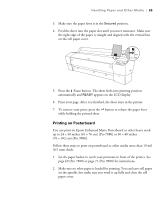
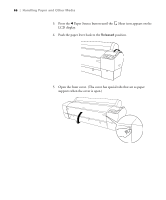
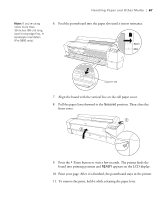
62 | Handling Paper and Other Media 3. Press the button. The printer automatically feeds the paper to the cutter guide. 4. If necessary, adjust the cutting position by pressing the u or d Paper Feed buttons. 5. Press the l Paper Source button until you see the On) icon on the LCD. roll (Auto Cut 6. Press and hold the button for 3 seconds. The paper is cut. Printing Trim Lines You can print trim lines on the right edge of your pages (Auto Cut On) or on the right and bottom edge (Auto Cut Off). 1. Press the Menu button. 2. Press the Menu button again to select the Printer Setup menu and highlight PLATEN GAP. 3. Press the d button to highlight PAGE LINE. 4. Press the Menu button. 5. Press the d or u button to highlight ON. 6. Press the button to save the setting. An asterisk appears next to ON. 7. Press the Pause button to exit the menu. You can also specify trim lines from your printer driver software. For instructions, see page 89 (Mac OS X) or page 106 (Windows). 62
-
 1
1 -
2
-
3
-
4
-
5
-
6
-
7
-
8
-
9
-
10
-
11
-
12
-
13
-
14
-
15
-
16
-
17
-
18
-
19
-
20
-
21
-
22
-
23
-
24
-
25
-
26
-
27
-
28
-
29
-
30
-
31
-
32
-
33
-
34
-
35
-
36
-
37
-
38
-
39
-
40
-
41
-
42
-
43
-
44
-
45
-
46
-
47
-
48
-
49
-
50
-
51
-
52
-
53
-
54
-
55
-
56
-
 57
57 -
 58
58 -
 59
59 -
 60
60 -
 61
61 -
 62
62 -
 63
63 -
 64
64 -
 65
65 -
 66
66 -
 67
67 -
68
-
69
-
70
-
71
-
72
-
73
-
74
-
75
-
76
-
77
-
78
-
79
-
80
-
81
-
82
-
83
-
84
-
85
-
86
-
87
-
88
-
89
-
90
-
91
-
92
-
93
-
94
-
95
-
96
-
97
-
98
-
99
-
100
-
101
-
102
-
103
-
104
-
105
-
106
-
107
-
108
-
109
-
110
-
111
-
112
-
113
-
114
-
115
-
116
-
117
-
118
-
119
-
120
-
121
-
122
-
123
-
124
-
125
-
126
-
127
-
128
-
129
-
130
-
131
-
132
-
133
-
134
-
135
-
136
-
137
-
138
-
139
-
140
-
141
-
142
-
143
-
144
-
145
-
146
-
147
-
148
-
149
-
150
-
151
-
152
-
153
-
154
-
155
-
156
-
157
-
158
-
159
-
160
-
161
-
162
-
163
-
164
-
165
-
166
-
167
-
168
-
169
-
170
-
171
-
172
-
173
-
174
-
175
-
176
-
177
-
178
-
179
-
180
-
181
-
182
-
183
-
184
-
185
-
186
-
187
-
188
-
189
-
190
-
191
-
192
-
193
-
194
-
195
-
196
-
197
-
198
-
199
-
200
-
201
-
202
-
203
-
204
-
205
-
206
-
207
-
208
-
209
-
210
-
211
-
212
-
213
-
214
-
215
-
216
-
217
-
218
 |
 |