Epson 7880 User's Guide - Page 31
Unpacking the Printer
 |
UPC - 010343866874
View all Epson 7880 manuals
Add to My Manuals
Save this manual to your list of manuals |
Page 31 highlights
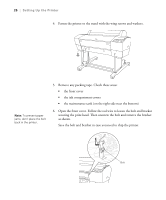
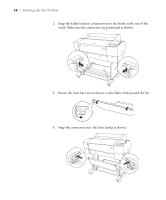
Setting Up the Printer | 31 4. Insert the support bar into one of the base sections as shown. Then attach it with two bolts using the included wrench. Leave the bolts a little loose, so that you can adjust the position when you insert the bolts at the other end. 5. Attach the base section to the other end. 6. Tighten all four bolts securely. Unpacking the Printer 1. Open the box and remove the roll paper, spindle, polystyrene foam, and cardboard cushions. 31
-
 1
1 -
2
-
3
-
4
-
5
-
6
-
7
-
8
-
9
-
10
-
11
-
12
-
13
-
14
-
15
-
16
-
17
-
18
-
19
-
20
-
21
-
22
-
23
-
24
-
25
-
 26
26 -
 27
27 -
 28
28 -
 29
29 -
 30
30 -
 31
31 -
 32
32 -
 33
33 -
 34
34 -
 35
35 -
 36
36 -
37
-
38
-
39
-
40
-
41
-
42
-
43
-
44
-
45
-
46
-
47
-
48
-
49
-
50
-
51
-
52
-
53
-
54
-
55
-
56
-
57
-
58
-
59
-
60
-
61
-
62
-
63
-
64
-
65
-
66
-
67
-
68
-
69
-
70
-
71
-
72
-
73
-
74
-
75
-
76
-
77
-
78
-
79
-
80
-
81
-
82
-
83
-
84
-
85
-
86
-
87
-
88
-
89
-
90
-
91
-
92
-
93
-
94
-
95
-
96
-
97
-
98
-
99
-
100
-
101
-
102
-
103
-
104
-
105
-
106
-
107
-
108
-
109
-
110
-
111
-
112
-
113
-
114
-
115
-
116
-
117
-
118
-
119
-
120
-
121
-
122
-
123
-
124
-
125
-
126
-
127
-
128
-
129
-
130
-
131
-
132
-
133
-
134
-
135
-
136
-
137
-
138
-
139
-
140
-
141
-
142
-
143
-
144
-
145
-
146
-
147
-
148
-
149
-
150
-
151
-
152
-
153
-
154
-
155
-
156
-
157
-
158
-
159
-
160
-
161
-
162
-
163
-
164
-
165
-
166
-
167
-
168
-
169
-
170
-
171
-
172
-
173
-
174
-
175
-
176
-
177
-
178
-
179
-
180
-
181
-
182
-
183
-
184
-
185
-
186
-
187
-
188
-
189
-
190
-
191
-
192
-
193
-
194
-
195
-
196
-
197
-
198
-
199
-
200
-
201
-
202
-
203
-
204
-
205
-
206
-
207
-
208
-
209
-
210
-
211
-
212
-
213
-
214
-
215
-
216
-
217
-
218
 |
 |
31
Setting Up the Printer
|
31
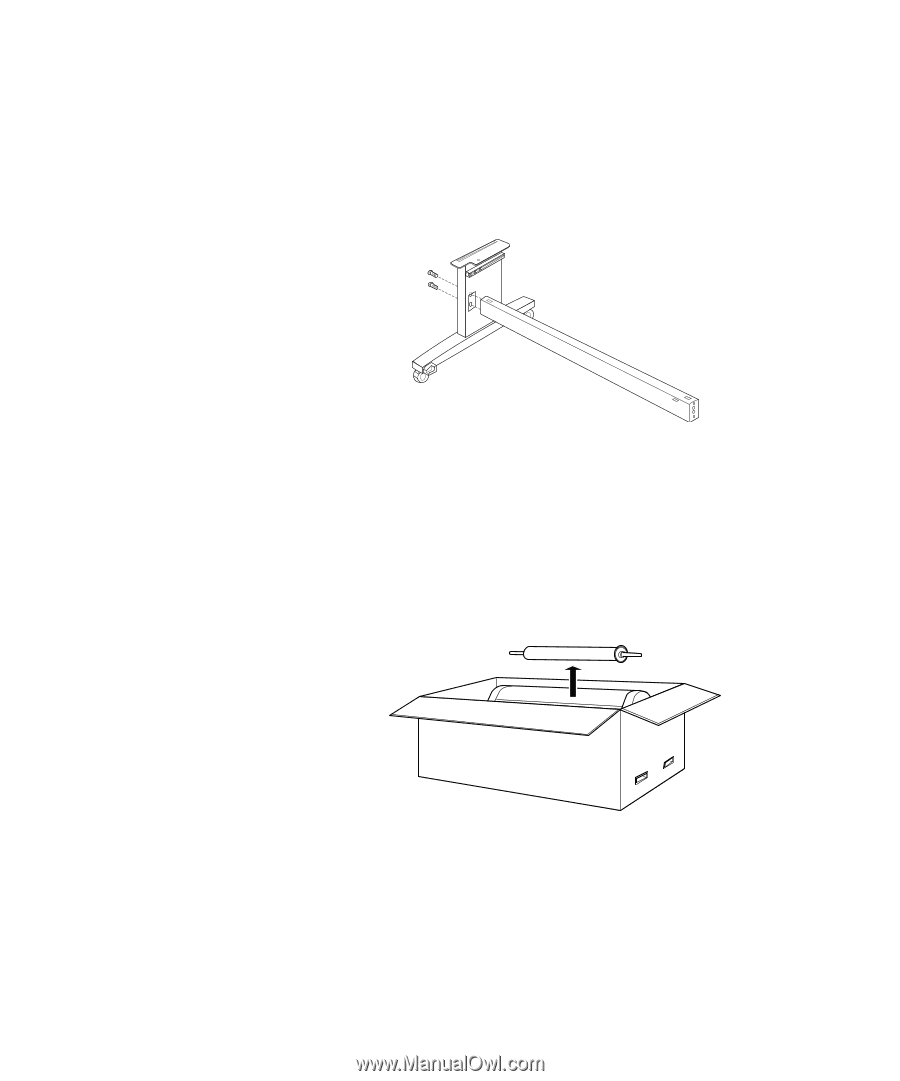
4.
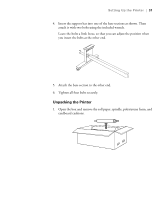
Insert the support bar into one of the base sections as shown. Then
attach it with two bolts using the included wrench.
Leave the bolts a little loose, so that you can adjust the position when
you insert the bolts at the other end.
5.
Attach the base section to the other end.
6.
Tighten all four bolts securely.
Unpacking the Printer
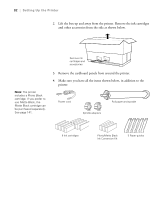
1.
Open the box and remove the roll paper, spindle, polystyrene foam, and
cardboard cushions.