Epson ActionTower 8400 User Manual - Page 95
Chap 5-installing And Removing Drives In The Slimline Computer,
 |
View all Epson ActionTower 8400 manuals
Add to My Manuals
Save this manual to your list of manuals |
Page 95 highlights
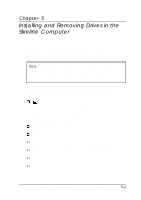
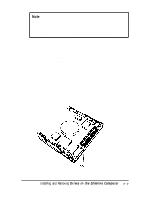
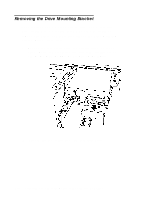
Chapter- 5 Installing and Removing Drives in the Slimline Computer This chapter describes how to install and remove optional drives in your slim line computer. You can use these instructions to install a variety of devices, such as hard disk drives, diskette drives, CD-ROM drives, or other devices. Note This chapter describes installing and removing drives in the slim line computer; if you have a tower computer, see Chapter 6. Although your drive may look different from the ones illustrated here, you should be able to install it the same way. If you are reading this manual online, be sure to print out this chapter before performing any of the steps it describes. Follow the instructions in this chapter to do the following: Set the IDE device jumpers Remove the drive mounting bracket Install a hard disk drive in the mounting bracket Remove a hard disk drive from the mounting bracket Install a drive in an externally accessible drive bay Remove a drive from an externally accessible drive bay. Installing and Removing Drives in the Slimline Computer 5-1
-
 1
1 -
2
-
3
-
4
-
5
-
6
-
7
-
8
-
9
-
10
-
11
-
12
-
13
-
14
-
15
-
16
-
17
-
18
-
19
-
20
-
21
-
22
-
23
-
24
-
25
-
26
-
27
-
28
-
29
-
30
-
31
-
32
-
33
-
34
-
35
-
36
-
37
-
38
-
39
-
40
-
41
-
42
-
43
-
44
-
45
-
46
-
47
-
48
-
49
-
50
-
51
-
52
-
53
-
54
-
55
-
56
-
57
-
58
-
59
-
60
-
61
-
62
-
63
-
64
-
65
-
66
-
67
-
68
-
69
-
70
-
71
-
72
-
73
-
74
-
75
-
76
-
77
-
78
-
79
-
80
-
81
-
82
-
83
-
84
-
85
-
86
-
87
-
88
-
89
-
 90
90 -
 91
91 -
 92
92 -
 93
93 -
 94
94 -
 95
95 -
 96
96 -
 97
97 -
 98
98 -
 99
99 -
 100
100 -
101
-
102
-
103
-
104
-
105
-
106
-
107
-
108
-
109
-
110
-
111
-
112
-
113
-
114
-
115
-
116
-
117
-
118
-
119
-
120
-
121
-
122
-
123
-
124
-
125
-
126
-
127
-
128
-
129
-
130
-
131
-
132
-
133
-
134
-
135
-
136
-
137
-
138
-
139
-
140
-
141
-
142
-
143
-
144
-
145
-
146
-
147
-
148
-
149
-
150
-
151
-
152
-
153
-
154
-
155
-
156
-
157
-
158
-
159
-
160
-
161
-
162
-
163
-
164
-
165
-
166
-
167
-
168
-
169
-
170
-
171
-
172
-
173
-
174
-
175
-
176
-
177
-
178
-
179
-
180
-
181
-
182
-
183
-
184
-
185
-
186
-
187
 |
 |
