Epson FX-85 User Manual - Page 66
Seven-bit graphics, FOR X=1 TO 383: LPRINT CHR$l;: NEXT X
 |
View all Epson FX-85 manuals
Add to My Manuals
Save this manual to your list of manuals |
Page 66 highlights
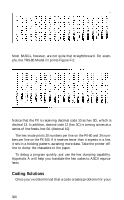
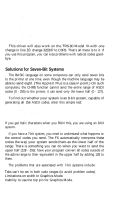
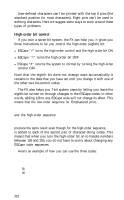
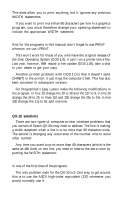
ABCDEFGHIJKLMNOPQRSTUVWXYZ ABCDEFGHIJKLMNOPQRSTUVWXYZ Setting the eighth bit on in line 10 adds 128 to each of the number in line 20; thus it prints Italic characters. The ESCape "=" in line 30 effectively subtracts 128 from each of the numbers in line 40, so the second line prints as the characters from 65 throught 90. Line 50 returns your system to its usual state. Seven-bit graphics The 7-bit limitation affects graphics in two ways. First, 7-bit computer programs are limited in the widths they can specify for graphics. When you enter a Graphics Mode from a 7-bit system, the first number (n1) you send can only range as high as 127. Even by changing n2 from 0 to 1, 2, 3, etc., you can only set specific figure widths: 0 to 127, 256 to 383, 512 to 639, etc. Let's look at an example. The usual way you reserve the entire width of an 8-inch page for graphics is: LPRINT CHR$(27)"K"CHR$(224)CHR$(ll); This gives 224 dots plus 1 times 256 dots, or 480 total. But a 7-bit system cannot send the 224; the largest number it can send is 127. So the maximum number attainable with n2 = l is 127 + 1 x 256 = 383, which is still less than Single-Density's page width. If you change n1to a 0 and n2 to a 2 you get 0 + 2 x 256 = 512. Now it's too high. So, what can you 7-bit users do? First, do not get discouraged. You can do a lot in 383 columns of dots and where you really need more than 383 columns graphics, there is a solution. Just enter Single-Density Graphics Mode twice on the same line, first for 383 columns and then for 97 columns. 10 LPRINT CHR$(27)"K"CHR$(127)CHR$(1): 20 FOR X=1 TO 383: LPRINT CHR$(l);: NEXT X 30 LPRINT CHR$(27)"K"CHR$(97)CHR$(0); 40 FOR X=1 TO 97: LPRINT CHR$(l);: NEXT X 50 LPRINT This gives coverage of the full 480 columns. It's not elegant, but it gets the job done. 311
-
 1
1 -
2
-
3
-
4
-
5
-
6
-
7
-
8
-
9
-
10
-
11
-
12
-
13
-
14
-
15
-
16
-
17
-
18
-
19
-
20
-
21
-
22
-
23
-
24
-
25
-
26
-
27
-
28
-
29
-
30
-
31
-
32
-
33
-
34
-
35
-
36
-
37
-
38
-
39
-
40
-
41
-
42
-
43
-
44
-
45
-
46
-
47
-
48
-
49
-
50
-
51
-
52
-
53
-
54
-
55
-
56
-
57
-
58
-
59
-
60
-
 61
61 -
 62
62 -
 63
63 -
 64
64 -
 65
65 -
 66
66 -
 67
67 -
 68
68 -
 69
69 -
 70
70 -
 71
71 -
72
-
73
-
74
-
75
-
76
-
77
-
78
-
79
-
80
-
81
-
82
-
83
-
84
-
85
-
86
-
87
-
88
-
89
-
90
-
91
-
92
-
93
-
94
-
95
-
96
-
97
-
98
-
99
-
100
-
101
-
102
-
103
-
104
-
105
-
106
-
107
-
108
 |
 |