Epson FX-85 User Manual - Page 79
Changing the Print Head, To remove the old print head - cartridges
 |
View all Epson FX-85 manuals
Add to My Manuals
Save this manual to your list of manuals |
Page 79 highlights
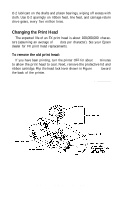
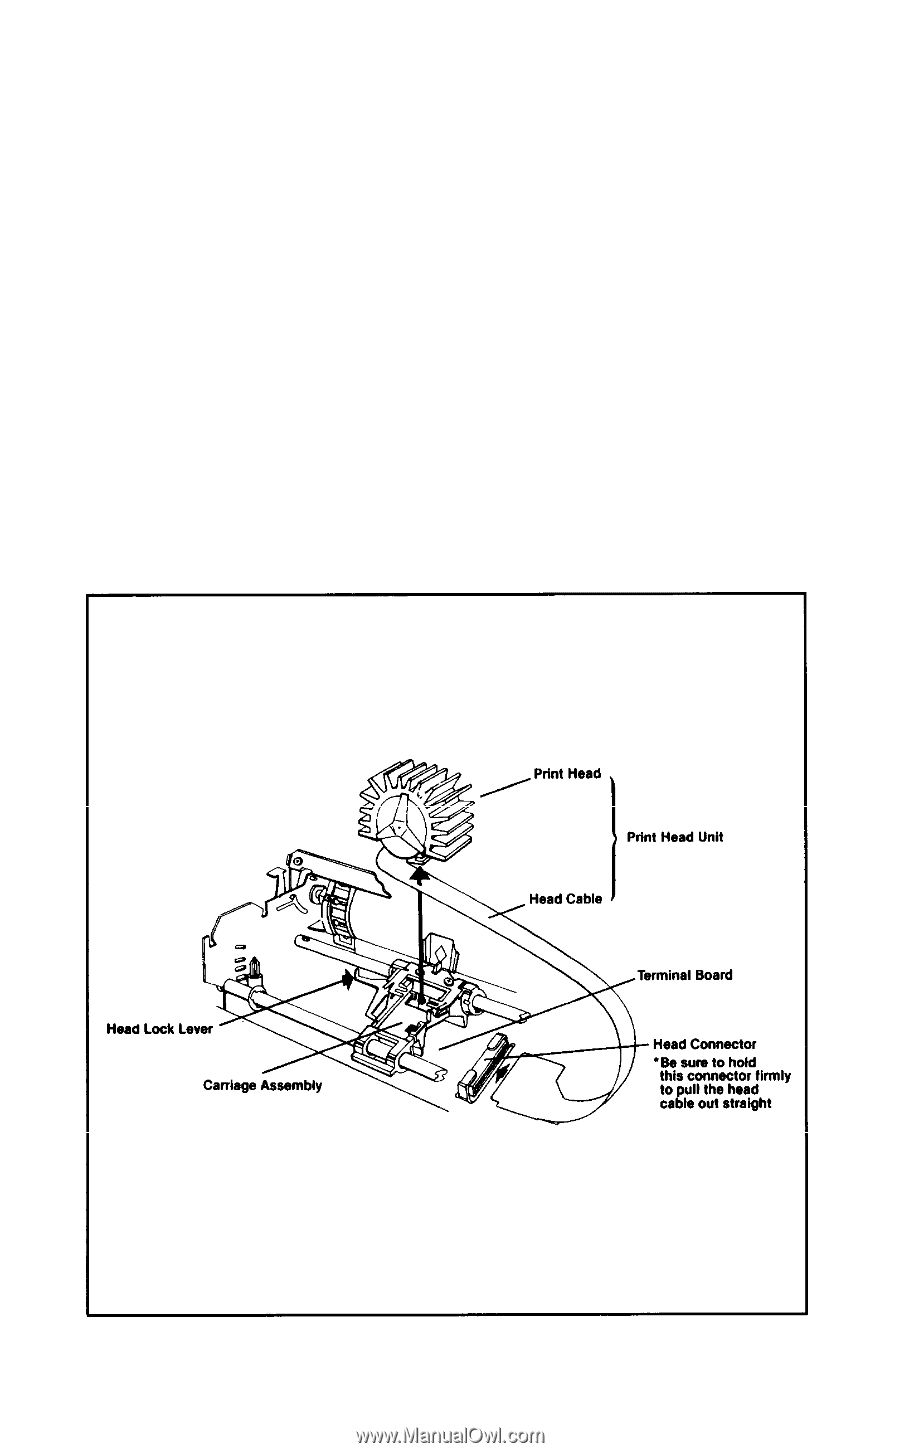
O-2 lubricant on the shafts and platen bearings, wiping off excess with cloth. Use G-2 sparingly on ribbon feed, line feed, and carriage return drive gears, every five million lines. Changing the Print Head The expected life of an FX print head is about 100,000,000 characters (assuming an average of 14 dots per character). See your Epson dealer for FX print head replacements. To remove the old print head: If you have been printing, turn the printer OFF for about 15 minutes to allow the print head to cool. Next, remove the protective lid and ribbon cartridge. Flip the head lock lever shown in Figure I-1 toward the back of the printer. Figure I-1. Print head replacement 324
-
 1
1 -
2
-
3
-
4
-
5
-
6
-
7
-
8
-
9
-
10
-
11
-
12
-
13
-
14
-
15
-
16
-
17
-
18
-
19
-
20
-
21
-
22
-
23
-
24
-
25
-
26
-
27
-
28
-
29
-
30
-
31
-
32
-
33
-
34
-
35
-
36
-
37
-
38
-
39
-
40
-
41
-
42
-
43
-
44
-
45
-
46
-
47
-
48
-
49
-
50
-
51
-
52
-
53
-
54
-
55
-
56
-
57
-
58
-
59
-
60
-
61
-
62
-
63
-
64
-
65
-
66
-
67
-
68
-
69
-
70
-
71
-
72
-
73
-
 74
74 -
 75
75 -
 76
76 -
 77
77 -
 78
78 -
 79
79 -
 80
80 -
 81
81 -
 82
82 -
 83
83 -
 84
84 -
85
-
86
-
87
-
88
-
89
-
90
-
91
-
92
-
93
-
94
-
95
-
96
-
97
-
98
-
99
-
100
-
101
-
102
-
103
-
104
-
105
-
106
-
107
-
108
 |
 |
O-2 lubricant on the shafts and platen bearings, wiping off excess with
cloth. Use G-2 sparingly on ribbon feed, line feed, and carriage return
drive gears, every five million lines.
Changing the Print Head
The expected life of an FX print head is about
100,000,000
charac-
ters (assuming an average of
14
dots per character). See your Epson
dealer for FX print head replacements.
To remove the old print head:
If you have been printing, turn the printer OFF for about
15
minutes
to allow the print head to cool. Next, remove the protective lid and
ribbon cartridge. Flip the head lock lever shown in Figure
I-1
toward
the back of the printer.
Figure I-1. Print head replacement
324