Epson Perfection V550 Photo User Manual - Page 34
Starting a Scan from a Scanning Program, Parent topic, Select Source - windows 10
 |
View all Epson Perfection V550 Photo manuals
Add to My Manuals
Save this manual to your list of manuals |
Page 34 highlights
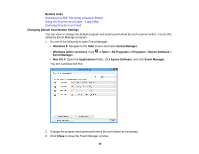
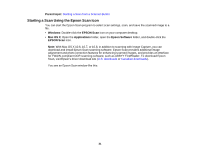
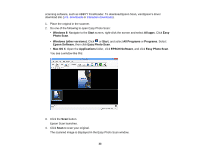
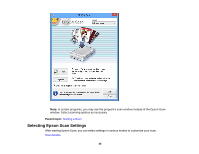
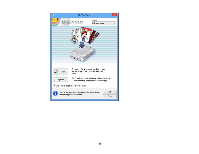
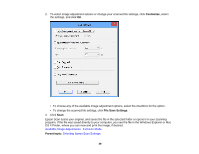
5. To edit the scanned image, click the Edit button and select one of the displayed options. 6. To save your image to a specific location, send it by email, or upload it to a photo sharing site, click one of the destination icons. Note: If this is the first time you are uploading to a destination, you may need to configure an existing account. See the Easy Photo Scan help for additional information on editing options and uploading files. Parent topic: Starting a Scan Starting a Scan from a Scanning Program You can start Epson Scan from a scanning program to select scan settings, scan, and open the scanned image in the program. Note: With Mac OS X 10.6, 10.7, or 10.8, in addition to scanning with Image Capture, you can download and install Epson Scan scanning software. Epson Scan provides additional image adjustment and photo correction features for enhancing scanned images, and provides an interface for TWAIN-compliant OCR scanning software, such as ABBYY FineReader. To download Epson Scan, visit Epson's driver download site (U.S. downloads or Canadian downloads). 1. Open your scanning program and select its scanning option. (See your scanning program help for instructions.) 2. Select your product. Note: In certain programs, you may need to select your product as the "source" first. If you see a Select Source option, choose it and select your product. With Windows, do not select a WIA option for your product; it will not work correctly. You see an Epson Scan window like this: 34
-
 1
1 -
2
-
3
-
4
-
5
-
6
-
7
-
8
-
9
-
10
-
11
-
12
-
13
-
14
-
15
-
16
-
17
-
18
-
19
-
20
-
21
-
22
-
23
-
24
-
25
-
26
-
27
-
28
-
 29
29 -
 30
30 -
 31
31 -
 32
32 -
 33
33 -
 34
34 -
 35
35 -
 36
36 -
 37
37 -
 38
38 -
 39
39 -
40
-
41
-
42
-
43
-
44
-
45
-
46
-
47
-
48
-
49
-
50
-
51
-
52
-
53
-
54
-
55
-
56
-
57
-
58
-
59
-
60
-
61
-
62
-
63
-
64
-
65
-
66
-
67
-
68
-
69
-
70
-
71
-
72
-
73
-
74
-
75
-
76
-
77
-
78
-
79
-
80
-
81
-
82
-
83
-
84
-
85
-
86
-
87
-
88
-
89
-
90
-
91
-
92
-
93
-
94
-
95
-
96
-
97
-
98
-
99
-
100
-
101
-
102
-
103
-
104
-
105
-
106
 |
 |
