Epson Stylus Photo 1200 User Manual - Page 127

Confirming the Printer ID Number, Settings Sheet.
Page 127 highlights

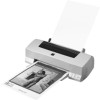
Load paper that's at least 8.27 inches (210 mm) wide. This prevents ink from spraying inside the printer and smudging your printouts. If you're using Windows, you can use the Printer and Option Information utility to confirm the Printer ID. Color quality may improve after you confirm the ID number. If you're using Status Monitor 2, this information is updated automatically. However, if a message appears prompting you to enter settings or if you change the printer's configuration, you'll need to update the Printer ID manually. Follow these steps: 1 Make sure paper is loaded in the printer. 2 Access the main printer settings dialog box as described in Printing from Windows. 3 Click the Utility tab. Then click the Printer and Option Information icon. 4 Click the Settings Sheet button. The printer prints the Printer ID on a sheet of paper. 5 Make sure the Printer ID shown in the Printer and Option Information dialog box matches the ID on the Settings Sheet. If they don't match, change the ID numbers in the dialog box to match those on the Settings Sheet. 6 Click OK to exit and save your settings.

  • 1
  • 2
  • 3
  • 4
  • 5
  • 6
  • 7
  • 8
  • 9
  • 10
  • 11
  • 12
  • 13
  • 14
  • 15
  • 16
  • 17
  • 18
  • 19
  • 20
  • 21
  • 22
  • 23
  • 24
  • 25
  • 26
  • 27
  • 28
  • 29
  • 30
  • 31
  • 32
  • 33
  • 34
  • 35
  • 36
  • 37
  • 38
  • 39
  • 40
  • 41
  • 42
  • 43
  • 44
  • 45
  • 46
  • 47
  • 48
  • 49
  • 50
  • 51
  • 52
  • 53
  • 54
  • 55
  • 56
  • 57
  • 58
  • 59
  • 60
  • 61
  • 62
  • 63
  • 64
  • 65
  • 66
  • 67
  • 68
  • 69
  • 70
  • 71
  • 72
  • 73
  • 74
  • 75
  • 76
  • 77
  • 78
  • 79
  • 80
  • 81
  • 82
  • 83
  • 84
  • 85
  • 86
  • 87
  • 88
  • 89
  • 90
  • 91
  • 92
  • 93
  • 94
  • 95
  • 96
  • 97
  • 98
  • 99
  • 100
  • 101
  • 102
  • 103
  • 104
  • 105
  • 106
  • 107
  • 108
  • 109
  • 110
  • 111
  • 112
  • 113
  • 114
  • 115
  • 116
  • 117
  • 118
  • 119
  • 120
  • 121
  • 122
  • 123
  • 124
  • 125
  • 126
  • 127
  • 128
  • 129
  • 130
  • 131
  • 132
  • 133
  • 134
  • 135
  • 136
  • 137
  • 138
  • 139
  • 140
  • 141
  • 142
  • 143
  • 144
  • 145
  • 146
  • 147
  • 148
  • 149
  • 150
  • 151
  • 152
  • 153
  • 154
  • 155
  • 156
  • 157
  • 158
  • 159
  • 160
  • 161
  • 162
  • 163
  • 164
  • 165
  • 166
  • 167
  • 168

If you’re using Windows, you can use the Printer and Option Information
utility to confirm the Printer ID. Color quality may improve after you
confirm the ID number.
If you’re using Status Monitor 2, this information is updated automatically.
However, if a message appears prompting you to enter settings or if you
change the printer’s configuration, you’ll need to update the Printer ID
manually. Follow these steps:
1
Make sure paper is loaded in the printer.
2
Access the main printer settings dialog box as described in
Printing
from Windows
.
3
Click the
Utility
tab. Then click the
Printer and Option Information
icon.
4
Click the
Settings Sheet
button. The printer prints the Printer ID on a
sheet of paper.
5
Make sure the Printer ID shown in the Printer and Option Information
dialog box matches the ID on the Settings Sheet. If they don’t match,
change the ID numbers in the dialog box to match those on the
Settings Sheet.
6
Click
OK
to exit and save your settings.
Load paper that’s at
least 8.27 inches
(210 mm) wide. This
prevents ink from
spraying inside the
printer and smudging
your printouts.