Epson Stylus Photo 1200 User Manual - Page 45
Maximum, Centered, Paper, Paper Size, User Defined, Printing from Windows
 |
View all Epson Stylus Photo 1200 manuals
Add to My Manuals
Save this manual to your list of manuals |
Page 45 highlights
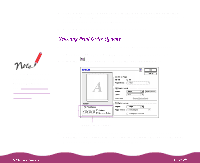
When you select Maximum as the Printable Area setting, print quality may decrease in the expanded printable area in the bottom margin. Don't select Maximum as the Printable Area setting if you're printing on EPSON Ink Jet Back Light Film. 10 The Standard Printable Area setting uses the maximum printable area of your paper with a minimum bottom margin of 0.55 inch (14 mm). To decrease the minimum bottom margin to 0.12 inch (3 mm), set the Printable Area setting to Maximum. To center your document on the page using either setting, select the Centered checkbox. 11 Click a tab for the settings you want to check or change next, or click OK to print your document. You can create up to 10 custom paper sizes and add them to the Paper Size list using the User Defined option. This is useful if you're printing a custom size document, such as a banner. You can select any width from 3.5 to 12.95 inches, and any height (length) from 3.5 to 44 inches. Follow these steps to create a User Defined paper size: 1 Follow the steps in Printing from Windows to access the printer software, then click the Paper tab. 2 Click the Paper Size list and scroll to the bottom of it using the arrows or scroll bar. 3 Click the User Defined option. You see the following dialog box:
-
 1
1 -
2
-
3
-
4
-
5
-
6
-
7
-
8
-
9
-
10
-
11
-
12
-
13
-
14
-
15
-
16
-
17
-
18
-
19
-
20
-
21
-
22
-
23
-
24
-
25
-
26
-
27
-
28
-
29
-
30
-
31
-
32
-
33
-
34
-
35
-
36
-
37
-
38
-
39
-
 40
40 -
 41
41 -
 42
42 -
 43
43 -
 44
44 -
 45
45 -
 46
46 -
 47
47 -
 48
48 -
 49
49 -
 50
50 -
51
-
52
-
53
-
54
-
55
-
56
-
57
-
58
-
59
-
60
-
61
-
62
-
63
-
64
-
65
-
66
-
67
-
68
-
69
-
70
-
71
-
72
-
73
-
74
-
75
-
76
-
77
-
78
-
79
-
80
-
81
-
82
-
83
-
84
-
85
-
86
-
87
-
88
-
89
-
90
-
91
-
92
-
93
-
94
-
95
-
96
-
97
-
98
-
99
-
100
-
101
-
102
-
103
-
104
-
105
-
106
-
107
-
108
-
109
-
110
-
111
-
112
-
113
-
114
-
115
-
116
-
117
-
118
-
119
-
120
-
121
-
122
-
123
-
124
-
125
-
126
-
127
-
128
-
129
-
130
-
131
-
132
-
133
-
134
-
135
-
136
-
137
-
138
-
139
-
140
-
141
-
142
-
143
-
144
-
145
-
146
-
147
-
148
-
149
-
150
-
151
-
152
-
153
-
154
-
155
-
156
-
157
-
158
-
159
-
160
-
161
-
162
-
163
-
164
-
165
-
166
-
167
-
168
 |
 |
