Epson WorkForce WF-2650 User Manual - Page 57
Scanning, Scanning Using the Control Panel, Scanning to the Cloud, Scanning to a Computer
 |
View all Epson WorkForce WF-2650 manuals
Add to My Manuals
Save this manual to your list of manuals |
Page 57 highlights
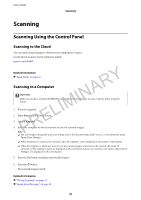
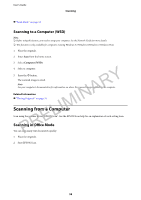
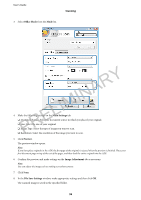
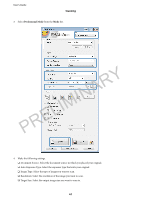
User's Guide Scanning Scanning Scanning Using the Control Panel Scanning to the Cloud You can send scanned images to cloud services using Epson Connect. See the Epson Connect portal website for details. epson.com/connect Related Information & "Scan Mode" on page 16 RY Scanning to a Computer c A Important: IN Make sure you have installed the EPSON Scan and Epson Event Manager on your computer before using this feature. IM 1. Place the originals. L 2. Enter Scan from the home screen. E 3. Select Computer. R 4. Select the computer to which you want to save the scanned images. PNote: ❏ You can change to frequently-used scan settings such as the document type, folder to save, or save format by using Epson Event Manager. ❏ When the printer is connected to a network, up to 20 computers can be displayed on the printer's control panel. ❏ When the computer to which you want to save the scanned images is detected on the network, the initial 15 characters of the computer's name are displayed on the control panel. If you set a network scan name in Epson Event Manager, it is displayed on the control panel. 5. Press the OK button, and then select the file format. 6. Press the x button. The scanned image is saved. Related Information & "Placing Originals" on page 31 & "Epson Event Manager" on page 99 57
-
 1
1 -
2
-
3
-
4
-
5
-
6
-
7
-
8
-
9
-
10
-
11
-
12
-
13
-
14
-
15
-
16
-
17
-
18
-
19
-
20
-
21
-
22
-
23
-
24
-
25
-
26
-
27
-
28
-
29
-
30
-
31
-
32
-
33
-
34
-
35
-
36
-
37
-
38
-
39
-
40
-
41
-
42
-
43
-
44
-
45
-
46
-
47
-
48
-
49
-
50
-
51
-
 52
52 -
 53
53 -
 54
54 -
 55
55 -
 56
56 -
 57
57 -
 58
58 -
 59
59 -
 60
60 -
 61
61 -
 62
62 -
63
-
64
-
65
-
66
-
67
-
68
-
69
-
70
-
71
-
72
-
73
-
74
-
75
-
76
-
77
-
78
-
79
-
80
-
81
-
82
-
83
-
84
-
85
-
86
-
87
-
88
-
89
-
90
-
91
-
92
-
93
-
94
-
95
-
96
-
97
-
98
-
99
-
100
-
101
-
102
-
103
-
104
-
105
-
106
-
107
-
108
-
109
-
110
-
111
-
112
-
113
-
114
-
115
-
116
-
117
-
118
-
119
-
120
-
121
-
122
-
123
-
124
-
125
-
126
-
127
-
128
-
129
-
130
-
131
-
132
-
133
-
134
-
135
-
136
-
137
 |
 |
