Garmin iQue 3000 Operating Instructions
Garmin iQue 3000 Manual
 |
UPC - 753759049812
View all Garmin iQue 3000 manuals
Add to My Manuals
Save this manual to your list of manuals |
Garmin iQue 3000 manual content summary:
- Garmin iQue 3000 | Operating Instructions - Page 1
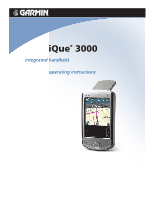
iQue® 3000 integrated handheld operating instructions - Garmin iQue 3000 | Operating Instructions - Page 2
. The Palm OS®, HotSync®, and the Palm Powered logo are registered trademarks and Palm Powered™ is a trademark of Palm Trademark Holding Company, LLC. Other brands may be trademarks of their respective owners. November 2005 ii Part Number 190-00537-00 Rev. A iQue® 3000 Operating Instructions - Garmin iQue 3000 | Operating Instructions - Page 3
. • If you experience any problems with the battery, keep the unit in a safe place and immediately contact Garmin. • If you must dispose of the unit, contact your local waste disposal department for information on properly disposing of lithium-ion batteries. iQue® 3000 Operating Instructions iii - Garmin iQue 3000 | Operating Instructions - Page 4
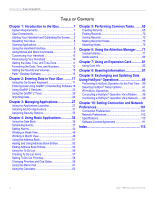
a Modem ....... 96 Conducting a HotSync® Operation Via a Network...... 99 Chapter 10: Setting Connection and Network Preferences 101 Connection Preferences 101 Network Preferences 103 Specifications 110 Software License Agreement 111 Index 113 iv iQue® 3000 Operating Instructions - Garmin iQue 3000 | Operating Instructions - Page 5
. This manual describes how to use the Palm™ applications included with your iQue handheld. To learn how to use QueNav, the GPS software on your iQue 3000, please refer to the Quick Reference Guide included in your product box. System Requirements To install and operate Palm Desktop software on your - Garmin iQue 3000 | Operating Instructions - Page 6
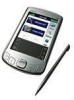
Front Panel Controls • Battery Icon: Displays the current battery level. When charging, the battery icon contains a lightning bolt symbol. • iQue Screen: Displays the applications area. Home Brightness Favorites (Hotsync by default) Volume Menu Palm OS® Find 2 iQue® 3000 Operating Instructions - Garmin iQue 3000 | Operating Instructions - Page 7
additional software. • Headphones Jack: Plug in headphones for listening to MP3 audio files or navigation guidance. • AC Charger Connector: Connects to the AC wall charger for battery recharge only. • Interface Connector: Connects your handheld to your computer. iQue® 3000 Operating Instructions 3 - Garmin iQue 3000 | Operating Instructions - Page 8
to use the reset button. • Speaker: Internal speaker for listening to voice-guided navigation commands and MP3 files. • Flip-up Integrated GPS Antenna: Open for satellite reception and GPS navigation. To extend battery life, keep the antenna closed when you are not using the iQue for navigation. NOTE - Garmin iQue 3000 | Operating Instructions - Page 9
list in the upper-right corner of the screen, tap Digitizer. 3. Follow the on-screen instructions. Adjusting the Brightness of Your Screen To adjust the battery life. Turning the brightness up or keeping the backlight on can reduce battery life significantly. iQue® 3000 Operating Instructions - Garmin iQue 3000 | Operating Instructions - Page 10
of the handheld. The Digitizer screen appears. • Press any other button to perform a soft reset. NOTE: When you perform a hard reset, the current date and time are retained. Formats, preferences, and other settings are restored to their factory default settings. 6 iQue® 3000 Operating Instructions - Garmin iQue 3000 | Operating Instructions - Page 11
name. The Application Launcher scrolls to the first application with a name that begins with that letter. Application Icons Scroll Bar Applications Launcher Icon (Home icon) iQue® 3000 Operating Instructions 7 - Garmin iQue 3000 | Operating Instructions - Page 12
to remove the check mark. • Next/previous arrows display the previous and next page of information. • Text areas and screens allow you to enter information. 8 iQue® 3000 Operating Instructions - Garmin iQue 3000 | Operating Instructions - Page 13
the dialog box or other useful information. To display a tip: 1. Tap the Tips icon . 2. When you are finished viewing the tip, tap Done. Tips Icon iQue® 3000 Operating Instructions 9 - Garmin iQue 3000 | Operating Instructions - Page 14
countries and time zones. • Shut down after a certain amount of time to save battery life. • Stay on while in the cradle. • Play sounds at a certain volume level. • Automatically receive any data beamed and tap OK. 4. Edit the Owner Preferences text as desired 10 iQue® 3000 Operating Instructions - Garmin iQue 3000 | Operating Instructions - Page 15
arrow to change the number. 6. If available, tap AM or PM. 7. Tap OK to set the new time and return to the Date & Time screen. iQue® 3000 Operating Instructions 11 - Garmin iQue 3000 | Operating Instructions - Page 16
the pick list in the upper-right corner and choose Date & Time. 3. Tap the Daylight Saving pick list and then tap On or Off. 12 iQue® 3000 Operating Instructions - Garmin iQue 3000 | Operating Instructions - Page 17
separator. NOTE: These settings affect the Day, Week, Month, and Agenda views in Date Book and all other aspects of your handheld that display a calendar. iQue® 3000 Operating Instructions 13 - Garmin iQue 3000 | Operating Instructions - Page 18
tap the Prefs icon . 2. Tap the pick list in the upper-right corner and choose General. 3. Tap the Stay on in Cradle check box to set your handheld to stay on. If you uncheck the box, your handheld shuts off after the period of time that you specify above. 14 iQue® 3000 Operating Instructions - Garmin iQue 3000 | Operating Instructions - Page 19
other color themes by repeating the steps above. Tap the box next to Auto-Night to automatically switch to the Night color theme after sunset. iQue® 3000 Operating Instructions 15 - Garmin iQue 3000 | Operating Instructions - Page 20
Manager If you prefer to use another Personal Information Manager (PIM), such as Microsoft® Outlook, be sure to install the correct connection software, called a conduit. Keep in mind, though, that you must install Palm Desktop software to set up your handheld. 16 iQue® 3000 Operating Instructions - Garmin iQue 3000 | Operating Instructions - Page 21
DATA > USING THE ON-SCREEN KEYBOARD CHAPTER 2: ENTERING DATA IN YOUR IQUE You can enter data into your iQue handheld by using the on-screen keyboard, writing with the stylus in the the desired characters or numbers; then tap Done to enter the text or numbers. iQue® 3000 Operating Instructions 17 - Garmin iQue 3000 | Operating Instructions - Page 22
handheld or perform a hard reset, the Welcome application automatically guides you through the setup process. When you complete setup, the iQue invites you to learn how to use the handwriting software. You should try the the strokes used to form that character. 18 iQue® 3000 Operating Instructions - Garmin iQue 3000 | Operating Instructions - Page 23
ENTERING DATA > ENTERING DATA USING GRAFFITI® 2 HANDWRITING SOFTWARE General Guidelines for Graffiti® 2 Writing Follow these guidelines to learn and use Graffiti 2 lowercase letters here. Write numbers here. Write uppercase letters across the division line. iQue® 3000 Operating Instructions 19 - Garmin iQue 3000 | Operating Instructions - Page 24
ENTERING DATA > ENTERING DATA USING GRAFFITI® 2 HANDWRITING SOFTWARE To write Graffiti® 2 letters: 1. Tap the screen where you want to write text (for example, on a can be written using two different strokes, use the one that is easiest for you. • Press firmly. 20 iQue® 3000 Operating Instructions - Garmin iQue 3000 | Operating Instructions - Page 25
letters according to the following alphabet. ENTERING DATA > ENTERING DATA USING GRAFFITI® 2 HANDWRITING SOFTWARE Writing Capital Letters Graffiti® 2 writing automatically capitalizes the first letter of a more frequently used punctuation is on the left side). iQue® 3000 Operating Instructions 21 - Garmin iQue 3000 | Operating Instructions - Page 26
ENTERING DATA > ENTERING DATA USING GRAFFITI® 2 HANDWRITING SOFTWARE Writing Accent Marks When writing letters with accent marks, first write the letter stroke on the characters, write the letter across the division mark, just as you would an ordinary letter. 22 iQue® 3000 Operating Instructions - Garmin iQue 3000 | Operating Instructions - Page 27
ShortCut stroke followed by the ShortCut character or characters. When you draw the ShortCut stroke, the ShortCut symbol appears at the insertion point. Shortcut stroke iQue® 3000 Operating Instructions 23 - Garmin iQue 3000 | Operating Instructions - Page 28
want, then tap OK. To delete a ShortCut: 1. In the ShortCut Preferences screen, tap the ShortCut you want to delete. 2. Tap Delete; then tap Yes. 24 iQue® 3000 Operating Instructions - Garmin iQue 3000 | Operating Instructions - Page 29
your computer keyboard using Palm™ Desktop software or any supported personal information manager (PIM) installed for use with your Palm Desktop software and in most PIMs. Refer to the Palm Desktop online Help for more information on entering data on your computer. iQue® 3000 Operating Instructions - Garmin iQue 3000 | Operating Instructions - Page 30
to your iQue handheld without having to enter it manually. Save the data in one of the file formats listed below, import it into Palm™ Desktop software, and a HotSync operation. See Palm Desktop online Help for more information on importing and exporting data. 26 iQue® 3000 Operating Instructions - Garmin iQue 3000 | Operating Instructions - Page 31
installed on your handheld appear in the Applications Launcher. In addition to providing a way for you to open applications, the Applications Launcher displays the current time, battery level application and displays it when you return to that application. iQue® 3000 Operating Instructions 27 - Garmin iQue 3000 | Operating Instructions - Page 32
Preferences. 3. From the View By pick list, tap List. Then tap OK to see your applications in list format. "Main" applications in list format 28 iQue® 3000 Operating Instructions - Garmin iQue 3000 | Operating Instructions - Page 33
different applications to the buttons on the front of the handheld and to the HotSync® button on the cradle. For example, if you find that you seldom use the To Do List and often use the TIP: To restore all of the buttons to their factory settings, tap Default. iQue® 3000 Operating Instructions 29 - Garmin iQue 3000 | Operating Instructions - Page 34
assign a password to lock the handheld. When locked, you must enter the password to use your handheld. • Beam Data beams the current record to another Garmin or Palm Powered™ organizer. 5. Tap OK. 30 iQue® 3000 Operating Instructions - Garmin iQue 3000 | Operating Instructions - Page 35
directory or into another folder you can find easily. 2. If the application is compressed, decompress the application before continuing. 3. Double-click the Palm Desktop icon on your computer desktop to open it; then click Install. (Continued on next page.) iQue® 3000 Operating Instructions 31 - Garmin iQue 3000 | Operating Instructions - Page 36
click Open. The file appears in the Palm™ Install Tool dialog box. 6. If you decide not to install an application, select it in the list of files in the Palm Install Tool dialog box, and then click Remove want to remove. 4. Tap Delete. Then tap Yes. 5. Tap Done. 32 iQue® 3000 Operating Instructions - Garmin iQue 3000 | Operating Instructions - Page 37
menu and choose Settings > Control Panel. 2. Click the Add/Remove Programs icon. 3. Select Palm Desktop software; then click Add/Remove (or Change/Remove.) NOTE: You must retain the HotSync® Manager from list and then tap Mask Records. (Continued on next page.) iQue® 3000 Operating Instructions 33 - Garmin iQue 3000 | Operating Instructions - Page 38
password again to verify it and tap OK. • To change your password, enter a new password and tap OK. • To delete your password, tap Unassign. 34 iQue® 3000 Operating Instructions - Garmin iQue 3000 | Operating Instructions - Page 39
on it. If you forget the password, you must perform a hard reset to resume using your handheld. Performing a hard reset deletes all the records in your handheld; however, you can restore all Lost Password. 3. Tap Yes to confirm deleting the forgotten password. iQue® 3000 Operating Instructions 35 - Garmin iQue 3000 | Operating Instructions - Page 40
BASIC APPLICATIONS > USING THE DATE BOOK CHAPTER 4: USING BASIC APPLICATIONS Your iQue Palm OS® handheld with integrated GPS includes the following basic applications: • Date Book • Memo Pad • To Do appear in the lower-left of the screen. Date Book button 36 iQue® 3000 Operating Instructions - Garmin iQue 3000 | Operating Instructions - Page 41
default. You can easily change the start time and duration for any event. You can schedule the following types of events in the Date Book: • Timed events, such as meetings, that have a specific date and , up to 255 characters in length. (Continued on next page.) iQue® 3000 Operating Instructions 37 - Garmin iQue 3000 | Operating Instructions - Page 42
to scroll to earlier hours Start Time highlighted Tap to change hours Tap to change minutes 6. Tap OK. Tap to scroll to later hours 38 iQue® 3000 Operating Instructions - Garmin iQue 3000 | Operating Instructions - Page 43
it an untimed event, tap directly on the event time on the Date Book screen; then tap No Time and tap OK. New untimed event iQue® 3000 Operating Instructions 39 - Garmin iQue 3000 | Operating Instructions - Page 44
date picker to select an end date. 7. Tap OK. An icon that represents a repeating event appears to the far right on the event line. 40 iQue® 3000 Operating Instructions - Garmin iQue 3000 | Operating Instructions - Page 45
Book, and you are returned to the day view where you started. These steps apply to all changes you make to repeating or continuous events. iQue® 3000 Operating Instructions 41 - Garmin iQue 3000 | Operating Instructions - Page 46
a Location to an Event You can add a name, address, and telephone number to an event using the Phone Lookup option. For instructions, see "Using Phone Lookup" in Chapter 5. For information on attaching a location to an event, refer to the Quick Reference Guide. 42 iQue® 3000 Operating Instructions - Garmin iQue 3000 | Operating Instructions - Page 47
to change the time unit; select Minutes, Hours, or Days. Enter number of time units here. 5. Tap OK. Tap here to select unit of time. iQue® 3000 Operating Instructions 43 - Garmin iQue 3000 | Operating Instructions - Page 48
text input area, drag a diagonal line from the lower-left to upper-right to display the Command toolbar. Type an R, the Graffiti® 2 shortcut for the Preferences command. 2. In the Options menu, tap Preferences. minute; or every 5, 10, or 30 minutes. 4. Tap OK. 44 iQue® 3000 Operating Instructions - Garmin iQue 3000 | Operating Instructions - Page 49
you release the stylus, the menu bar appears.) 2. Drag the stylus away from the date and then lift to release without displaying the menu bar. iQue® 3000 Operating Instructions 45 - Garmin iQue 3000 | Operating Instructions - Page 50
View Week view displays a calendar of your events for an entire week. This view lets you quickly review your appointments and available time slots. In addition, the graphical display helps you spot overlaps and con of the event at the top of the screen. 46 iQue® 3000 Operating Instructions - Garmin iQue 3000 | Operating Instructions - Page 51
Week view as overlapping time bars and in the Day view as overlapping brackets to the left of the conflicting times. Event conflicts iQue® 3000 Operating Instructions 47 - Garmin iQue 3000 | Operating Instructions - Page 52
icon 2. Use the navigation bars to move forward or backward a day at a time or to display more To Do items. (Continued on next page.) 48 iQue® 3000 Operating Instructions - Garmin iQue 3000 | Operating Instructions - Page 53
Book display of events: 1. In Day view or Month view, tap the Menu icon. 2. Tap Options, and then tap Display Options. (Continued on next page.) iQue® 3000 Operating Instructions 49 - Garmin iQue 3000 | Operating Instructions - Page 54
times when the All Day option is selected. The Week view displays the time span defined by the Start Time and End Time. 50 iQue® 3000 Operating Instructions - Garmin iQue 3000 | Operating Instructions - Page 55
list of all your records. Address Book button NOTE: Press the Address Book button repeatedly to cycle through the categories in which you have records. iQue® 3000 Operating Instructions 51 - Garmin iQue 3000 | Operating Instructions - Page 56
Palm™ Desktop software to create entries on your computer and then download them to your handheld with your next HotSync® operation. Palm Desktop software tap Done. To attach a GPS location to an entry, please refer to the Quick Reference Guide. 9. When you have fi iQue® 3000 Operating Instructions - Garmin iQue 3000 | Operating Instructions - Page 57
record as necessary. 4. Tap Done when finished. Selecting Different Types of Phone Numbers and Addresses You can select the types of phone numbers or e-mail addresses that an Address Book entry finished. Tap a triangle Select a new label from the pick list. iQue® 3000 Operating Instructions 53 - Garmin iQue 3000 | Operating Instructions - Page 58
box, select any of the following settings: • Tap Show in List, and in the pick list tap which type of phone or other information you want to appear in the Address List screen. Options are Work, Home, Fax, name, and then an individual's last name. 4. Tap OK. 54 iQue® 3000 Operating Instructions - Garmin iQue 3000 | Operating Instructions - Page 59
Address Book display the All category on returning to the application, tap the Remember Last Category check box to clear it (check mark). 4. Tap OK. iQue® 3000 Operating Instructions 55 - Garmin iQue 3000 | Operating Instructions - Page 60
last viewed. NOTE: Press the To Do List button repeatedly to cycle through the categories in which you have items. To Do List button 56 iQue® 3000 Operating Instructions - Garmin iQue 3000 | Operating Instructions - Page 61
the To Do List item. TIP: If no To Do List item is currently selected, writing in the text input area automatically creates a new item. iQue® 3000 Operating Instructions 57 - Garmin iQue 3000 | Operating Instructions - Page 62
. See "Purging Records" in Chapter 5 for more information. 2. Tap the check box on the left side of the item. Completed To Do List item 58 iQue® 3000 Operating Instructions - Garmin iQue 3000 | Operating Instructions - Page 63
to reverse that order. 4. Tap Category, Priority to sort items by category first, and then priority. Tap Priority, Category to reverse that order. 5. Tap OK. iQue® 3000 Operating Instructions 59 - Garmin iQue 3000 | Operating Instructions - Page 64
in the To Do List and to display an exclamation mark next to items that remain incomplete after the due date passes. 3. Tap OK. 60 iQue® 3000 Operating Instructions - Garmin iQue 3000 | Operating Instructions - Page 65
Microsoft® Word when you synchronize using Palm™ Desktop software and HotSync® technology. • Assign memos to categories so that you can organize and view them in logical groups. • Write down phone numbers and other types iQue® 3000 Operating Instructions 61 - Garmin iQue 3000 | Operating Instructions - Page 66
you are reviewing: 1. In the Memo List, tap the text of the memo you want to review. If the Manual to sort new memos in the sequence in which you create them. • Tap Alphabetic to sort new and existing memos in numerical and then alphabetical sequence. 4. Tap OK. 62 iQue® 3000 Operating Instructions - Garmin iQue 3000 | Operating Instructions - Page 67
the stored value from memory and inserts it in the current calculation. The MC button clears any value that is stored in the Calculator memory. iQue® 3000 Operating Instructions 63 - Garmin iQue 3000 | Operating Instructions - Page 68
Calculator application, tap the Menu icon. 2. Tap Options, and then tap Recent Calculations. 3. When you have finished reviewing the calculations, tap OK. Using QueNav For detailed instructions on using the QueNav, refer to the Quick Reference Guide. Que button 64 iQue® 3000 Operating Instructions - Garmin iQue 3000 | Operating Instructions - Page 69
line. You can enter text in any of the ways described in Chapter 2, "Entering Data in your iQue Handheld." Selecting Text Select the text you want to edit using one of the following techniques: • Double-tap the text input area of your screen. Command Toolbar iQue® 3000 Operating Instructions 65 - Garmin iQue 3000 | Operating Instructions - Page 70
, the record is transferred to the archive file on your PC the next time you perform a HotSync® operation. 4. Tap OK to delete the record. 66 iQue® 3000 Operating Instructions - Garmin iQue 3000 | Operating Instructions - Page 71
Purging is not available in Address Book or Memo Pad, so records from these applications must be deleted manually. To purge a record: 1. Open the application from which you want to purge records. 2. Choose list, select the desired category, and then tap OK. iQue® 3000 Operating Instructions 67 - Garmin iQue 3000 | Operating Instructions - Page 72
from the following options: • Tap the pick list in the upper-right corner of the screen, and tap Edit Categories. (Continued on next page.) 68 iQue® 3000 Operating Instructions - Garmin iQue 3000 | Operating Instructions - Page 73
the Edit Categories dialog box. TIP: You can move records from multiple categories into a single category by renaming all individual categories with a single category name. iQue® 3000 Operating Instructions 69 - Garmin iQue 3000 | Operating Instructions - Page 74
using the scroll button on the front panel of your device or by typing the first few letters of a name in the Look Up option The Find option lets you locate text in any standard Palm OS applications on your iQue handheld. For example, if the text "dog" appears in 70 iQue® 3000 Operating Instructions - Garmin iQue 3000 | Operating Instructions - Page 75
highlight the text, then follow step 2 above. When the search is complete, the name and phone number of the candidate will replace the selected text. iQue® 3000 Operating Instructions 71 - Garmin iQue 3000 | Operating Instructions - Page 76
an "R", the shortcut for the Preferences command. 3. In the Preferences dialog box, tap the option you want; then tap OK to sort the list. 72 iQue® 3000 Operating Instructions - Garmin iQue 3000 | Operating Instructions - Page 77
To display the list of your memos on your computer as you arranged them manually on your handheld, open the Memo Pad in Palm™ Desktop, click List By, and select Order on Handheld. Making Records Private At the alert in the Private Records dialog box, tap OK. iQue® 3000 Operating Instructions 73 - Garmin iQue 3000 | Operating Instructions - Page 78
OK. 3. If you have assigned a password, you must enter the password before the hidden records are displayed. Enter your password, and then tap Show. 74 iQue® 3000 Operating Instructions - Garmin iQue 3000 | Operating Instructions - Page 79
. A note icon appears to the right of any item containing a note. The note icon indicates that a note is attached to this event To review or edit a note: Tap the Note icon. To delete a note: 1. Tap the Note icon. 2. Tap Delete; then tap Yes to delete the note. iQue® 3000 Operating Instructions 75 - Garmin iQue 3000 | Operating Instructions - Page 80
are in the Date Book, the command is About Date Book; if you are in the Address Book, the command is About Address Book. 76 iQue® 3000 Operating Instructions - Garmin iQue 3000 | Operating Instructions - Page 81
alarm and shows the record that caused the alarm, although you may have to navigate within the application. The alarm does not go off again. iQue® 3000 Operating Instructions 77 - Garmin iQue 3000 | Operating Instructions - Page 82
sound effect (for example, Bird or Concerto). • How many times the alarm repeats before giving up. • The pause between each time the alarm sounds. 78 iQue® 3000 Operating Instructions - Garmin iQue 3000 | Operating Instructions - Page 83
of the items from the list, but does not close the Reminders List screen. Tap this button to erase a list of events that have passed. iQue® 3000 Operating Instructions 79 - Garmin iQue 3000 | Operating Instructions - Page 84
, until you view the new event. Tapping on the indicator opens the Attention Manager in list mode, even if there is only one item. 80 iQue® 3000 Operating Instructions - Garmin iQue 3000 | Operating Instructions - Page 85
iQue 3000 allows you to insert a microSD expansion card. You can insert and remove a card at any time without a reset. An expansion card allows you to back up data, increase memory size, or add games, reference materials, or other additional software scroll bar. iQue® 3000 Operating Instructions 81 - Garmin iQue 3000 | Operating Instructions - Page 86
EXPANSION CARD To launch an application on your iQue from a card: 1. Tap the Home icon . 2. Tap the pick list in the upper-right corner of the screen More, you access the Card Info application, described in the "Using Card Info" section later in this chapter. 82 iQue® 3000 Operating Instructions - Garmin iQue 3000 | Operating Instructions - Page 87
the From and the Copy To pick lists. EXPANSION CARD 4. Select the application and then tap Copy. The application is copied to the selected destination. iQue® 3000 Operating Instructions 83 - Garmin iQue 3000 | Operating Instructions - Page 88
EXPANSION CARD To beam an application on your card to another Palm Powered™ device: 1. Tap the Home icon . Then tap the Menu icon . 2. Tap the App menu and select Applications that are loaded in ROM (for example, Memo Pad) cannot be deleted, and are not listed. 84 iQue® 3000 Operating Instructions - Garmin iQue 3000 | Operating Instructions - Page 89
EXPANSION CARD Using Card Info The Card Info application displays summary information for each known directory type found on the expansion card. To use Card Info: 1. Tap the Home icon . name in the Rename Card dialog box and tap Rename. (Continued on next page.) iQue® 3000 Operating Instructions 85 - Garmin iQue 3000 | Operating Instructions - Page 90
displayed. 6. To view information about Card Info, tap Card Info in the upper-left corner of the screen, and then tap About Card Info. 86 iQue® 3000 Operating Instructions - Garmin iQue 3000 | Operating Instructions - Page 91
iQue handheld is equipped with an IR (infrared) port that you can use to beam information to another Garmin integrated handheld (or other Palm want to exchange with business contacts. • An application installed in RAM memory. NOTE: HotSync® operations can also be iQue® 3000 Operating Instructions 87 - Garmin iQue 3000 | Operating Instructions - Page 92
the upper-right corner and select General. 3. In the General Preferences screen, tap the Beam Receive pick list, and then tap On or Off. 88 iQue® 3000 Operating Instructions - Garmin iQue 3000 | Operating Instructions - Page 93
your personal computer supports it. This chapter installed the Palm Desktop software. If you have not installed this software, see the Setup Guide included with the Setup disk for instructions. To perform a local HotSync operation: 1. Connect your iQue to your computer. 2. Open the HotSync® software - Garmin iQue 3000 | Operating Instructions - Page 94
on the handheld, and click OK. 3. Click Yes to transfer all the profile data to the handheld. The next time you perform a HotSync operation, Palm Desktop software prompts you to assign a user name to the handheld. 90 iQue® 3000 Operating Instructions - Garmin iQue 3000 | Operating Instructions - Page 95
Palm™ Desktop software is not running. • Available Only When Palm Desktop software Is Running: Starts HotSync Manager and monitors requests automatically when you open Palm Desktop software. • Manual " later in this chapter for more information. 6. Click OK. iQue® 3000 Operating Instructions 91 - Garmin iQue 3000 | Operating Instructions - Page 96
can also click the HotSync command on the Palm Desktop software menu bar. 2. From the HotSync Manager menu, choose Custom. 3. Select the appropriate user name from the list. 4. Select an application in the Conduit list. Click Change. (Continued on next page.) 92 iQue® 3000 Operating Instructions - Garmin iQue 3000 | Operating Instructions - Page 97
device that supports the IrCOMM not need a cradle to do this. install an infrared driver. After you install the infrared driver or determine that the infrared driver is already installed, check the ports used by your computer for infrared communication. iQue® 3000 Operating Instructions - Garmin iQue 3000 | Operating Instructions - Page 98
used by the HotSync® Manager. 5. Make a note of which port is listed as "Providing application support." You need this information to configure the HotSync Manager for infrared communication. This port is the with the port defined for cable synchronization. 94 iQue® 3000 Operating Instructions - Garmin iQue 3000 | Operating Instructions - Page 99
USB. 4. Click OK. You can leave the HotSync application on your handheld set to perform IR HotSync operations and still use the cradle. This setting is useful if you perform HotSync operations with both your desktop computer and a laptop that you travel with. iQue® 3000 Operating Instructions 95 - Garmin iQue 3000 | Operating Instructions - Page 100
Palm® modem accessory Palm Desktop software services, such as America Online (AOL) or CompuServe, to avoid conflicts with the COM port. 2. Start HotSync Manager if it is not already running, and choose Modem from the HotSync Manager menu. (Continued on next page.) 96 iQue® 3000 Operating Instructions - Garmin iQue 3000 | Operating Instructions - Page 101
problems. This setting lets Palm™ Desktop software and your handheld find and use the fastest speed. • Modem: To identify the modem type or manufacturer. Refer to your modem manual or face plate for its type Configurations" in Chapter 10 for more information. iQue® 3000 Operating Instructions 97 - Garmin iQue 3000 | Operating Instructions - Page 102
operation to minimize the time required to synchronize data with a Palm™ Modem accessory. To define what synchronizes, use the Conduit Setup dialog to dial the Palm™ Desktop modem and synchronize the applications. 3. Wait for the HotSync operation to complete. 98 iQue® 3000 Operating Instructions - Garmin iQue 3000 | Operating Instructions - Page 103
cradle also has the Network HotSync software installed, your computer is on, and the HotSync Manager is running). The Network HotSync software has the following requirements: • Your computer has TCP/IP support installed a HotSync operation over the network. iQue® 3000 Operating Instructions 99 - Garmin iQue 3000 | Operating Instructions - Page 104
company phone list. HotSync Manager stores the data in a separate category on your Palm™ Desktop software and your handheld. You can set the File Link feature to check for changes For information on how to set up a file link, see the Palm Desktop online Help. 100 iQue® 3000 Operating Instructions - Garmin iQue 3000 | Operating Instructions - Page 105
software you have added to your handheld. Connection Types There are three basic types of connections you can choose from when configuring your preferences: • Cradle/Cable: This connection type defines the direct cradle corner of the screen and select Connection. iQue® 3000 Operating Instructions 101 - Garmin iQue 3000 | Operating Instructions - Page 106
configuring Modem settings, to be able to use TCP/IP software included in the handheld operating system to connect to remote devices. type of connection. 6. In the Dialing pick list, tap TouchTone or Rotary. Select Rotary only if your telephone service does not support iQue® 3000 Operating Instructions - Garmin iQue 3000 | Operating Instructions - Page 107
software your ISP or dial-up service: • To save your password iQue prompt you for the password during log-on, leave "Prompt" in the Password field and do not enter anything. You should choose this option if you are concerned about security. (Continued on next page.) iQue® 3000 Operating Instructions - Garmin iQue 3000 | Operating Instructions - Page 108
3. In the Network Preferences screen, tap the Service pick list. Tap the predefined service template you want to duplicate. 4. Tap the Menu icon . 5. Tap the Service menu and then tap Duplicate. A copy of the service template is added to the Service pick list. 104 iQue® 3000 Operating Instructions - Garmin iQue 3000 | Operating Instructions - Page 109
type. Palm™ Modem accessory. 6. Enter a DNS number following the instructions in the next section. 7. Tap OK. To delete a service Service pick list. Tap the template you want to delete. 4. Tap the Menu icon . 5. Tap the Service menu, and then tap Delete. 6. Tap OK. iQue® 3000 Operating Instructions - Garmin iQue 3000 | Operating Instructions - Page 110
into IP addresses. A DNS number (or IP address) identifies a specific server that handles the translation services. Each DNS or IP address is a series of four numbers, from 0 to 255, separated by periods. step for the remaining sections of the field. 4. Tap OK. 106 iQue® 3000 Operating Instructions - Garmin iQue 3000 | Operating Instructions - Page 111
page for more information. To create a login script: 1. Follow the instructions to view details for a Service template (see "To edit a service template"). 2. In the Details dialog box, tap Script. 3. In the 6. Tap OK, and then tap OK in the Details dialog box. iQue® 3000 Operating Instructions 107 - Garmin iQue 3000 | Operating Instructions - Page 112
service and display the Service Connection Progress messages. 4. To see expanded Service Connection Progress messages, press the lower half of the Scroll button during login. 5. Tap Disconnect to terminate the connection between your handheld and your service. 108 iQue® 3000 Operating Instructions - Garmin iQue 3000 | Operating Instructions - Page 113
connecting to a network using TCP/IP, you can display information to troubleshoot the problem. You can display expanded Service Connection Progress messages. You can also display the Network Log to of the scroll bar to see the entire Network Log. 6. Tap Done. iQue® 3000 Operating Instructions 109 - Garmin iQue 3000 | Operating Instructions - Page 114
AutoLocate®: Approx 5 minutes Update rate: 1/sec. continuous GPS Accuracy: < 15 meters backlight off. Battery life varies depending Palm OS® 5.2.1 GPS receiver, IrDA Integrated speaker, headphone jack Based on 200 mHz TI OMAP technology 32 MB SDRAM microSD 110 iQue® 3000 Operating Instructions - Garmin iQue 3000 | Operating Instructions - Page 115
GARMIN LTD. ("GARMIN"). ALL GARMIN SOFTWARE AND THIRD PARTY SOFTWARE THAT IS (i) INSTALLED Garmin ("we" or "us") provides you with storage media containing the Software, which may also include digital the hard disk copy) made in support of your use of the Product, iQue® 3000 Operating Instructions 111 - Garmin iQue 3000 | Operating Instructions - Page 116
2.101(a) and as such is provided with only such rights as are provided in Garmin's standard commercial license for such software. Technical data is provided with limited rights only as provided in DFARS 252.227-7015 shall remain in full force and effect. 112 iQue® 3000 Operating Instructions - Garmin iQue 3000 | Operating Instructions - Page 117
Computer Keyboard 25 Connection Preferences 101-102 iQue® 3000 Operating Instructions Connection Types 101 Continuous Events 40-42 Creating a Insistent Alarms 77-79 Installing Palm Desktop Software 16 Interface Connector 3 International Keyboard 17-18 IP Addresses 106-107 iQue Components 2-4 IR Port - Garmin iQue 3000 | Operating Instructions - Page 118
57 Opening 56 Priorities 58-60 U Untimed Events 39-40 User Profile 90 Using the Handheld Interface 8-10 V Volume 15 W Week View 46-47 iQue® 3000 Operating Instructions - Garmin iQue 3000 | Operating Instructions - Page 119
- Garmin iQue 3000 | Operating Instructions - Page 120
2005 Garmin Ltd. or its subsidiaries Garmin International, Inc. 1200 E. 151st Street, Olathe, KS 66062, U.S.A. Garmin (Europe) Ltd. Unit 5, The Quadrangle, Abbey Park Industrial Estate, Romsey, SO51, 9DL, U.K. Garmin Corporation No. 68, Jangshu 2nd Road, Shijr, Taipei County, Taiwan www.garmin.com
-
 1
1 -
 2
2 -
 3
3 -
 4
4 -
 5
5 -
 6
6 -
 7
7 -
8
-
9
-
10
-
11
-
12
-
13
-
14
-
15
-
16
-
17
-
18
-
19
-
20
-
21
-
22
-
23
-
24
-
25
-
26
-
27
-
28
-
29
-
30
-
31
-
32
-
33
-
34
-
35
-
36
-
37
-
38
-
39
-
40
-
41
-
42
-
43
-
44
-
45
-
46
-
47
-
48
-
49
-
50
-
51
-
52
-
53
-
54
-
55
-
56
-
57
-
58
-
59
-
60
-
61
-
62
-
63
-
64
-
65
-
66
-
67
-
68
-
69
-
70
-
71
-
72
-
73
-
74
-
75
-
76
-
77
-
78
-
79
-
80
-
81
-
82
-
83
-
84
-
85
-
86
-
87
-
88
-
89
-
90
-
91
-
92
-
93
-
94
-
95
-
96
-
97
-
98
-
99
-
100
-
101
-
102
-
103
-
104
-
105
-
106
-
107
-
108
-
109
-
110
-
111
-
112
-
113
-
114
-
115
-
116
-
117
-
118
-
119
-
120
 |
 |

iQue
®
3000
integrated handheld
operating instructions