HP 2410 HP PSC 2400 Photosmart series All-in-One - (English) Reference Guide - Page 74
set up speed dialing, create speed-dial entries
 |
View all HP 2410 manuals
Add to My Manuals
Save this manual to your list of manuals |
Page 74 highlights
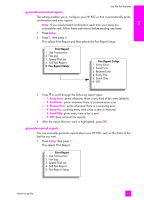
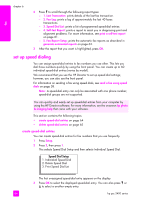
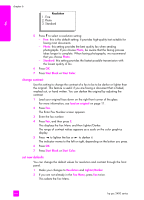
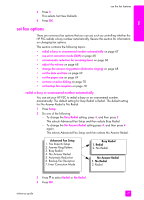
fax chapter 6 2 Press to scroll through the following report types: - 1. Last Transaction: prints details of the last fax transaction. - 2. Fax Log: prints a log of approximately the last 40 faxes transactions. - 3. Speed Dial List: prints a list of programmed speed-dial entries. - 4. Self-Test Report: prints a report to assist you in diagnosing print and alignment problems. For more information, see print a self-test report on page 81. - 5. Fax Report Setup: prints the automatic fax reports as described in generate automated reports on page 63. 3 After the report that you want is highlighted, press OK. set up speed dialing You can assign speed-dial entries to fax numbers you use often. This lets you dial those numbers quickly by using the front panel. You can create up to 60 individual speed-dial entries (varies by model). We recommend that you use the HP Director to set up speed-dial settings; however, you can also use the front panel. For information on sending a fax using speed dials, see send a fax using speed dials on page 58. Note: A speed-dial entry can only be associated with one phone number; speed-dial groups are not supported. You can quickly and easily set up speed-dial entries from your computer by using the HP Director software. For more information, see the onscreen hp photo & imaging help that came with your software. This section contains the following topics: • create speed-dial entries on page 64 • delete speed-dial entries on page 65 create speed-dial entries You can create speed-dial entries for fax numbers that you use frequently. 1 Press Setup. 2 Press 2, then press 1. This selects Speed Dial Setup and then selects Individual Speed Dial. Speed Dial Setup 1. Individual Speed Dial 2. Delete Speed Dial 3. Print Speed Dial List The first unassigned speed-dial entry appears on the display. 3 Press OK to select the displayed speed-dial entry. You can also press or to select a another empty entry. 64 hp psc 2400 series
-
 1
1 -
2
-
3
-
4
-
5
-
6
-
7
-
8
-
9
-
10
-
11
-
12
-
13
-
14
-
15
-
16
-
17
-
18
-
19
-
20
-
21
-
22
-
23
-
24
-
25
-
26
-
27
-
28
-
29
-
30
-
31
-
32
-
33
-
34
-
35
-
36
-
37
-
38
-
39
-
40
-
41
-
42
-
43
-
44
-
45
-
46
-
47
-
48
-
49
-
50
-
51
-
52
-
53
-
54
-
55
-
56
-
57
-
58
-
59
-
60
-
61
-
62
-
63
-
64
-
65
-
66
-
67
-
68
-
 69
69 -
 70
70 -
 71
71 -
 72
72 -
 73
73 -
 74
74 -
 75
75 -
 76
76 -
 77
77 -
 78
78 -
 79
79 -
80
-
81
-
82
-
83
-
84
-
85
-
86
-
87
-
88
-
89
-
90
-
91
-
92
-
93
-
94
-
95
-
96
-
97
-
98
-
99
-
100
-
101
-
102
-
103
-
104
-
105
-
106
-
107
-
108
-
109
-
110
-
111
-
112
-
113
-
114
-
115
-
116
-
117
-
118
-
119
-
120
-
121
-
122
-
123
-
124
-
125
-
126
-
127
-
128
-
129
-
130
-
131
-
132
-
133
-
134
-
135
-
136
-
137
-
138
-
139
-
140
-
141
-
142
-
143
-
144
-
145
-
146
-
147
-
148
-
149
-
150
-
151
-
152
-
153
-
154
-
155
-
156
-
157
-
158
-
159
-
160
-
161
-
162
-
163
-
164
-
165
-
166
 |
 |
