HP 5310m HP ProBook 5310m Notebook PC - Maintenance and Service Guide - Page 57
Memory module
 |
UPC - 884962601266
View all HP 5310m manuals
Add to My Manuals
Save this manual to your list of manuals |
Page 57 highlights
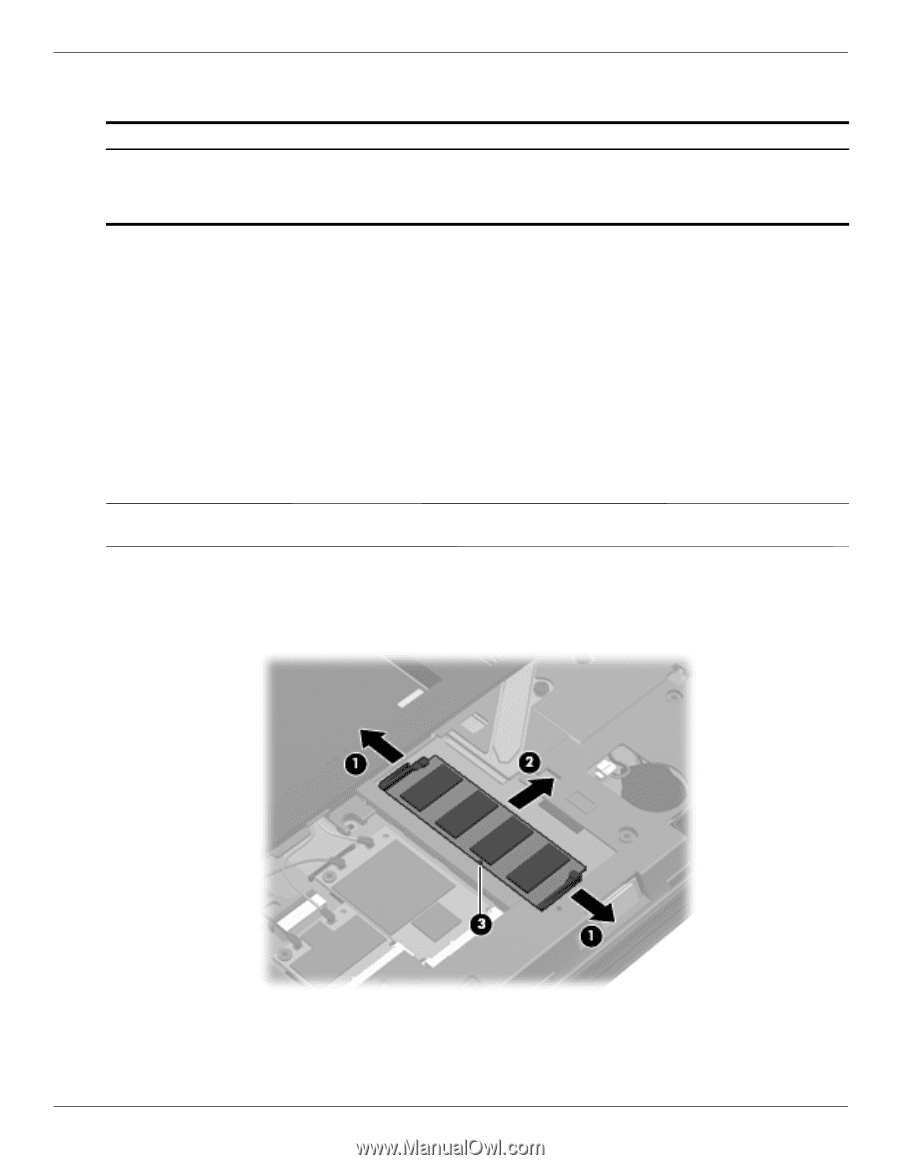
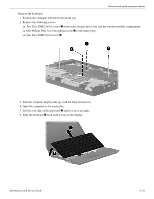
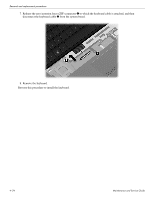
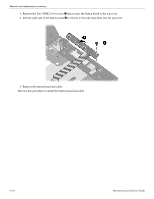
Memory module Removal and replacement procedures Description 4096-MB memory module (800-MHz, DDR3) 2048-MB memory module (1066-MHz, DDR3) 1024-MB memory module (1066-MHz, DDR3) Spare part number 581097-001 581096-001 581095-001 Before removing the memory module, follow these steps: 1. Shut down the computer. If you are unsure whether the computer is off or in Hibernation, turn the computer on, and then shut it down through the operating system. 2. Disconnect all external devices connected to the computer. 3. Disconnect the power from the computer by first unplugging the power cord from the AC outlet, and then unplugging the AC adapter from the computer. 4. Remove the battery (see "Battery" on page 4-7). 5. Remove the accessory cover (see "Mass storage device" on page 4-9). Remove the memory module: 1. Pull away the retention clips 1 on each side of the memory module to release the memory module. (The memory module tilts up.) Ä CAUTION: To prevent damage to the memory module, hold it by the edges only. Do not touch the components on the memory module. 2. Grasp the edge of the memory module 2, and then pull it out of the memory module slot. ✎ Memory modules are designed with a notch 3 to prevent incorrect insertion into the memory module slot. Reverse this procedure to install a memory module. Maintenance and Service Guide 4-21
-
 1
1 -
2
-
3
-
4
-
5
-
6
-
7
-
8
-
9
-
10
-
11
-
12
-
13
-
14
-
15
-
16
-
17
-
18
-
19
-
20
-
21
-
22
-
23
-
24
-
25
-
26
-
27
-
28
-
29
-
30
-
31
-
32
-
33
-
34
-
35
-
36
-
37
-
38
-
39
-
40
-
41
-
42
-
43
-
44
-
45
-
46
-
47
-
48
-
49
-
50
-
51
-
 52
52 -
 53
53 -
 54
54 -
 55
55 -
 56
56 -
 57
57 -
 58
58 -
 59
59 -
 60
60 -
 61
61 -
 62
62 -
63
-
64
-
65
-
66
-
67
-
68
-
69
-
70
-
71
-
72
-
73
-
74
-
75
-
76
-
77
-
78
-
79
-
80
-
81
-
82
-
83
-
84
-
85
-
86
-
87
-
88
-
89
-
90
-
91
-
92
-
93
-
94
-
95
-
96
-
97
-
98
-
99
-
100
-
101
-
102
-
103
-
104
-
105
-
106
-
107
-
108
-
109
-
110
-
111
-
112
-
113
-
114
-
115
-
116
-
117
-
118
-
119
-
120
-
121
-
122
-
123
-
124
-
125
-
126
-
127
-
128
-
129
-
130
-
131
-
132
-
133
-
134
-
135
-
136
-
137
-
138
-
139
-
140
-
141
-
142
-
143
-
144
-
145
-
146
-
147
-
148
-
149
-
150
-
151
-
152
-
153
-
154
-
155
-
156
-
157
 |
 |