HP 5310m HP ProBook 5310m Notebook PC - Maintenance and Service Guide - Page 72
Due to the adhesive quality of the thermal material located between the heat sink and system board
 |
UPC - 884962601266
View all HP 5310m manuals
Add to My Manuals
Save this manual to your list of manuals |
Page 72 highlights
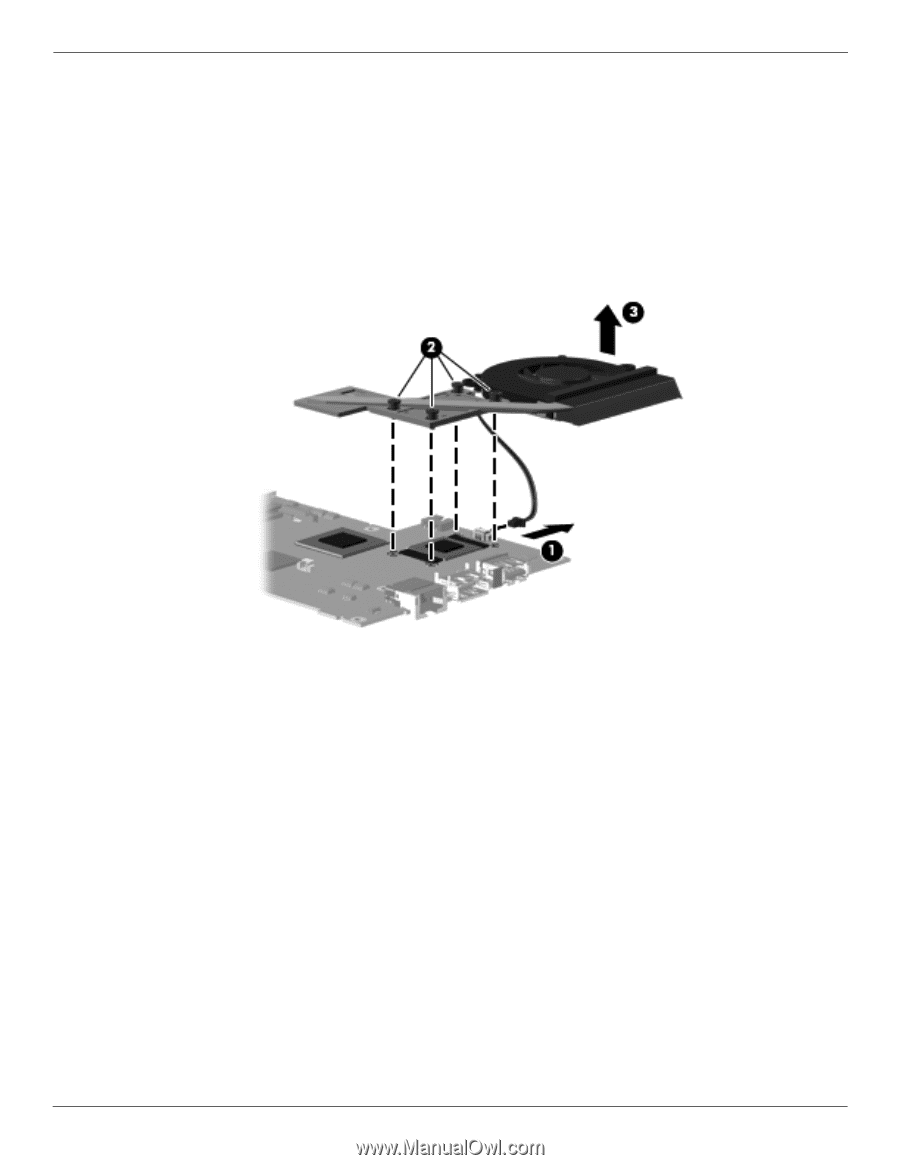
Removal and replacement procedures Remove the fan and heat sink: 1. Turn the system board upside down, with the front toward you. 2. Disconnect the fan cable 1 from the system board. 3. Following the 1, 2, 3, 4 sequence stamped into the heat sink, loosen the four Torx T8M2.0×7.0 captive screws 2 that secure the fan and heat sink to the system board. ✎ Due to the adhesive quality of the thermal material located between the heat sink and system board components, it may be necessary to move the heat sink from side to side to detach it. 4. Remove the fan and heat sink 3. 4-36 Maintenance and Service Guide
-
 1
1 -
2
-
3
-
4
-
5
-
6
-
7
-
8
-
9
-
10
-
11
-
12
-
13
-
14
-
15
-
16
-
17
-
18
-
19
-
20
-
21
-
22
-
23
-
24
-
25
-
26
-
27
-
28
-
29
-
30
-
31
-
32
-
33
-
34
-
35
-
36
-
37
-
38
-
39
-
40
-
41
-
42
-
43
-
44
-
45
-
46
-
47
-
48
-
49
-
50
-
51
-
52
-
53
-
54
-
55
-
56
-
57
-
58
-
59
-
60
-
61
-
62
-
63
-
64
-
65
-
66
-
 67
67 -
 68
68 -
 69
69 -
 70
70 -
 71
71 -
 72
72 -
 73
73 -
 74
74 -
 75
75 -
 76
76 -
 77
77 -
78
-
79
-
80
-
81
-
82
-
83
-
84
-
85
-
86
-
87
-
88
-
89
-
90
-
91
-
92
-
93
-
94
-
95
-
96
-
97
-
98
-
99
-
100
-
101
-
102
-
103
-
104
-
105
-
106
-
107
-
108
-
109
-
110
-
111
-
112
-
113
-
114
-
115
-
116
-
117
-
118
-
119
-
120
-
121
-
122
-
123
-
124
-
125
-
126
-
127
-
128
-
129
-
130
-
131
-
132
-
133
-
134
-
135
-
136
-
137
-
138
-
139
-
140
-
141
-
142
-
143
-
144
-
145
-
146
-
147
-
148
-
149
-
150
-
151
-
152
-
153
-
154
-
155
-
156
-
157
 |
 |
4–36
Maintenance and Service Guide
Removal and replacement procedures
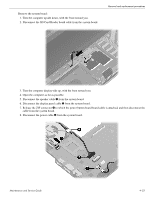
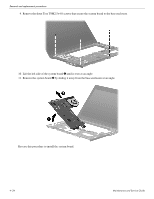
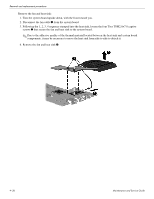
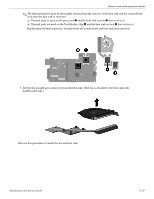
Remove the fan and heat sink:
1. Turn the system board upside down, with the front toward you.
2. Disconnect the fan cable
1
from the system board.
3. Following the 1, 2, 3, 4 sequence stamped into the heat sink, loosen the four Torx T8M2.0×7.0 captive
screws
2
that secure the fan and heat sink to the system board.
✎
Due to the adhesive quality of the thermal material located between the heat sink and system board
components, it may be necessary to move the heat sink from side to side to detach it.
4. Remove the fan and heat sink
3
.