HP 7960 HP Photosmart 7900 series - (English) Basics Guide - Page 15
maintain the quality of your photo paper - windows 7
 |
UPC - 844844844303
View all HP 7960 manuals
Add to My Manuals
Save this manual to your list of manuals |
Page 15 highlights
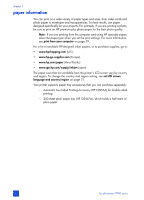
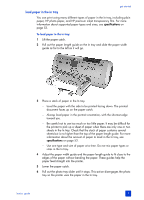
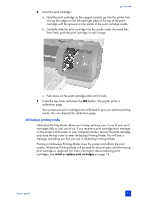
get started 5 Adjust the photo tray paper length guide and paper width guide to fit close to the edges of the paper without bending the paper. These guides help the paper feed straight into the printer. 6 Lower the paper catch. 7 Push the photo tray slider forward until it stops. The photo tray disappears from view in the photo tray window. This action engages the photo tray. maintain the quality of your photo paper To ensure high-quality prints, it is important to maintain the quality of your photo paper. This section provides information about storing and handling your photo paper. store photo paper Keep unused photo paper in the resealable photo paper storage bag that was shipped with your printer. Store the packaged photo paper on a flat surface in a cool, dry place. When you are ready to print, remove only the paper you plan to use immediately. When you have finished printing, return any unused photo paper to the photo paper storage bag and then seal the bag. Note: Do not leave unused paper in the printer's photo tray or In tray. The paper may start to curl, which may reduce the quality of your photos. Photo paper should be flat before printing. For more information about flattening curled paper, see the next section. handle photo paper Always hold photo paper by the edges. Fingerprints on photo paper can reduce print quality. If the corners of the photo paper curl, place the paper in a resealable plastic bag and gently bend it in the opposite direction of the curl until the paper lies flat. basics guide 11
-
 1
1 -
2
-
3
-
4
-
5
-
6
-
7
-
8
-
9
-
 10
10 -
 11
11 -
 12
12 -
 13
13 -
 14
14 -
 15
15 -
 16
16 -
 17
17 -
 18
18 -
 19
19 -
 20
20 -
21
-
22
-
23
-
24
-
25
-
26
-
27
-
28
-
29
-
30
-
31
-
32
-
33
-
34
-
35
-
36
-
37
-
38
-
39
-
40
-
41
-
42
-
43
-
44
-
45
-
46
-
47
-
48
-
49
-
50
-
51
-
52
-
53
-
54
-
55
-
56
-
57
-
58
-
59
-
60
-
61
-
62
-
63
-
64
 |
 |
