HP 7960 HP Photosmart 7900 series - (English) Basics Guide - Page 8
printer parts
 |
UPC - 844844844303
View all HP 7960 manuals
Add to My Manuals
Save this manual to your list of manuals |
Page 8 highlights
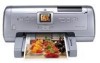
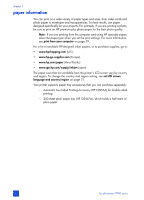
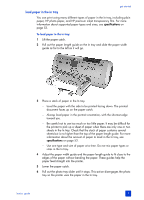
chapter 1 printer parts front Out tray Remove this tray to load small media and to clear a paper jam Paper catch Lift this tray to load paper Main door Press the OPEN DOOR button (located on the control panel) to open this door to change the print cartridges. For more information, see control panel on page 5 Paper catch extension Flip this guide open to catch the printed paper Paper width guide Adjust this guide to fit close to the edge of the paper in the In tray In tray Place paper or envelopes in this tray for printing back Power cord connection Use this to connect the power cord included with the printer Paper length guide Adjust this guide to fit close to the edge of the paper in the In tray LCD screen Use this screen to view your photos and menu options Input bay Lift the Top cover to access the input bay. For more information, see input bay on page 6 Top cover Lift this cover to access the input bay, the print cartridge storage area, and the direct-printing port Photo tray Lift the paper catch to load photo paper in the photo tray Photo tray slider Move this slider to engage or disengage the photo tray USB port Use this port to connect the printer to your computer Rear access door Remove this door to clear a paper jam 4 hp photosmart 7900 series
-
 1
1 -
2
-
 3
3 -
 4
4 -
 5
5 -
 6
6 -
 7
7 -
 8
8 -
 9
9 -
 10
10 -
 11
11 -
 12
12 -
 13
13 -
14
-
15
-
16
-
17
-
18
-
19
-
20
-
21
-
22
-
23
-
24
-
25
-
26
-
27
-
28
-
29
-
30
-
31
-
32
-
33
-
34
-
35
-
36
-
37
-
38
-
39
-
40
-
41
-
42
-
43
-
44
-
45
-
46
-
47
-
48
-
49
-
50
-
51
-
52
-
53
-
54
-
55
-
56
-
57
-
58
-
59
-
60
-
61
-
62
-
63
-
64
 |
 |